

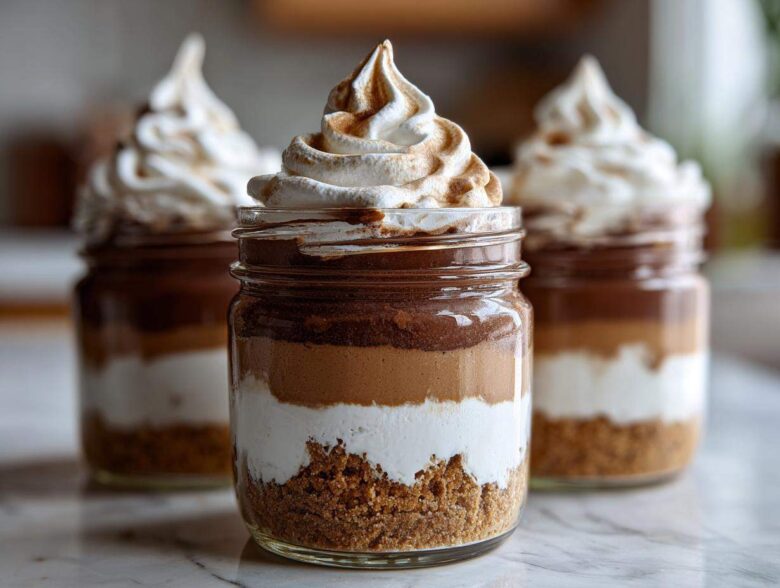
Oh my gosh, are you having one of those days where only chocolate and peanut butter can save you? Trust me, I know that feeling! When I need that perfect, decadent fix without turning on the oven, I grab my supplies for what I affectionately call my No-Bake Chocolate Peanut Butter Pie Jars. These aren’t just individual servings; they are portable little miracles of creamy, dreamy goodness!
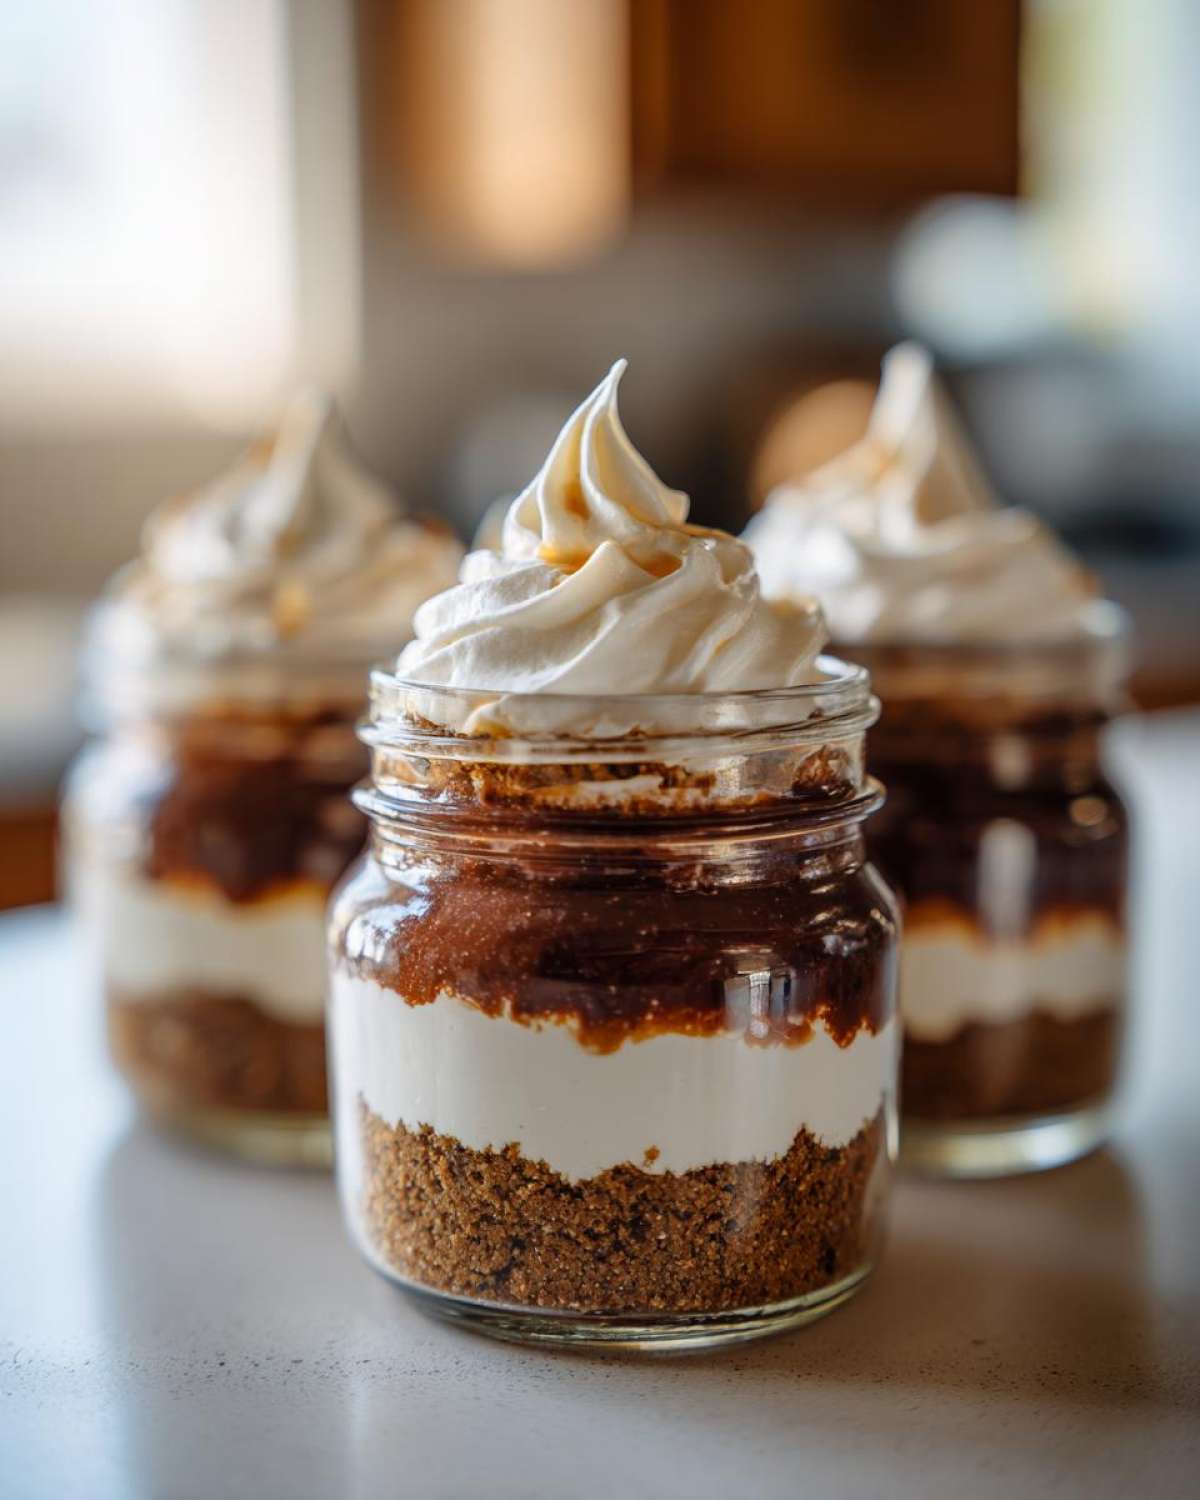
I’ve been making speedy desserts like this for years, especially when company drops by unexpectedly. The best part about serving pie in a jar is the sheer lack of mess. No slicing, no fighting over the biggest wedge, and cleanup is a dream because everyone just brings their jar back to the counter. It’s dessert perfection at its easiest. Seriously, if you’ve ever needed a foolproof, rich, single-serving treat, this is the recipe you’ll be reaching for again and again. We’re skipping oven time entirely, and I promise you won’t miss it!
If you love layering flavors, you should check out my recipe for the no-bake strawberry options too, it has a similar ‘wow’ factor, but today, it’s all about chocolate and PB taking center stage. Ready to assemble some magic?
Why You Will Love These No-Bake Chocolate Peanut Butter Pie Jars
I can tell you why *I* love them, and I guarantee you’ll agree! These jars hit that sweet spot where minimal effort meets maximum flavor reward. They are just so perfect for busy weeks or when you need that perfect, satisfying flavor profile without turning on the oven. If you are looking for quick peanut butter treats that taste like you worked all day, look no further.
Here’s what makes this recipe such a winner:
- Zero Oven Required: Seriously, this is the ultimate no-oven dessert idea. We mix and chill—that’s it!
- Perfect Portions: Who needs a whole pie? Serving them in jars is fantastic for portion control, and they look adorable on any party table. You can see all those beautiful layers!
- Incredible Flavor Bomb: It’s rich, it’s creamy, and the chocolate and peanut butter layers don’t fight—they sing together. It’s what a chocolate peanut butter dessert should taste like.
- Make Ahead Superstar: I usually assemble these the day before serving. They firm up beautifully in the fridge, making me look super organized!
Essential Ingredients for Your No-Bake Chocolate Peanut Butter Pie Jars
Okay, listen up! Because these are no-bake desserts, the quality of your ingredients really shines through, which is why I’m so careful about what I bring home. You don’t need anything fancy, but you do need them ready! Make sure your cream cheese and your peanut butter are nice and soft—don’t try to rush this by microwaving them, or you’ll end up with a sad, oily mess. Softened means you can press a finger into them easily.
We’ve got three main parts here: the crust, the PB layer, and the chocolate layer. It’s simpler than it sounds, I promise. If you want to see how I approach the base, check out my thoughts on a great peanut butter graham cracker crust—though here we’re pressing it right into the jars!
Here is what you need for 8 jars, give or take, depending on how tall you layer things:
- For the Crust: You’ll need 1 1/2 cups of graham cracker crumbs and 1/4 cup of melted unsalted butter. That’s it for the foundation!
- For the Peanut Butter Dream Layer: We’re using 1 cup of creamy peanut butter—again, softened—8 ounces of cream cheese, also softened, 1/2 cup of powdered sugar, and 1 teaspoon of vanilla extract. This is the stuff that makes your eyes close with happiness.
- For the Chocolate Layer: Grab one whole package (that’s 3.9 ounces) of instant chocolate pudding mix and 1 1/2 cups of very cold milk. Cold milk is key for instant pudding to set quickly!
- For the Topping: I finish mine with a cloud of sweetness—that means 1/2 cup cold heavy whipping cream and 1/4 cup granulated sugar to whip up nicely.
Grab those 8 small (8-ounce) mason jars, and let’s get layering!
Step-by-Step Instructions for Perfect No-Bake Chocolate Peanut Butter Pie Jars
This is where the fun really starts! Because we are using jars, we get to build this dessert layer by beautiful layer. Follow these steps carefully, and you’ll end up with professional-looking dessert in a jar presentation without breaking a sweat. Remember, a little patience in the mixing stage pays off huge when everything sets up beautifully!
Preparing the Peanut Butter Graham Cracker Crust in Jars
First things first, we need the base! In a small bowl, mix your graham cracker crumbs with that 1/4 cup of melted butter. Make sure all those crumbs look evenly moistened—you want it to stick together when you press it.
Now, scoop about 2 tablespoons of that buttery crumb mixture into the bottom of each of your 8 jars. Use the back of a small measuring cup to press it down firmly. This is your peanut butter graham cracker crust foundation. Don’t skip this! We need to get these jars into the fridge now while we make the good stuff. A good 15 minutes chilling helps this base stay put when we start layering.
Making the Creamy Chocolate Peanut Butter Filling
Time for the star! In a big mixing bowl—one that can handle a mixer—beat together your softened peanut butter, softened cream cheese, powdered sugar, and vanilla extract until it’s completely smooth and looks like the creamiest peanut butter chocolate you’ve ever imagined. Set that aside for just a moment.
In a separate bowl, grab your instant chocolate pudding mix and whisk it vigorously with the 1 1/2 cups of very cold milk. Whisk for about 2 minutes until it starts getting thick. Seriously, let that sit for just 5 minutes; it needs that time to firm up properly before we make the final no-bake pie filling.
Once the pudding has had its moment, gently fold it right into your peanut butter mixture. Don’t over-mix! We want to combine them, but we don’t want to knock all the air out. Just fold until you see mostly uniform swirls of dark brown and creamy tan.
Layering and Finishing Your No-Bake Chocolate Peanut Butter Pie Jars
We’re going to whip our topping next. In a clean bowl—and this bowl needs to be cold—beat that heavy whipping cream and the 1/4 cup of granulated sugar until you get stiff peaks. Wow, doesn’t that look amazing? Keep this handy in the fridge until we need it.
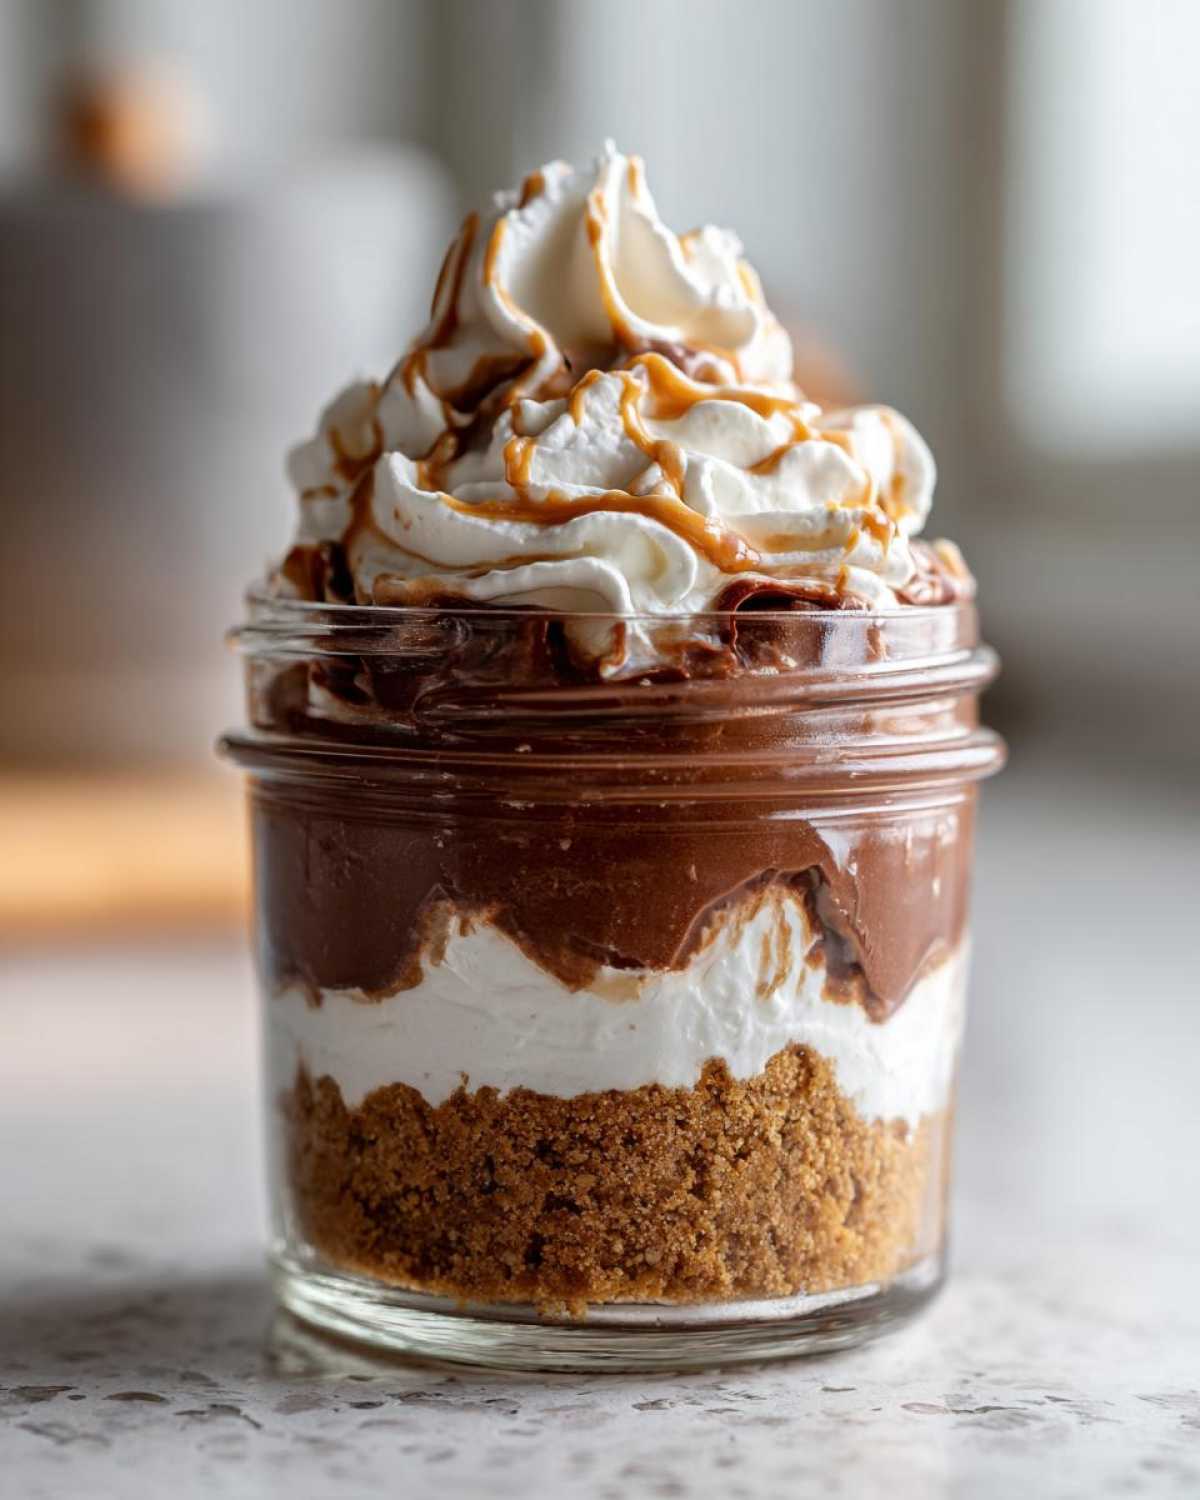
Now, back to the jars. For the absolute cleanest look, I highly recommend using a piping bag fitted with a large round tip for the filling. If you don’t have one, be slow and gentle with two spoons! Spoon or pipe half of your peanut butter chocolate filling mixture evenly over the chilled crusts in the 8 jars.
Top that creamy chocolate layer with the remaining plain whipped cream. If you want a little presentation pizzazz, you can save a tiny bit of that chocolate filling to drizzle on the very top! The critical final step: cover these beauties up and stick them back in the refrigerator for a minimum of 4 hours. They need that chill time to set everything firmly so you can dig in right to the bottom without making a mess!
Tips for Success with No-Bake Chocolate Peanut Butter Pie Jars
Making success happen with these jars really just boils down to paying attention to a couple of little details. I’ve learned the hard way that rushing the set-up phase leads to soupy layers, and nobody wants a soupy pie, not even a layered dessert in a jar!
For the absolute best, most stable filling texture, temperature is your best friend. Don’t bring out that cream cheese or peanut butter just five minutes before mixing. I usually leave them on the counter for a solid hour before I start. They need to be soft enough so they incorporate beautifully without leaving any hard chunks behind, but if they get too warm, they get oily when mixed with the sugar.
When it comes to presentation—which is half the fun of these individual servings—do yourself a huge favor and use a piping bag for the filling and the whipped cream topping. Yes, you can use a spoon, but you’ll end up with messy ridges on the inside of your glass. A piping bag lets you neatly deposit the creamy filling right on top of that chilled crust, and then you can swirl the top layer of cream beautifully.
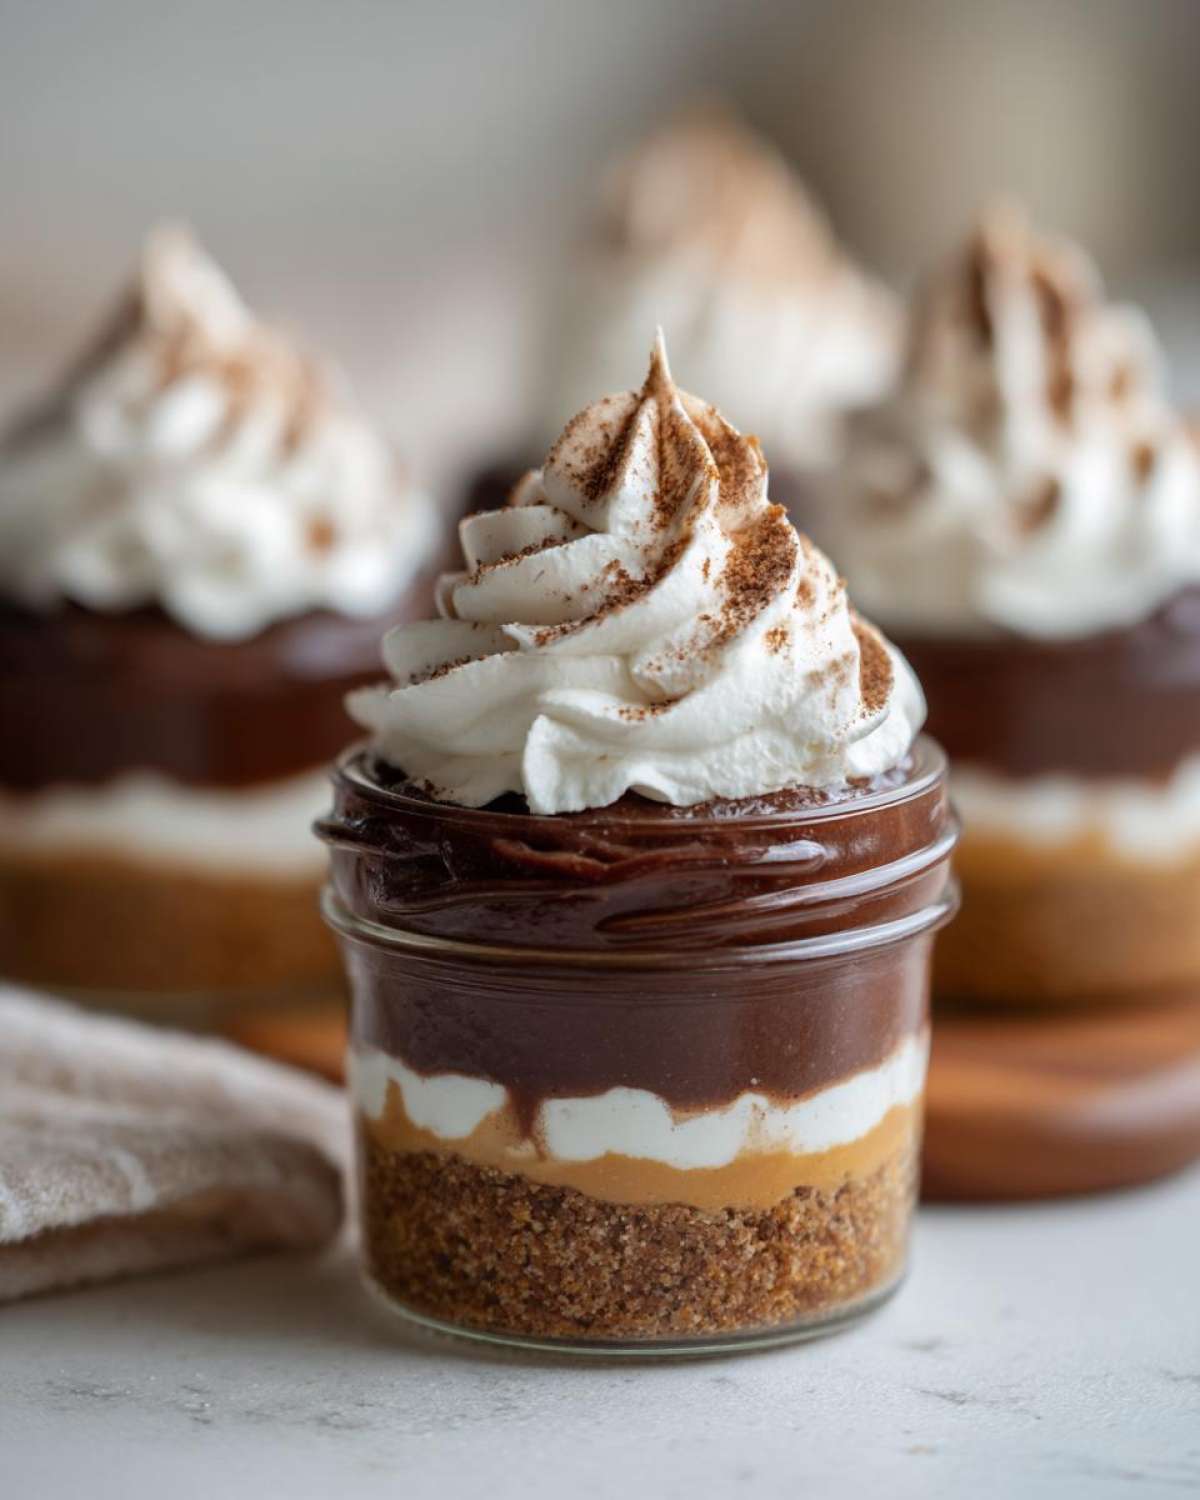
Also, here is a pro-tip for the pudding layer: make absolutely sure your milk is ice cold before you whisk in that instant pudding. If the milk is even slightly lukewarm, the pudding will struggle to thicken properly, and we need that thickness before we fold it into the peanut butter base.
Finally, don’t be tempted to eat them right after you layer them! The 4-hour chill time isn’t just a suggestion; it’s when all those delicious flavors meld and the layers firm up enough to give you that satisfying bite through crust, filling, and cream. Be patient; it’s the final secret ingredient!
Storage and Make-Ahead Options for No-Bake Chocolate Peanut Butter Pie Jars
This is one of the best parts about using jars for desserts: they are basically designed for making ahead! If you’re hosting a dinner party, or just like having a little treat hanging out in the fridge for later, these No-Bake Chocolate Peanut Butter Pie Jars are fantastic because they only get better with a little chill time.
I often assemble these totally the day before I plan to serve them. As I mentioned, that 4-hour chill is essential for the creamy layers to set up firmly, but leaving them overnight? That’s when all the flavors—the tartness from the cream cheese, the deep chocolate of the pudding, and the saltiness of the peanut butter—really get to know each other. It just deepens the whole experience!
Because we already have them sealed up in mason jars, they are naturally portable. You can easily pack these up for a picnic or a work lunch. If you need ideas for planning ahead for a crowd, you absolutely have to check out my guide on make ahead desserts—these jars are featured prominently there because they save so much last-minute stress!
So, how long do they last? Good news: because of all that sugar and fat content in the layers, they hang out in the refrigerator beautifully. If you seal the lids tightly—and I use the standard canning lids—they will stay fresh and absolutely delicious for up to three days. That’s a whole three days of instant dessert gratification! Just remember that the graham cracker crust might soften slightly after day two, but honestly, I think it blends in nicely with the creamy layers anyway. If you prefer a crunchier base, you might want to limit consumption to the first 48 hours.
Just make sure they stay tucked in the coldest part of the fridge, and avoid stacking heavy items on top of the lids if you are storing them in bulk!
Variations: Customizing Your Chocolate Peanut Butter Dessert
You know I love sticking to tradition, but sometimes you just need to switch things up, right? These No-Bake Chocolate Peanut Butter Pie Jars are wonderful because they are so adaptable. Even though the base recipe is already stellar, there are a few little tweaks you can make to change the texture or punch up a flavor note if you’re feeling adventurous. This is a fantastic base for any chocolate peanut butter dessert enthusiast!
First, let’s talk about that crust we press into the bottom. The graham cracker base is classic comfort food, but if you want to lean harder into that rich chocolate profile, try swapping the graham crackers entirely for chocolate wafer crumbs. You crush those right up, mix with the butter, and bam—you’ve got a double-chocolate foundation that melts beautifully into the peanut butter layer.
Another easy win? The peanut butter itself! The recipe calls for creamy because it blends the smoothest, which is ideal for that silky layer. But if you really love texture—and I sometimes do, especially when I want something less rich—swap out half or all of the creamy for crunchy peanut butter. Just be warned, you might need to mix that slightly longer when combining it with the cream cheese to ensure you don’t have hard chunks when chilling.
If you’ve got some mini chocolate chips lying around, here’s where to use them! You can gently fold about a half-cup of the mini chips right into the peanut butter filling *before* you fold in the chocolate pudding. They provide these lovely little bursts of solid chocolate when you dig down past the whipped cream topping. It adds a little extra surprise factor in every spoonful.
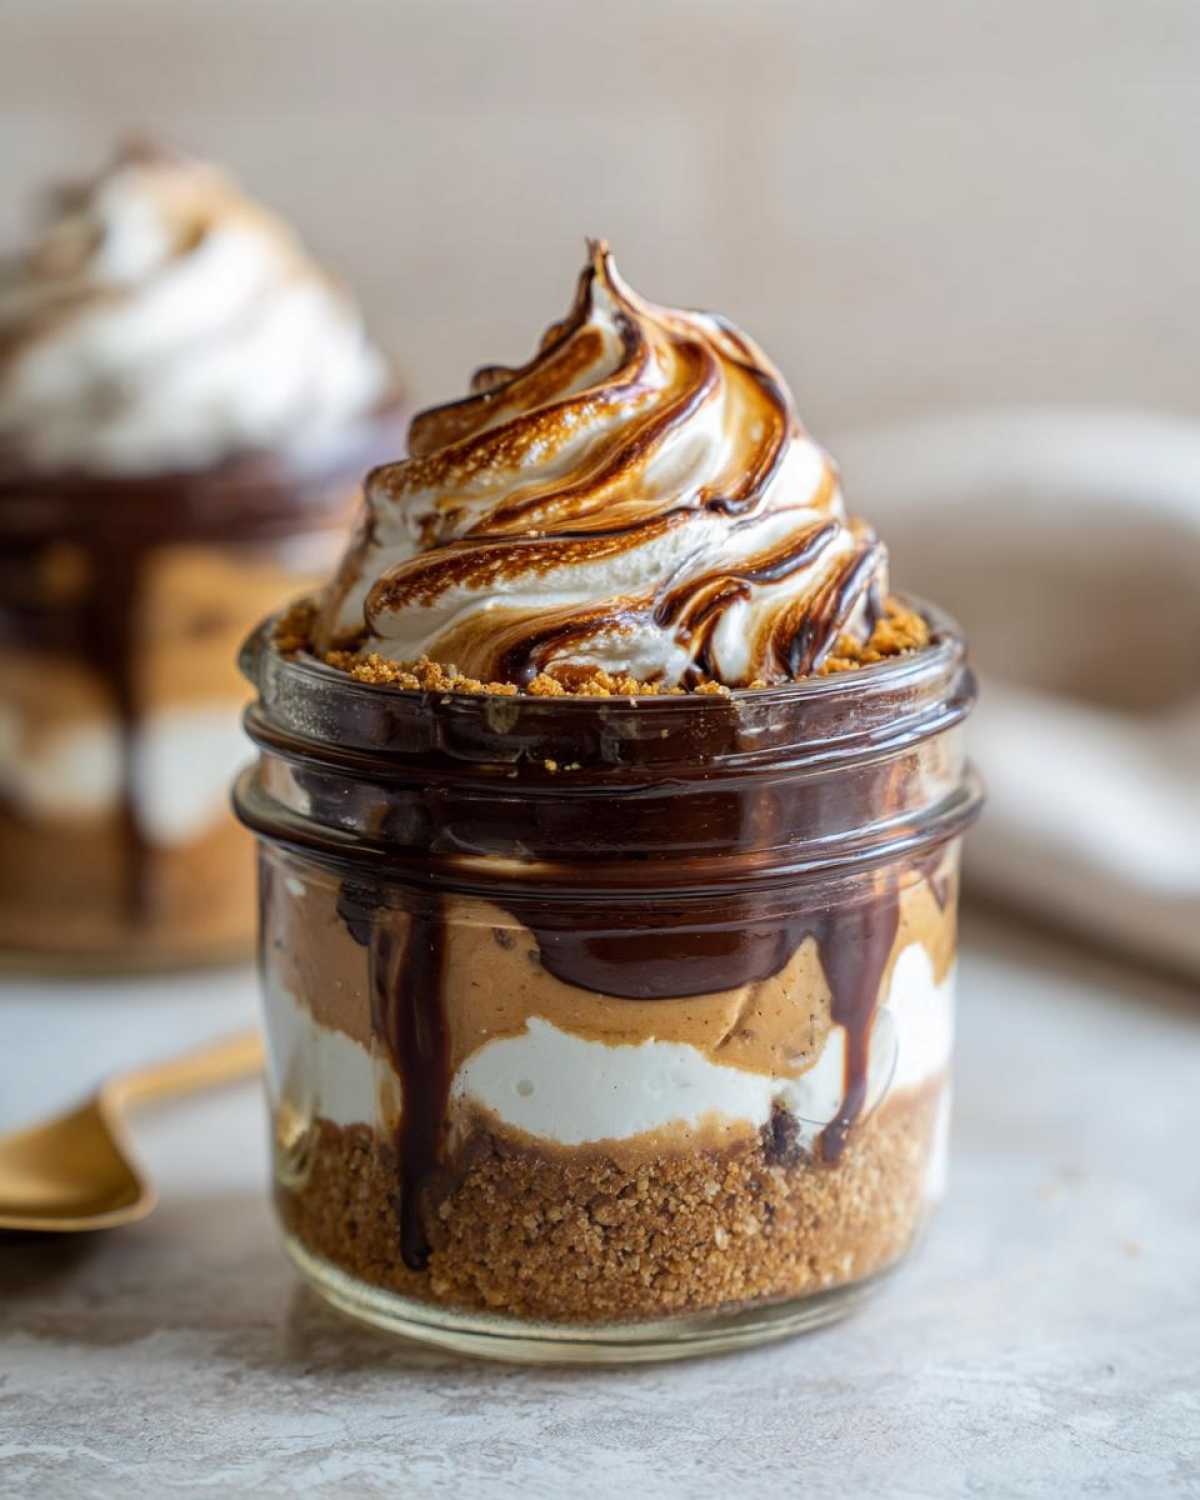
Finally, don’t forget the salt! If you’re using unsalted butter in the crust, a tiny pinch (and I mean tiny!) of flaky sea salt sprinkled right over the final whipped cream layer makes those sweet and salty flavors absolutely sing. It really elevates the whole dish, making it feel a little more gourmet, even though it took hardly any time at all!
Frequently Asked Questions About No Bake Dessert Recipes
I get so many questions about quick, easy desserts, so I figured I’d answer a few that pop up often when people are trying out these no-bake dessert recipes. It’s easy to get stuck on little details, but honestly, these are just so forgiving!
What if I don’t have mason jars? Can I still make this?
Oh absolutely! While the jars give this recipe its cute name and make them perfect jar desserts for parties, you can totally use other things. Think clear plastic cups, small ramekins, or even small wine glasses if you want to be fancy! The key is creating that nice base layer and having enough vertical space for the three layers (crust, filling, cream). If you use something wider, you might have to adjust how much crust mixture you press into the bottom to keep it proportional. Essentially, you are making a single serving chocolate pie, just presented differently!
Can I skip the required chilling time?
I really, truly advise against skipping the chilling time! This is the part where the magic happens for any no bake dessert recipe. Remember, nothing is actually baking or firming up in the heat. The chilling time is what allows the instant pudding to reach its full set, and it lets the cream cheese and peanut butter mixture stabilize. If you eat it right away, you’ll end up with a runny, slightly warm puddle of deliciousness, which is fine for a quick snack, but not great for serving guests or for portability. Give it those 4 hours; your patience will be rewarded!
I only have crunchy peanut butter—is that okay?
Yes, you can use crunchy peanut butter if that’s what you have on hand! I generally recommend creamy because it yields that super smooth, uniform layer that contrasts nicely with the crust, but crunchy works just fine for flavor. If you go crunchy, you might need to run your mixer for an extra minute or two when you combine the peanut butter, cream cheese, and powdered sugar. You want to make sure the cream cheese fully envelopes all those crunchy bits so you don’t end up with a grainy texture on your tongue. It’s a great way to make some quick peanut butter treats with what you already have!
Can I convert this into a full-sized pie instead of jars?
Definitely! If you have a 9-inch pie dish, you can absolutely use this mixture to create one large pie. You would likely need to increase the crust ingredients by about 50% since the jars use the base recipe for 8 individual portions. For the filling, you might need a bit more milk for the pudding and perhaps another dollop of peanut butter, but the ratio is sound. Since this is a no-bake pie filling, the main difference is that you’ll need to chill the entire pie for at least 6 to 8 hours, or ideally overnight, to ensure the whole thing holds together when sliced.
Estimated Nutritional Snapshot for No-Bake Chocolate Peanut Butter Pie Jars
I always run the numbers on my go-to recipes, mostly because I like to see how decadent I’m being! Keep in mind that since we’re using different brands of peanut butter, cream cheese, and types of crackers, these numbers are just a general guide to help you understand what you’re digging into with these portion controlled desserts.
For one single jar serving (about 1/8th of the recipe), here is what we estimate:
- Calories: Around 450
- Total Fat: Roughly 30g (A significant portion coming from the peanut butter and cream cheese, naturally!)
- Sugar: About 35g (That’s from the powdered sugar, granulated sugar in the whip, and the pudding mix!)
- Protein: A decent 12g boost from the dairy and peanut butter.
- Carbohydrates: Around 40g
Because we are mixing rich ingredients, the fat content is definitely there, but hey, this is a treat, not a diet food! Enjoy the richness you worked so hard to assemble!
Share Your No-Bake Chocolate Peanut Butter Pie Jars Creations
I absolutely love seeing your creations! When you make these super simple, yet stunning, No-Bake Chocolate Peanut Butter Pie Jars, please snap a picture and share it with me! There is nothing better than seeing my recipes come to life in your kitchens.
Take a moment to fill out the rating section below—five stars if it saved your dessert dilemma!—and let me know in the comments how your layering went or if you tried one of the crunchy peanut butter variations. Your feedback helps other cooks feel confident trying out these easy layered desserts!
Don’t forget to tag me on social media! I always check out the fun everyone is having with these jar desserts for parties. Happy layering, everyone!
PrintNo-Bake Chocolate Peanut Butter Pie Jars
Make individual servings of rich, creamy chocolate and peanut butter pie layered in jars. This no-bake dessert is quick to assemble and perfect for parties or easy portion control.
- Prep Time: 25 min
- Cook Time: 0 min
- Total Time: 25 min
- Yield: 8 servings
- Category: Dessert
- Method: No Bake
- Cuisine: American
- Diet: Vegetarian
Ingredients
- 1 1/2 cups graham cracker crumbs
- 1/4 cup melted unsalted butter
- 1 cup creamy peanut butter, softened
- 8 ounces cream cheese, softened
- 1/2 cup powdered sugar
- 1 teaspoon vanilla extract
- 1/2 cup cold heavy whipping cream
- 1/4 cup granulated sugar (for whipped cream)
- 1 package (3.9 ounces) instant chocolate pudding mix
- 1 1/2 cups cold milk (for pudding)
- 8 small (8-ounce) mason jars
Instructions
- Combine graham cracker crumbs and melted butter. Press about 2 tablespoons of the mixture into the bottom of each of the 8 jars to form the crust. Chill the jars while preparing the filling.
- In a large bowl, beat the softened peanut butter, softened cream cheese, powdered sugar, and vanilla extract until smooth and creamy. Set aside.
- In a separate bowl, whisk the instant chocolate pudding mix and cold milk for 2 minutes until slightly thickened. Let it sit for 5 minutes.
- Gently fold the prepared chocolate pudding into the peanut butter mixture until just combined.
- In a clean bowl, beat the cold heavy whipping cream and granulated sugar until stiff peaks form.
- Fold half of the whipped cream into the peanut butter chocolate mixture to lighten it.
- Spoon or pipe the peanut butter chocolate filling evenly over the crusts in the jars.
- Top the filling layer with the remaining plain whipped cream.
- Chill the jars for at least 4 hours, or until firm, before serving.
Notes
- You can substitute chocolate wafer crumbs for graham crackers for a richer chocolate base.
- For easier layering, use a piping bag fitted with a large round tip to pipe the filling into the jars.
- These jars keep well in the refrigerator for up to 3 days.
Nutrition
- Serving Size: 1 jar
- Calories: 450
- Sugar: 35
- Sodium: 280
- Fat: 30
- Saturated Fat: 10
- Unsaturated Fat: 20
- Trans Fat: 0
- Carbohydrates: 40
- Fiber: 2
- Protein: 12
- Cholesterol: 45