

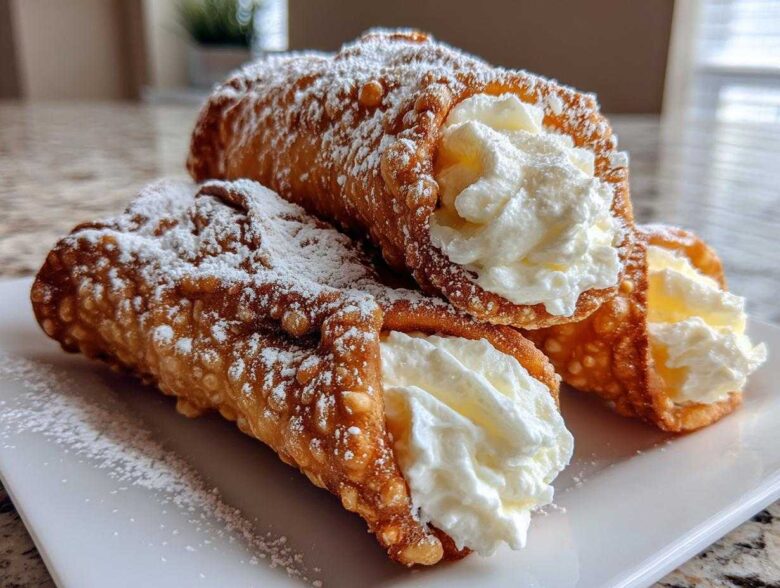
Oh, trust me, when you picture a trip to Italy, what’s one of the first things you dream about tasting? Those little crunchy tubes filled with the sweetest, creamiest ricotta! For years, I thought a truly authentic cannoli recipe was something only Nonna could master, something that required magical secret techniques. I tried so many times, and I kept ending up with shells that were either tough or soggy ten minutes after filling them. It was heartbreaking!
But after years of trial and error—and yes, maybe a few wine-soaked kitchen experiments—I finally cracked the code. This isn’t just *a* cannoli recipe; this is *the* recipe that gives you shatteringly crisp, bubbly shells and a rich, perfectly balanced sweet Italian treat every single time. You absolutely can make these spectacular pastries at home, and I’m going to show you every single trick my research uncovered!
Why This Is the Best Cannoli Recipe You Will Ever Make
If you’ve been scared off thinking this is too complicated, stop right there! This cannoli recipe strips away the guesswork. We are achieving pastry perfection starting with the dough, and we are ensuring that filling stays fluffy, never watery. I promise, these turn out looking and tasting like you spent all day in a professional Italian bakery.
- Guaranteed shatteringly crisp shells that hold up!
- A filling that is unbelievably creamy, never grainy.
- The traditional flavor profile you’ve been searching for.
Achieving Truly Crispy Cannoli Shells
The trick to keeping those shells bubbly and never getting soggy lives right in the dough! You need that perfect combination of dry white wine and vinegar—the alcohol evaporates super fast when it hits the hot oil, creating those beautiful, air-pocket bubbles. Seriously, watch that oil temperature; it *must* hit 375°F (190°C) before anything goes in. And when you wrap the dough around the metal tubes? Press that seam down hard with a tiny bit of water—if it pops open, you’ll get oil flooding your beautiful shell!
The Secret to Smooth Ricotta Filling Recipe
Okay, listen closely about the ricotta. You cannot skip draining it! I mean it—overnight in the fridge, sitting over a bowl. That gets rid of the watery nonsense that ruins the texture. Once it’s strained, push it through a fine-mesh sieve. That sieve step is what transforms grainy cheese into a luxurious cream. A little cinnamon and vanilla, and voilà—perfection.
Ingredients for the Ultimate Homemade Cannoli Recipe
Gathering your supplies is half the battle when getting ready to make this incredible cannoli recipe from scratch. I always lay everything out before I start mixing, because once that dough starts coming together, you want to move quickly! Remember, for the filling, we need that ricotta to have been draining for ages—I usually prep that the night before so I’m ready to go when I want to bake.
Ingredients for Crispy Cannoli Shells
- 2 cups all-purpose flour
- 1/4 cup granulated sugar
- 1/4 teaspoon salt
- 1 tablespoon unsalted butter, cold and cubed
- 1 large egg yolk
- 1/2 cup dry white wine (like Marsala or Pinot Grigio)
- 1 tablespoon white vinegar
- Vegetable oil, for frying
Ingredients for the Ricotta Filling Recipe
- 15 ounces whole milk ricotta cheese, drained overnight
- 1/2 cup powdered sugar, plus more for dusting
- 1 teaspoon vanilla extract
- 1/4 teaspoon ground cinnamon
- 1/4 cup mini chocolate chips (optional)
How to Prepare the Dough for Your Cannoli Recipe
Now that you have all your components ready, let’s tackle the pastry for this amazing cannoli recipe. This dough is surprisingly easy, but you have to treat it delicately. We combine the flour, sugar, and salt first—just whisk them dry in a big bowl. Then comes the butter, and you need to work that cold butter in until it feels like coarse meal. I use my fingertips for this part; you want it combined but not melted by the warmth of your hands, see?
Next, we add the magic liquids: the yolk, the wine, and the vinegar. Mix it just until it comes together into something shaggy. Resist the urge to add more flour! Knead it on the counter for maybe two minutes—that’s all it needs to become smooth, but overworking it is a HUGE mistake. It develops gluten, and that’s the enemy of crispiness! Seriously, two minutes max. Wrap that gorgeous little ball up tightly in plastic wrap and send it to the fridge to chill for at least an hour. This resting time is vital, so don’t rush it!
Making the Sweet Ricotta Filling Recipe for Your Cannoli Recipe
Okay, we’ve talked about the pastry, but the filling for this cannoli recipe is where the real, creamy magic happens. Remember how I stressed draining everything overnight? That step pays off huge here!
Once your ricotta is beautifully dry, you must press it right through a fine-mesh sieve. This is non-negotiable if you want that super smooth texture that melts in your mouth. If you skip the sieve, you risk little grainy bits in your final product. Trust me, it’s worth the extra five minutes of pushing it through.
After sieving, we gently fold in the powdered sugar—I use powdered sugar, not granulated, because we want smooth dissolving action!—along with the vanilla and that hint of cinnamon. If you’re adding those mini chocolate chips, fold those in last. Cover the whole bowl and put it back in the fridge to chill for at least an hour. When you pull it out before filling, it should be stiff enough to hold that beautiful piped shape you’re going for. If it seems too loose, pop a couple more tablespoons of powdered sugar in there until it feels right!
Rolling and Frying Crispy Cannoli Shells
This part, the frying for our cannoli recipe, is where people get nervous, but I promise it’s all about temperature control! First, you need to roll that dough out impossibly thin—I mean, thin enough that you can almost read the newspaper through it. If you have a pasta roller, go to setting 6 or 7; if you’re using a rolling pin, just keep going until you think you’re going to rip it, and then roll just a little more! Cut out those circles, about 4 inches wide.
Now for wrapping the metal tubes. You have to overlap the dough edge slightly; that overlap is the only thing keeping the oil out! Seal that seam *super* tight with a little dab of water or egg white. I’ll let you in on a secret: the first time I did this, one of my shells blew up in the oil like a small, buttery firework! It happens when the seam isn’t sealed, letting hot oil rush inside. Don’t panic!
Heat your oil to exactly 375°F (190°C). Seriously, get a thermometer; this is where the magic happens. Drop two or three shells in gently—don’t overcrowd the pot! They only need about one minute per side until they are gorgeously deep golden brown and super bubbly. Use tongs to pull them out and slide them carefully off the tube while they are still warm enough to move, letting them cool totally on paper towels before you even *think* about filling them. That waiting time ensures they stay perfectly crisp for this magnificent cannoli recipe!
Assembling the Final Cannoli Recipe
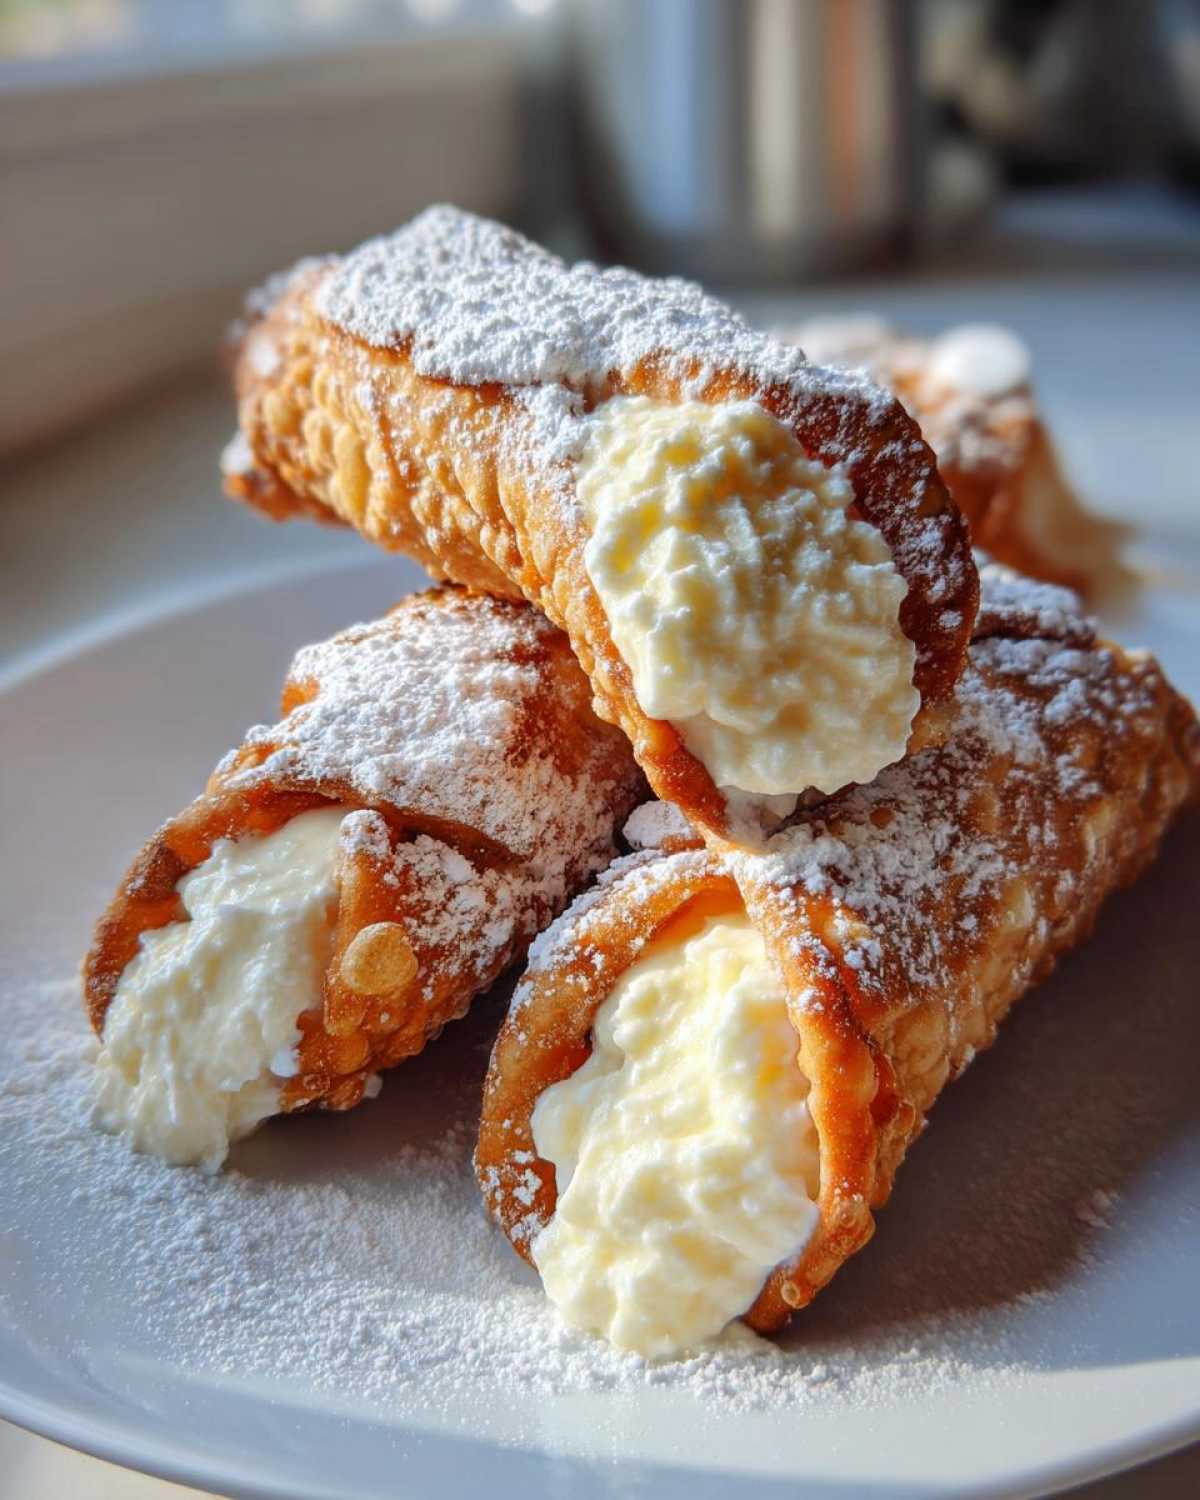
We’ve done the hard work! We have our crispy, cooled shells and our magically smooth, chilled filling. Now comes the fun part of finishing this cannoli recipe. The Golden Rule of Cannoli assembly is simple: Wait until the absolute last minute to fill them!
If you fill them hours ahead of serving time, I promise you’ll get sad, soggy shells. So, once your guests are ready or you’re about to sit down for dessert, take that piping bag full of ricotta cream and gently pipe the filling into both ends of each shell until they look plump and appealing. Finish them off with a generous dusting of powdered sugar—and honestly, that’s it! You’ve made the best Italian dessert!
Tips for Success with Your Homemade Cannoli Recipe
I’ve made a few batches of this cannoli recipe by now, and I’ve learned that nailing the final result really comes down to respecting the ingredients and the timing. It’s less about a huge complicated step and more about nailing a few small details. If you remember these points, your next batch of **cannoli recipe** stars will be better than the last!
- Drain That Ricotta! I can’t shout this loud enough—strain that cheese for a minimum of four hours, or preferably overnight. If you skip this, your filling will weep and make the shells soggy immediately.
- Oil Temperature is King: Keep that frying oil steady at 375°F (190°C). Too cool, and the dough soaks up oil and gets dense. Too hot, and it burns before puffing up correctly.
- Fill Last Minute: Seriously, this is the final defense against sogginess. Prepare the shells and the filling entirely, but only fill those crispy tubes right before you plan to eat them. No exceptions for this amazing **cannoli recipe**!
Storage and Make-Ahead Guidance for This Cannoli Recipe
Okay, if you’re making this incredible batch of cannoli recipe components ahead of time—which I totally recommend for parties—you must keep the shells and the filling totally separate. I cannot stress this enough! If you mix them and store them together, those crispy shells become sad, floppy things overnight. So boring!
For the shells? Keep them in a completely airtight container at room temperature. They’ll stay perfectly crisp for about three days. For the delicious ricotta filling recipe, cover it tightly and keep it in the fridge. Because we used such high-quality, drained cheese, it stays absolutely perfect for up to five days. Then, when you’re ready to serve this classic **cannoli recipe**, just grab your tubes, pipe them full, dust them with sugar, and enjoy the crunch!
Frequently Asked Questions About Authentic Sicilian Cannoli
When you decide to tackle Authentic Sicilian Cannoli, naturally you end up with a few questions! It’s totally normal, especially with frying involved. I’ve gathered the most common things people ask me when they try this recipe for the first time, so you can walk into the kitchen feeling totally confident!
Can I bake the cannoli shells instead of frying them?
Oh, that’s the million-dollar question! You absolutely *can* bake the shells. If you prefer to skip the hot oil, just wrap the dough around the tubes and place them on a baking sheet. You’ll bake them at about 400°F (200°C) until they are light golden brown. BUT—and this is a big but—the texture will be different. Fried shells puff up and get those gorgeous, big, airy bubbles that make them shatter when you bite them. Baked shells are usually denser and closer to a hard cookie texture. For the true deal, you just have to fry!
How long can I store the filling before using it in the cannoli recipe?
Because we took the time to strain all that excess water out of the ricotta, this filling holds up really well! If you’ve made a big batch of the ricotta cream dessert, you can safely seal it tightly and keep it in the refrigerator for up to five days. That means you can make the filling early on a Tuesday and still have it ready for weekend guests! Just give it a gentle stir right before you pipe it into those shells.
What wine is best for the cannoli dough?
This is where the chemistry comes in! We use dry white wine—Marsala is traditional, but I’ve had great luck with Pinot Grigio or even a dry sherry. Honestly, the type of wine matters less than the alcohol content itself. When the wine hits that hot oil during frying, the alcohol rapidly turns to steam, which forces the dough to puff up and crisp rather than just sit there and absorb oil. It’s the bubbles you want! So grab whatever dry white wine you have open, just make sure it’s dry!
PrintClassic Homemade Cannoli Recipe

Make authentic Italian cannoli with crispy, fried shells and a sweet, creamy ricotta filling from scratch.
- Prep Time: 45 min
- Cook Time: 20 min
- Total Time: 2 hours 5 minutes
- Yield: 12 servings
- Category: Dessert
- Method: Frying
- Cuisine: Italian
- Diet: Vegetarian
Ingredients
- 2 cups all-purpose flour
- 1/4 cup granulated sugar
- 1/4 teaspoon salt
- 1 tablespoon unsalted butter, cold and cubed
- 1 large egg yolk
- 1/2 cup dry white wine (like Marsala or Pinot Grigio)
- 1 tablespoon white vinegar
- Vegetable oil, for frying
- 15 ounces whole milk ricotta cheese, drained overnight
- 1/2 cup powdered sugar, plus more for dusting
- 1 teaspoon vanilla extract
- 1/4 teaspoon ground cinnamon
- 1/4 cup mini chocolate chips (optional)
- Powdered sugar, for dusting
Instructions
- Make the dough: In a large bowl, whisk together the flour, granulated sugar, and salt. Cut in the cold butter using a pastry blender or your fingers until the mixture resembles coarse crumbs.
- Add the egg yolk, white wine, and vinegar. Mix until a shaggy dough forms. Knead briefly on a lightly floured surface until smooth, about 2 minutes. Do not overwork.
- Wrap the dough tightly in plastic wrap and refrigerate for at least 1 hour.
- Prepare the filling: After draining the ricotta, press it through a fine-mesh sieve into a bowl to remove excess moisture and ensure a smooth texture.
- Mix the strained ricotta with the powdered sugar, vanilla extract, and cinnamon until fully combined and creamy. Fold in the chocolate chips, if using. Cover and chill for at least 1 hour.
- Roll the shells: Divide the chilled dough into four pieces. Working with one piece at a time (keep others covered), roll it out very thinly, either by hand or using a pasta machine, to setting 6 or 7.
- Cut the dough into 4-inch circles or squares. Wrap each piece around a metal cannoli tube, overlapping the edges slightly. Seal the seam firmly with a dab of water or egg white.
- Fry the shells: Heat about 2 inches of vegetable oil in a deep, heavy-bottomed pot to 375°F (190°C).
- Carefully place 2 or 3 shells into the hot oil, using tongs to keep them submerged and away from each other. Fry for 1 to 2 minutes per side until deep golden brown and bubbly.
- Use tongs to remove the shells, keeping the tube inside until they cool slightly. Gently slide the tube out. Place the hot shells on a paper towel-lined plate to drain completely. Repeat with remaining dough.
- Fill the cannoli: Once the shells are completely cool, use a piping bag or a small spoon to fill both ends of each shell with the chilled ricotta mixture.
- Dust generously with powdered sugar before serving.
Notes
- For the crispiest shells, ensure your frying oil temperature is correct (375°F).
- Strain the ricotta cheese for a minimum of 4 hours, or preferably overnight, in the refrigerator to prevent a watery filling.
- Fill the cannoli shells just before serving to maintain maximum crispness.
Nutrition
- Serving Size: 1 cannoli
- Calories: 350
- Sugar: 25
- Sodium: 120
- Fat: 18
- Saturated Fat: 10
- Unsaturated Fat: 8
- Trans Fat: 0
- Carbohydrates: 40
- Fiber: 1
- Protein: 10
- Cholesterol: 65