

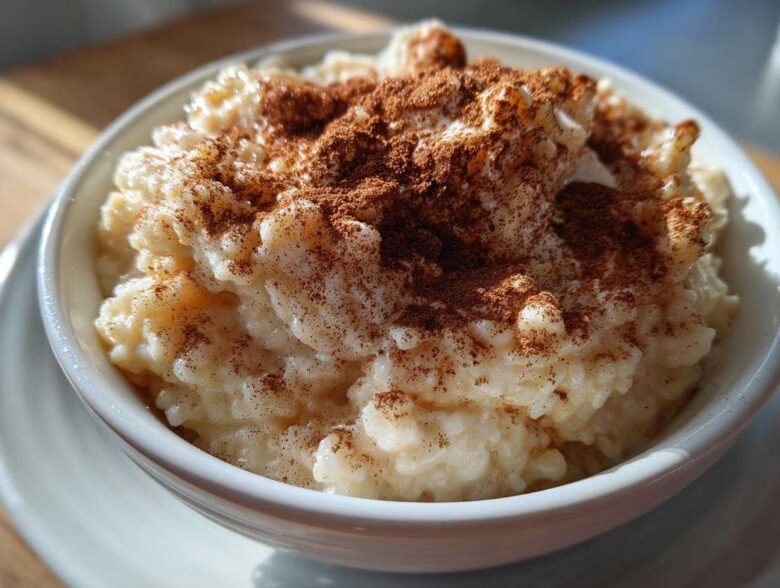
Oh, stop whatever you’re doing right now, because I have found the actual answer to every cozy night in, rainy Sunday, or sudden craving for something warm and sweet: the most incredible, truly old fashioned rice pudding you will ever put a spoon into. Forget those watery, overcooked versions you might have tried! For years, I struggled to get that perfect, creamy texture that clings to the spoon just right. I mean, I nearly gave up after one batch came out tasting like rice soup, honestly. But I finally cracked the code for my Ultimate Creamy Old Fashioned Stovetop Rice Pudding recipe—and guess what? It only needs five core ingredients. Trust me, this is the recipe from my childhood kitchen, and it brings back the best memories every single time I make it. Check out more of my favorite tried-and-true recipes!
This method focuses purely on time and patience on the stovetop, which builds up this rich, naturally sweet gravy you just can’t get from a hasty bake. If you’re looking for a simple yet profoundly satisfying dessert from scratch, this is it. I even keep this recipe bookmarked on my phone for those days when I need instant nostalgia. You absolutely have to try this!
Why This Old Fashioned Rice Pudding Recipe Stands Out
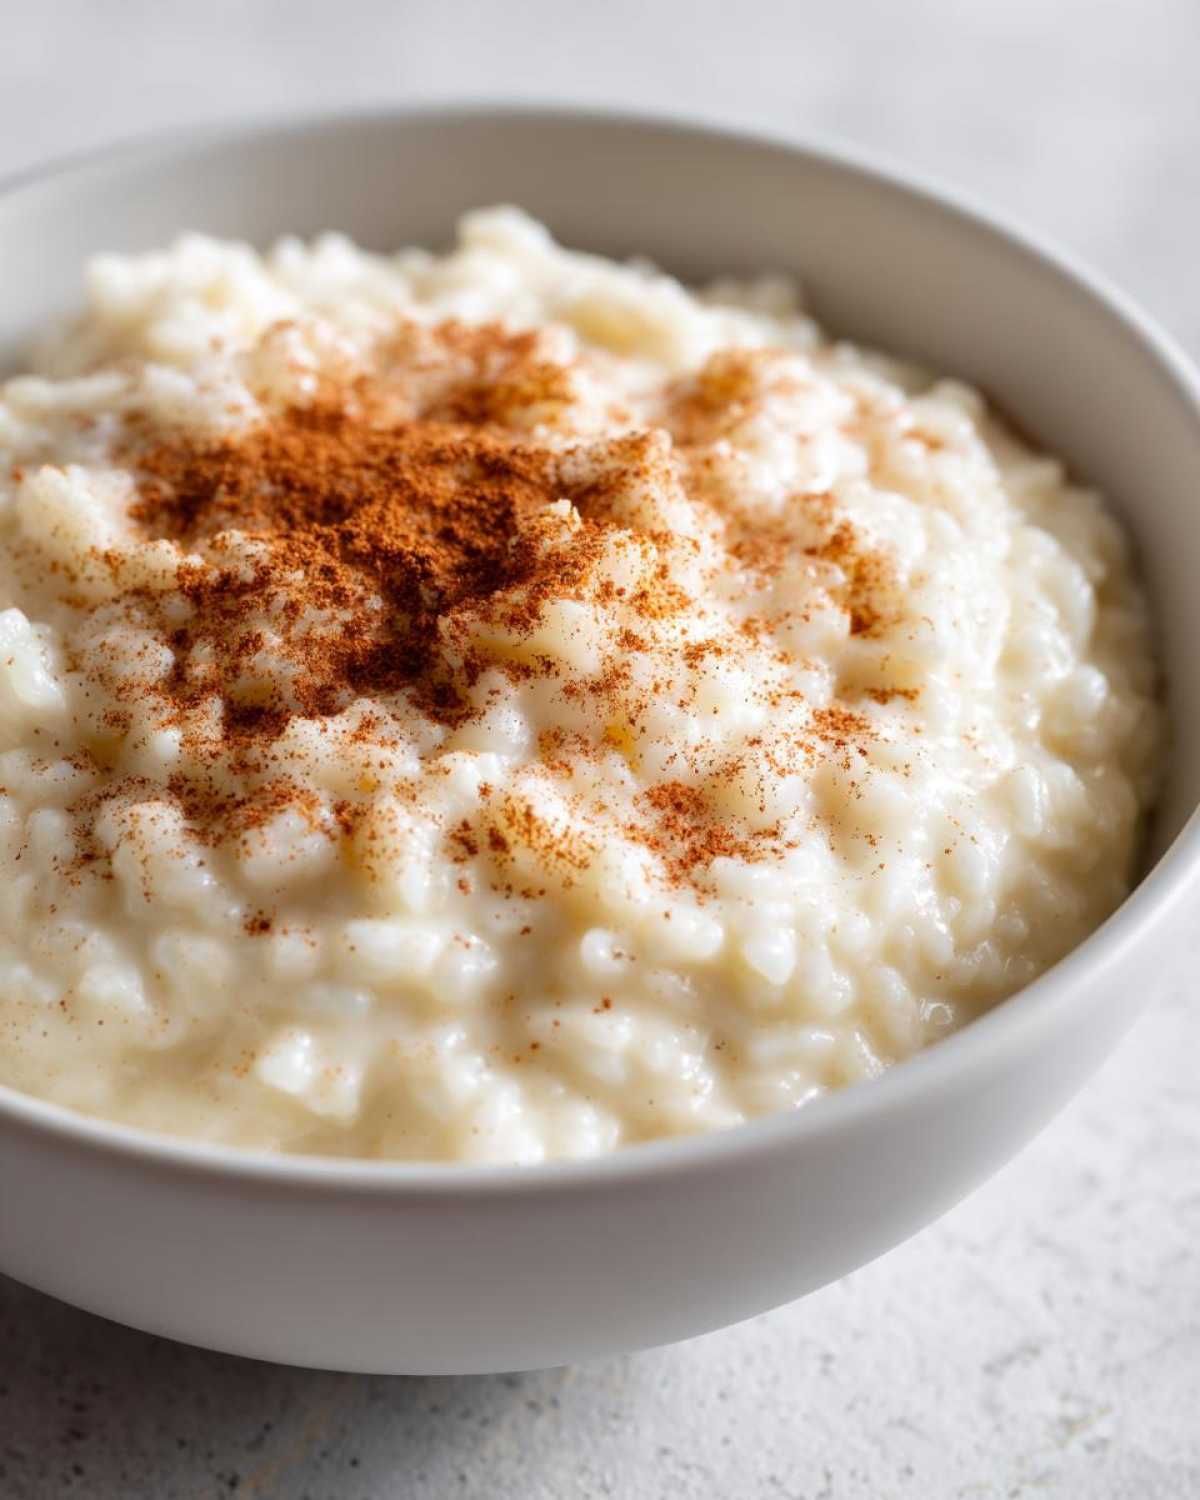
What makes this particular stovetop version the keeper? Honestly, it’s the texture. This isn’t just good; it’s the *best creamy rice pudding* I’ve ever made. It hits that perfect sweet spot between thick and velvety, the kind that reminds you of true classic comfort desserts.
You are going to love how simple it is. We aren’t messing around with complicated steps or fancy equipment here. This old fashioned rice pudding relies on quality basic ingredients and elbow grease!
- It delivers an ultra-creamy texture thanks to the right milk and rice ratio.
- It’s surprisingly easy, using only five main ingredients to get that big flavor.
- It has serious nostalgia factor—it tastes just like grandma used to make!
- It’s perfectly delicious served piping hot or chilled, making it versatile for any night.
I’ve pulled together all my favorite tips so you can easily replicate this magic at home. You should definitely check out some other classic comfort desserts I’ve shared too!
Gathering Ingredients for Your Creamy Rice Pudding
Okay, let’s talk supplies. Since this is a foundational recipe—a true dessert from scratch—the quality of these few items really shines through. Don’t even think about swapping out the short-grain rice for anything else, okay? That sticky starch is what thickens this pudding beautifully and keeps it from turning into mush. I learned that the hard way years ago!
And please, for the love of creaminess, use whole milk! Skim just won’t cut it here; you need the fat content to create that rich, velvety mouthfeel we are aiming for. We keep this recipe streamlined, so you probably have most of this sitting in your pantry already.
Here is exactly what you need for this batch. Remember, the goal is to make sure everything is ready to go before the heat turns on, so measuring everything out first really helps keep things moving smoothly when we get to the stove. Find more tips on making dessert from scratch on my site!
- 1 cup short-grain white rice (this is our texture secret weapon!)
- 4 cups whole milk (don’t skimp here!)
- 1/2 cup granulated sugar
- 1 teaspoon pure vanilla extract
- 1/4 teaspoon ground cinnamon, plus extra for that stunning topping later
If you decide to add raisins later—which I sometimes do—make sure you have those ready, but we’ll talk about soaking them in the next section!
Step-by-Step Instructions for Perfect Stovetop Rice Pudding
Alright, here is where the magic happens! Making this simple stovetop pudding is less about fast action and more about gentle commitment. We are trying to coax the starch out of the rice, which takes time. If you rush it, you end up with undercooked grains swimming in hot milk, and nobody wants that mess. This whole process is designed to create that beautiful, thick consistency that qualifies as a truly rich and smooth pudding.
I’ve found that setting a timer for stirring helps me stick to the schedule, so don’t be afraid to get your phone out! Remember to check out my guide on other simple stovetop pudding methods too, but this one is the best for classic rice pudding.
Preparing the Rice and Initial Simmer for Rice Pudding
First things first: grab that rice and give it a good rinse under cold water until the water running off looks clear. Seriously, do this! It washes away surface starch that can sometimes cause gummy pockets later on. Once rinsed, toss the rice, the four cups of milk, and all the sugar right into a heavy-bottomed saucepan—that’s important for even heat distribution. Turn the heat up to medium and stir it often until it just starts to simmer gently. You want to see those little bubbles forming around the edge, but don’t let it boil over!
The Slow Cook: Achieving the Best Creamy Rice Pudding Texture
The moment that gentle simmer starts, turn that heat way down to low! This is the crucial part of making this creamy rice pudding. You need to cook this uncovered for a solid 45 to 60 minutes. Set a timer for every 10 minutes and give that bottom a good scrape and stir. I mean it—every 5 to 10 minutes! If you let it sit too long, the milk solids burn right to the bottom, and then you’ve got scorched pudding, which tastes awful. As it cooks down over that hour, the rice will soften beautifully, and the whole mixture will thicken up significantly. My personal tip? Take it off the heat when it looks slightly runnier than you want it, because I promise you, it firms up dramatically as it cools down.
Tips for the Ultimate Rich and Smooth Pudding Experience
Now that your stovetop pudding is cooked down and looking beautifully thick, we move into the fun part—the finishing touches and troubleshooting! Even the best, most authentic rice pudding method can sometimes throw us a curveball, like getting too thick too fast, so I always keep a little extra milk handy. You see, the beauty of this dessert is its adaptability. It’s designed to be a personalized treat, not a rigid science experiment! If mine starts looking too stiff while I’m stirring it at the 50-minute mark, I just whisk in a splash of whole milk until it flows smoothly again. Then I pull it off the heat, knowing it’ll set up nicely later.
If you want to dive into other ways to make something truly spectacular, take a peek at my tips for the best creamy rice pudding variations!
Vanilla Cinnamon Dessert Enhancements for Your Rice Pudding
The base recipe is amazing on its own, right? But once it comes off the heat—and only then—we add the flavor stars. Stir in that teaspoon of vanilla extract right away. It smells incredible and really brightens up the rich dairy flavor. Follow that immediately with that quarter teaspoon of cinnamon that we set aside.
Now, if you’re like me and sometimes crave that little bit of texture contrast, you can absolutely add raisins! But here’s the rule: they have to go in during the last 15 minutes of cooking. If you toss them in at the beginning, they just get mushy. If you add them now, they soak up all that creamy goodness without dissolving. Oh, and speaking of enhancements, don’t forget about the topping! I always finish mine with a dusting of extra cinnamon right before it hits the table—it’s visually arresting and gives you that first lovely little warm spice hit. Perfection!
Serving and Storing Your Nostalgic Pudding Recipe
So, you’ve survived the stirring hour and your kitchen smells like pure comfort. Now for the best part: deciding how to eat it! My favorite way to enjoy this nostalgic pudding recipe is warm, right out of the pot, sprinkled heavily with that extra cinnamon. That warmth really lets the vanilla shine through. But honestly, for a true family favorite, we often let it cool and serve it chilled the next day. It firms up beautifully in the fridge, making it a wonderful make ahead pudding for entertaining!
Storing it is simple. Just pop any leftovers into an airtight container. It stays wonderfully creamy for about four days in the refrigerator. If it seems a little too stiff after chilling (which happens!), don’t panic! Just stir in a splash or two of milk—yes, even whole milk if you have it—while it sits on the counter for about ten minutes, and it loosens right up. Remember, these are the kinds of easy dessert ideas that get better with a little planning!
I have a whole list of delicious make ahead pudding options if you want to plan your desserts for the entire week!
Variations on Classic Comfort Desserts: Making Your Rice Pudding Unique
This core recipe is already spectacular, making it one of my go-to comfort food dessert recipes, but sometimes you just need to stir things up a little, right? I love experimenting once the vanilla and cinnamon are mixed in, just before I take the pot off the heat. Since this recipe is so forgiving, it’s the perfect base for fun, easy tweaks that keep things interesting without turning it into something unrecognizable!
Don’t feel like you have to stick to the classics every time. Once you master that super creamy base, you can really start playing around with flavor combinations. I always encourage bakers to treat the spice measurements as suggestions, not absolute laws. This is exactly how you develop your own signature version of a favorite classic!
If you’re browsing for more ideas, I’ve cataloged a ton of fun comfort food dessert recipes on the site!
- Get Zesty: A tiny bit of fresh orange or lemon zest stirred in right at the end wakes up the whole pudding. It gives it this amazing brightness that cuts through the richness of the whole milk. It’s phenomenal if you’re serving it chilled on a warm day!
- Spice it Up Differently: Swap out some of that cinnamon for cardamom—it has a beautiful, almost floral note that pairs surprisingly well with the sweet rice. A tiny pinch of ground nutmeg is always lovely too, especially if you plan on serving this around the holidays. It makes it feel incredibly autumnal.
- Go Decadent: Want a richer, more adult twist? Instead of adding milk if it gets too thick (as I mentioned earlier), substitute that liquid with a small splash of dark rum or an orange liqueur when the pudding is done simmering. Wow. Just wow.
- Nutty Crunch: For texture, try toasting some slivered almonds or pecans separately in a dry pan until they smell fragrant, and then stir them in right before serving. Make sure to toast them first, or you’ll compromise the texture of the soft pudding.
These little additions change the entire profile of the dessert, turning a simple bowl of pudding into something that feels totally gourmet. It’s proof that you don’t need a complicated recipe to make something special.
Frequently Asked Questions About Making Rice Pudding
I get so many questions about this recipe once people start trying it, especially concerning texture and cooking shortcuts! People often ask if they can skip the long simmer time now that they know how to make a creamy pudding base. Honestly, the stovetop method is what creates the authentic result, but I can certainly clear up the most common things people wonder about when making their own rice dessert recipes at home!
If you have any other questions, drop them below! I genuinely love hearing how everyone is enjoying their homemade sweet treats.
Can I use leftover cooked rice for this rice pudding?
That’s a great question regarding making this a speedy meal! Yes, you absolutely can use already cooked rice, which taps into that “quick rice pudding version” idea. However, you need to adjust things quite a bit. Since the rice is already soft, it won’t release starch to thicken the milk like raw rice does. You’ll need to cut the cook time way back—maybe only 15 or 20 minutes total—and you might need to add an extra cup of milk. Also, using leftover rice rarely gives you that *ultimate* level of creaminess you get from the slow starch release, but it works in a pinch!
How do I ensure my stovetop rice pudding stays creamy?
This comes down to two things: heat and stirring! If the heat is too high, the milk burns, and the bottom sticks before everything gets creamy. You must keep it at a very low simmer once you incorporate the rice and milk. And stick to the stirring schedule! Seriously, scraping the bottom of that pot every 5 to 10 minutes prevents scorching and encourages the starch from the rice to create that glorious, velvety sauce we are looking for. If you follow those two rules, you will always get a rich pudding!
For more ways to customize your bowls, check out the tips in my guide on delicious rice dessert recipes!
Nutritional Estimates for This Simple Dessert
I know that when we’re making something that feels this decadent and comforting, we don’t always want to think about the numbers, but I always like to give people a general idea of what’s in a serving of this simple dessert. After all, knowing what you’re eating is part of the fun!
I ran this batch through a standard calculator based on the ingredients list—the whole milk really pushes the richness here, as you might expect—but please keep in mind these are just estimates. If you swap whole milk for skim, or if you decide to use a little more sugar for a late-night treat (I won’t tell!), these numbers will definitely change. This is where understanding that heavy cream means more fat, and more sugar means more calories, comes into play!
For a standard one-cup serving of this naturally sweetened pudding base (without heavy toppings), here is what you can generally expect:
- Serving Size: 1 cup
- Calories: 350
- Sugar: 25g
- Sodium: 80mg
- Total Fat: 8g
- Saturated Fat: 4.5g
- Carbohydrates: 60g
- Protein: 10g
See? Not too bad for a gorgeous, belly-warming bowl of comfort! It’s certainly a better choice than grabbing something artificial from the store when you want a true dessert from scratch.
Share Your Cozy Night In Recipes Experience
I truly hope this recipe elevates your next quiet night at home! This old fashioned rice pudding is my ultimate stress reliever, and I just can’t wait for you to try it. Once you sit down with your warm (or perfectly chilled!) bowl, I really want to hear what you think. Did you stick to the simple vanilla and cinnamon, or did you go wild with some rum or zest?
Please let me know how it went down in the comments below! Rating the recipe is super helpful for me and for other folks looking for a reliable comfort food dessert. It lets me know I got the texture just right for you!
And if you snapped a picture of your beautiful, creamy bowl—maybe you’re even curled up on the sofa with a good book—please tag me on social media! I absolutely adore seeing your creations come to life in your kitchens. Nothing makes me happier than knowing this recipe is making another home feel a little cozier. Check out my ideas for more cozy night in recipes while you’re deciding what to cook next!
PrintThe Ultimate Creamy Old Fashioned Stovetop Rice Pudding

Make a rich and smooth rice pudding on the stovetop using just a few simple ingredients for a classic comfort dessert.
- Prep Time: 5 min
- Cook Time: 60 min
- Total Time: 65 min
- Yield: 4 servings
- Category: Dessert
- Method: Stovetop
- Cuisine: American
- Diet: Vegetarian
Ingredients
- 1 cup short-grain white rice
- 4 cups whole milk
- 1/2 cup granulated sugar
- 1 teaspoon vanilla extract
- 1/4 teaspoon ground cinnamon, plus extra for topping
Instructions
- Rinse the rice under cold water until the water runs clear.
- Combine the rinsed rice, whole milk, and sugar in a heavy-bottomed saucepan.
- Place the saucepan over medium heat and bring the mixture to a gentle simmer, stirring often to prevent sticking.
- Once simmering, reduce the heat to low. Cook uncovered for 45 to 60 minutes, stirring every 5 to 10 minutes, especially scraping the bottom of the pan.
- The pudding is done when the rice is tender and the mixture has thickened to your desired consistency. It will thicken more as it cools.
- Remove the saucepan from the heat. Stir in the vanilla extract and 1/4 teaspoon of cinnamon.
- Serve warm or chill completely before serving. Sprinkle with extra cinnamon before eating.
Notes
- For a creamier texture, use whole milk or half-and-half.
- If the pudding becomes too thick while cooking, add a splash more milk until you reach the right consistency.
- You can add 1/2 cup of raisins during the last 15 minutes of cooking if you prefer.
Nutrition
- Serving Size: 1 cup
- Calories: 350
- Sugar: 25
- Sodium: 80
- Fat: 8
- Saturated Fat: 4.5
- Unsaturated Fat: 3.5
- Trans Fat: 0
- Carbohydrates: 60
- Fiber: 1
- Protein: 10
- Cholesterol: 25