

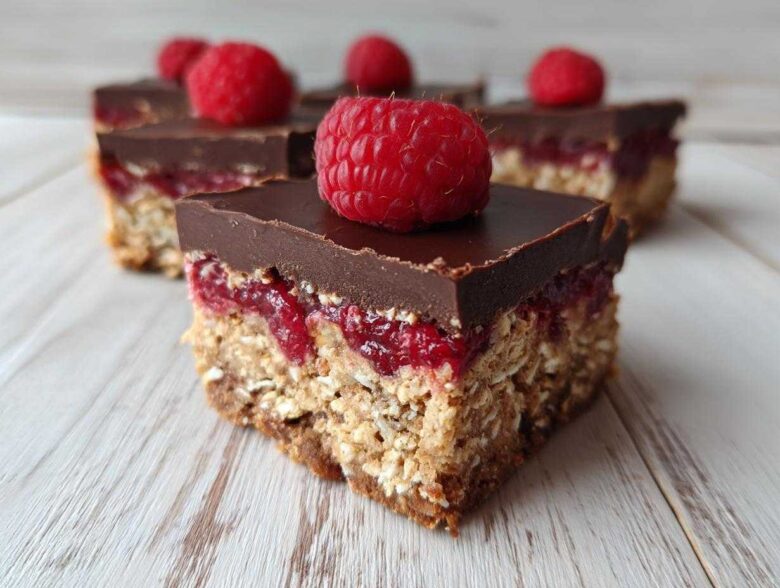
Oh, there are those days, aren’t there? The ones where you desperately crave something intensely chocolatey and bright with raspberry, but the thought of turning on the oven feels like climbing a mountain. Been there, done that, bought the ice cream! Trust me, I get it. That’s exactly why I spent what felt like a month tweaking this recipe until it was absolutely perfect. You are looking at the absolute best No-Bake Raspberry Chocolate Oat Slice you will ever make.
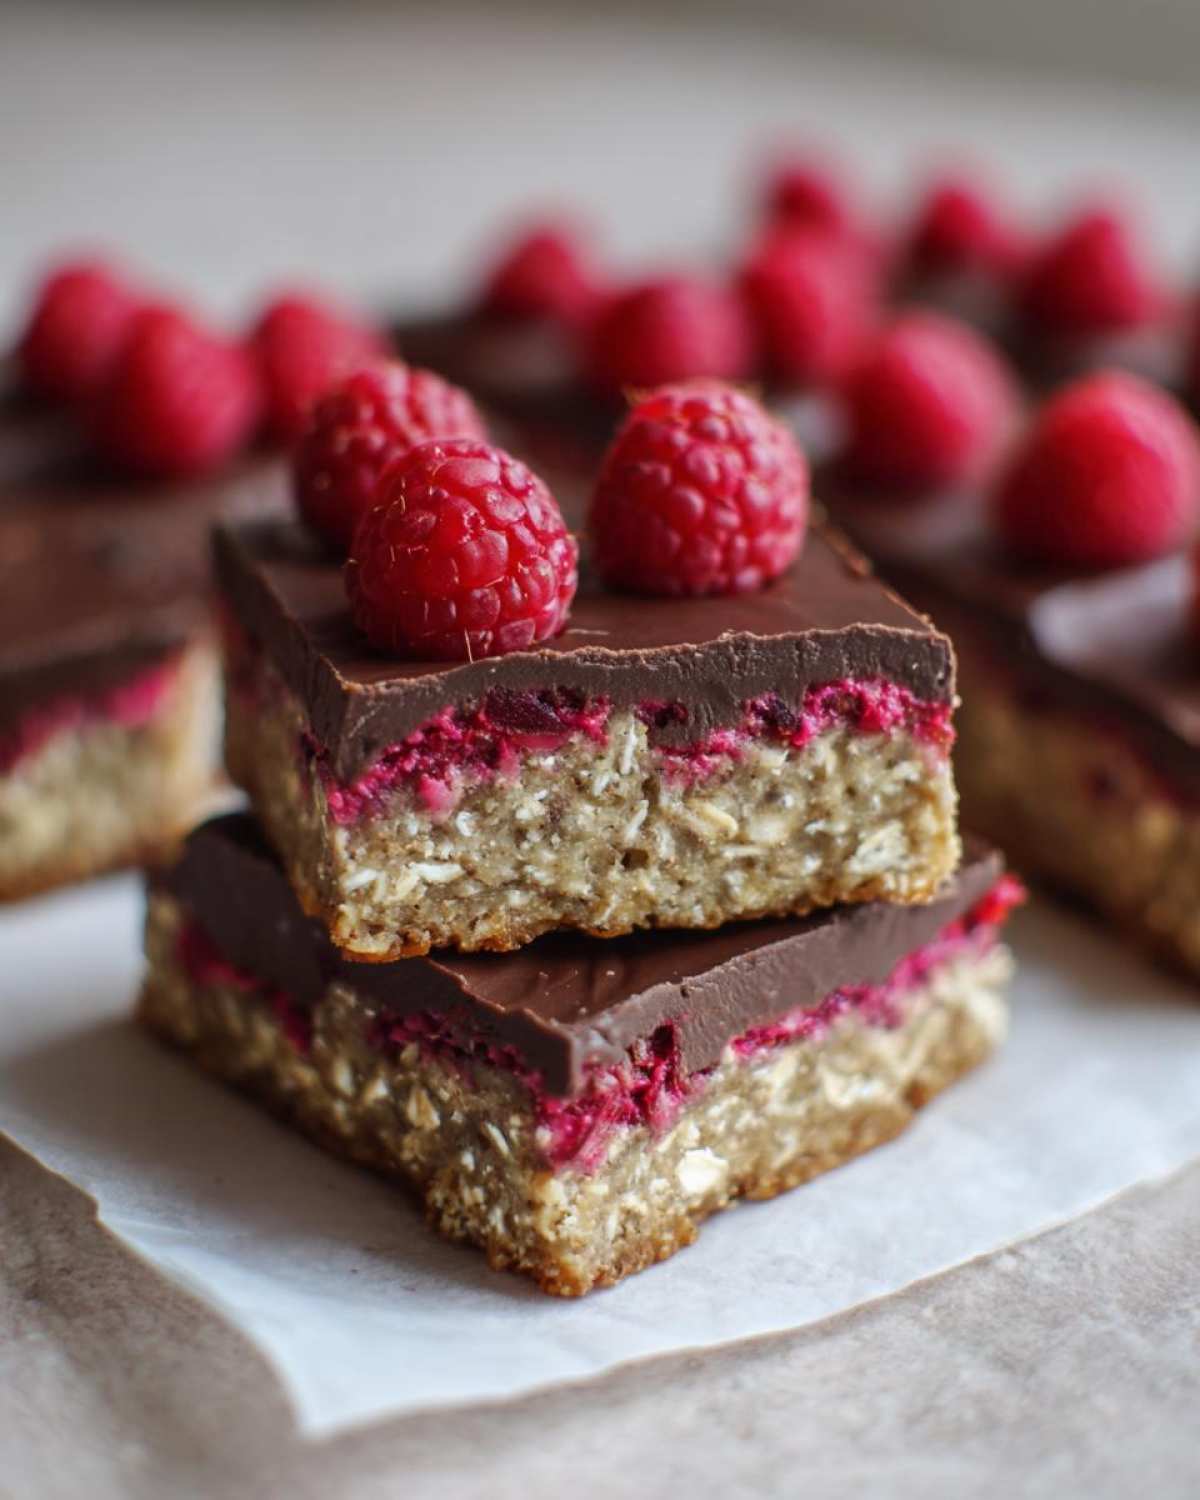
Forget crumbly messes or chocolate that stays gooey forever. After many failed (but tasty!) attempts, I finally locked down the ratios. This slice has this unbelievably chewy, slightly salty oat base, a rich, dark layer of chocolate, and those perfect tart pops from the raspberries on top. It sets up beautifully in the fridge. It’s my go-to recipe when I need a show-stopping dessert without breaking a sweat. You’re going to love how easy this is!
If you’ve ever wanted a totally foolproof frozen treat, you should also check out my recipe for the No-Bake Strawberry Lemon Cheesecake Bars—it uses the same ‘set-it-and-forget-it’ magic!
Why You Will Love This No-Bake Raspberry Chocolate Oat Slice
I’m telling you, this recipe is a lifesaver when the craving hits hard and fast. It’s got everything you want in a fancy dessert, but zero fuss. Here are the top reasons this has become my absolute favorite:
- It’s genuinely no-bake! You just mix, press, pour, and chill. Seriously, the easiest way to nail a decadent treat.
- The texture combo is spot-on: a delightfully chewy oat base meets smooth, snappy chocolate. It’s so satisfying.
- The sharp, tartness of the raspberries cuts through the richness of the dark chocolate perfectly. That balance makes this No-Bake Raspberry Chocolate Oat Slice addictive.
- Prep time is lightning fast—I’m usually done mixing the base in under 15 minutes.
- You can keep these gems in the fridge for almost a week, which is great because they disappear quickly anyway!
- It travels like a dream. Perfect for picnics or potlucks because there’s no fear of melting unless it gets totally forgotten outside on a hot day!
If you love this flavor profile, you absolutely have to try my White Chocolate Raspberry Cookies too, but for something quick and chunky, this slice wins every time!
Essential Ingredients for the No-Bake Raspberry Chocolate Oat Slice
This recipe keeps the ingredient list short and sweet, which is another reason I love it so much! We aren’t dealing with complicated custards or temperamental candies here—just good, solid pantry staples that come together beautifully. Because this is a no-bake item, the quality of what you do use really shines through, so make sure your chocolate is something you actually enjoy eating on its own!
Here is exactly what you’ll need to gather:
- Rolled Oats: We need 1 1/2 cups of these. Stick to old-fashioned rolled oats for the best chewy texture for the base. Quick oats can work if you want it much firmer, but I prefer the chewiness!
- Shredded Coconut: Half a cup of unsweetened shredded coconut adds a little lovely texture to the bottom layer.
- Nut Butter: Half a cup of creamy peanut butter or smooth almond butter. This is what binds that oat base together, so make sure it’s smooth—no chunky bits for this job!
- Sweetener: A quarter cup of maple syrup or honey. This helps everything hold its shape, so don’t skip it!
- Coconut Oil (Base): We use a quarter cup of melted coconut oil in the base mixture to help keep things rich and scoopable before chilling.
- Dark Chocolate Chips: You’ll need half a cup of good quality dark chocolate chips for that decadent middle layer. The darker the better, in my opinion, to balance the fruit!
- Coconut Oil (Chocolate): Just one extra tablespoon of coconut oil for the chocolate topping. This helps the chocolate melt smoothly and gives it that beautiful, slightly shiny finish when it sets up.
- Raspberries: One full cup of fresh or frozen raspberries. This is where the magic happens! Don’t worry if they’re frozen—that actually helps keep them firm against the warm chocolate.
- Optional Dusting: A tiny bit of powdered sugar if you want to make them look extra pretty before serving, but honestly, they don’t need it.
If you’re curious about other easy, no-fuss treats you can make without turning on the oven, you should definitely peek at my Buckeye Graham Crackers Recipe. It uses similar binding magic!
Step-by-Step Instructions for the No-Bake Raspberry Chocolate Oat Slice
Okay, getting this slice right is all about layering. Since we aren’t baking, every step matters because that’s how it gets its structure. I used to rush the pressing part, and my base crumbled when I tried to cut it—rookie mistake! Don’t make mine! Follow these steps precisely, and you’ll have the best slices ready for the fridge in no time. Remember, the chilling time is basically our “cook time” here, so be patient!
We are using the quick-set power of the freezer and fridge to do all the hard work for us. If you’ve ever admired how smooth those Oreo Balls turn out, this principle is similar—we need everything firmly bonded before we cut!
Preparing the Pan and Oat Base for the No-Bake Raspberry Chocolate Oat Slice
First thing? Get your 8×8 inch pan ready. Line it with parchment paper, making sure you leave a big overhang on two sides. That overhang is your handle later when you lift the whole thing out!
In a medium bowl, mix your dry friends: the rolled oats and that shredded coconut we talked about. Now for the sticky stuff: In a separate microwave-safe bowl, combine your nut butter, maple syrup, and that first bit of melted coconut oil. Microwave it for just 30 seconds until it’s smooth and runny. Pour that warm gooey mixture right over your dry oats and stir like crazy until every single oat is coated and looks wet.
This is the most important part for structure: Press! Use the bottom of a measuring cup or a flat glass and push that mixture into the bottom of your prepared pan. Press it down hard and make sure it’s perfectly even. You want zero gaps or soft spots, or it *will* crumble later!
Creating the Chocolate Topping and Assembling the No-Bake Raspberry Chocolate Oat Slice
Toss that pan into the freezer while you whip up the topping—about five minutes to freeze up the base slightly helps prevent the chocolate from soaking in too much. For the chocolate layer, combine your dark chocolate chips and that extra tablespoon of coconut oil. Melt this slowly, either over a very low double boiler or by zapping it in the microwave for 20-second bursts, stirring really well between each zap until it’s silky smooth.
Pour that gorgeous chocolate over your chilled oat base and spread it quickly and evenly. Once the chocolate is spread, gently arrange your cup of raspberries right on top. If you’re using frozen ones, just pop them on—don’t thaw them! Give them a tiny press so they stick into the chocolate layer.
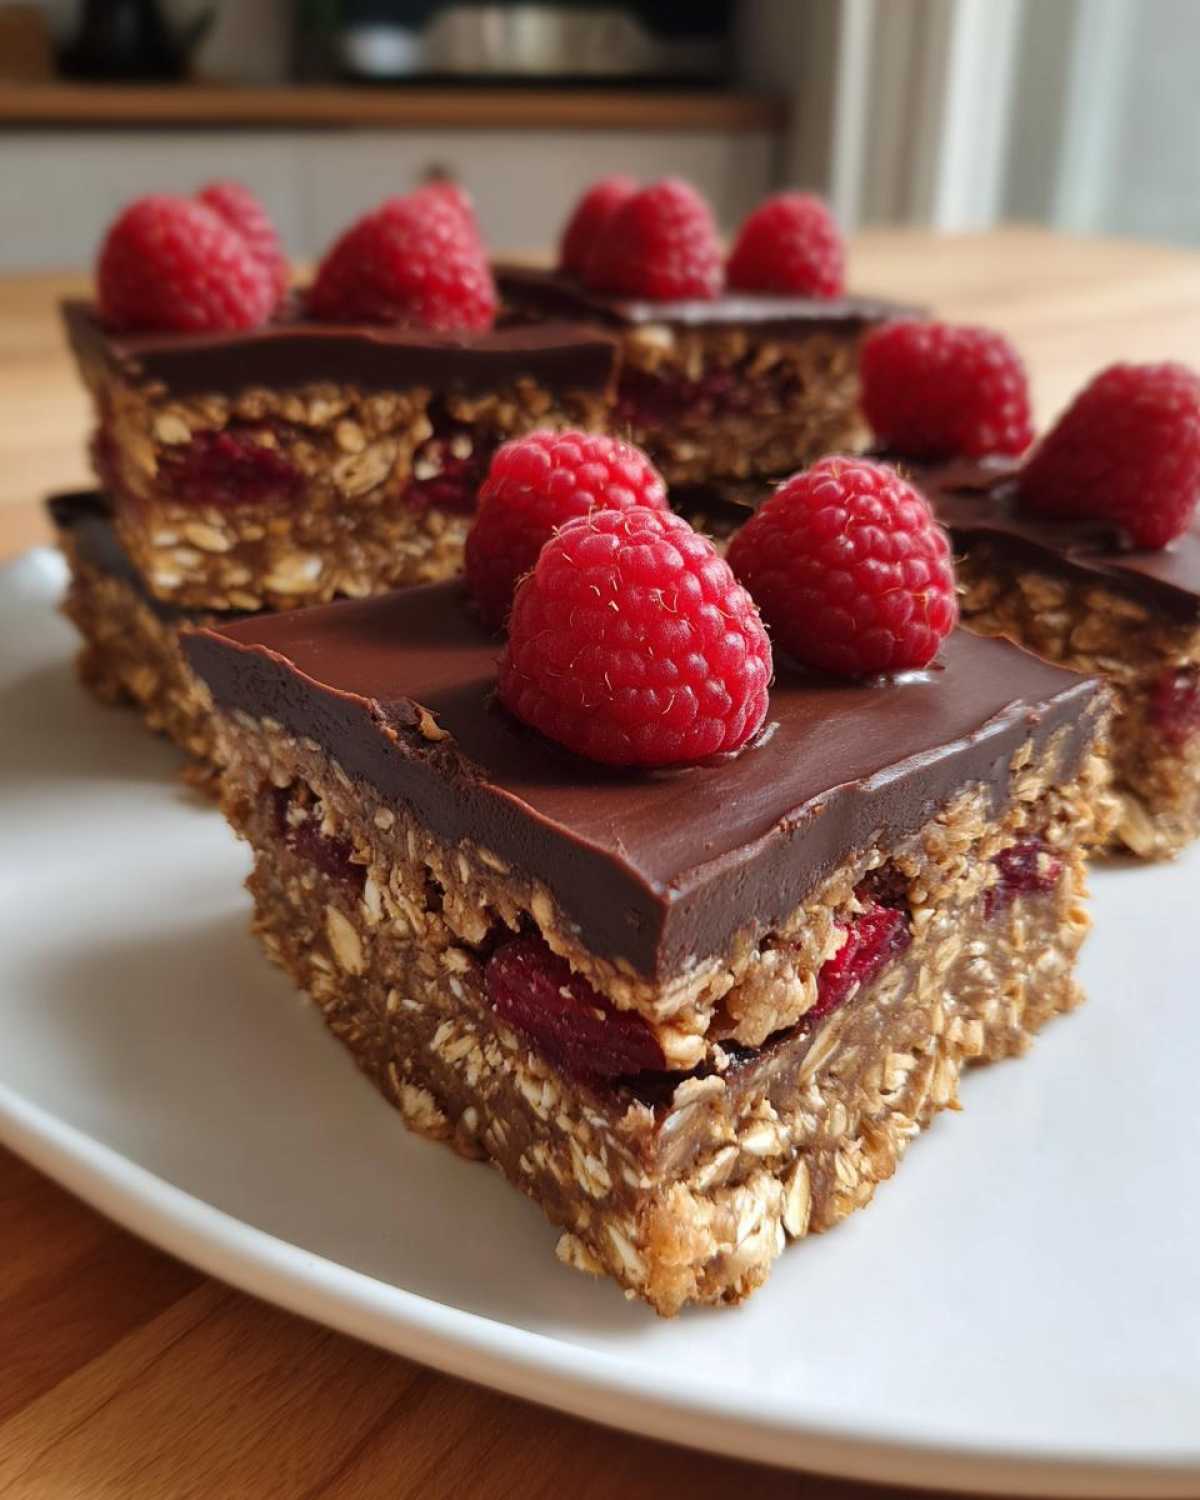
Now, patience is key. Return the pan to the refrigerator and let it chill for a minimum of 3 hours. Seriously, don’t rush this! If you try to cut it before the chocolate is rock solid, you’ll end up with a mess. Once it’s firm, use those parchment overhangs to gently lift the entire slice out, and then cut it into your squares. Done!
Tips for the Best No-Bake Raspberry Chocolate Oat Slice
Look, even though these are incredibly simple Easy Chocolate Oat Bars, there are a few things I learned the hard way that will save you frustration! My biggest early failure was trying to cut the slice right after the raspberries went on—it was a soupy disaster. I learned that those three hours aren’t optional; they are structural integrity time!
If your base seems too crumbly, it usually means your binder wasn’t warm enough when you mixed it. The peanut butter and maple syrup need to be heated just enough so they flow easily around the oats. If they stay too stiff, they won’t create the necessary glue. Next time, microwave that sticky mixture for just five seconds longer until it easily coats the oats—that little bit of warmth makes all the difference in creating those beautifully Chewy Chocolate Raspberry Bars.
Another thing people struggle with is the chocolate topping refusing to set properly. If your chocolate layer stays soft, the culprit is usually the extra fat being used. You need that tablespoon of coconut oil so it melts nicely, but too much will keep it soft. If you skip the oil, it sets better, but it won’t be as smooth or easy to slice. It’s a trade-off, but I stick to the recipe for that gorgeous finish!
For a fantastic treat that’s even faster to prepare next time, considering making a batch of my No-Bake Chocolate Orange Truffles—they are pure decadence with almost zero effort!
Ingredient Notes and Substitutions for Your No-Bake Raspberry Chocolate Oat Slice
Because this recipe relies on chilling instead of baking, our ingredients have huge jobs to do! They aren’t just adding flavor; they are responsible for the entire structure of the slice. That’s why knowing how to swap things out (or what to use if you’re missing something) is so important for making these No Bake Raspberry Chocolate Dessert work perfectly every time.
Let’s talk about those binder ingredients first. The combination of nut butter, maple syrup, and coconut oil is what turns a bowl of oats into a solid bar. If you can’t use peanut butter for allergy reasons, feel free to substitute it with almond butter, sunflower seed butter, or tahini. Just remember that sweeter butters, like cashew, might need you to cut back slightly on the maple syrup!
For those of you looking specifically at Vegan Raspberry Chocolate Slice Ingredients, this recipe is easily made vegan! Make sure you use maple syrup instead of honey, and double-check that your dark chocolate chips don’t contain milk fat. Most good quality dark chocolate chips are naturally vegan these days, but it’s always good to check your labels.
What about the coconut oil? Since it’s essential for both the base and helping the top layer set smoothly, I really don’t recommend skipping it or substituting it heavily for the chocolate layer. If you absolutely must avoid coconut, you could use a neutral vegetable shortening, but the final flavor and texture won’t be quite as clean. If you’re making these for someone who needs a lower-fat option, check out my recipe for Easy No-Bake 5 Ingredient Protein Bars—those are great for keeping things lighter!
A quick note on the raspberries: If you use fresh berries, they can release a little more juice into the chocolate, which might slightly soften the chocolate layer’s snap. That’s totally fine, it just makes it a bit softer and more delicious! If you use frozen ones, just make absolutely sure they don’t thaw before they hit that chocolate layer, or you’ll get a pink swirl instead of distinct layers.
Storage and Make-Ahead Tips for the No-Bake Raspberry Chocolate Oat Slice
This is one of the huge advantages of a great no-bake recipe—you can usually make it ahead of time! Planning desserts for a party or a busy week is so much less stressful when you know you can whip something up and forget about it until you need it. The key here is patience during the setting phase, but once it’s firm, these Chewy Chocolate Raspberry Bars are super stable.
For best results, you absolutely must let this slice chill for the full 3 hours in the refrigerator. If you try to cut it after two hours, you risk squishing the raspberry layer up into the warmish chocolate, leading to a huge mess when you pull the knife out. Trust me, I learned this the hard way when I was trying to impress someone with my speed!
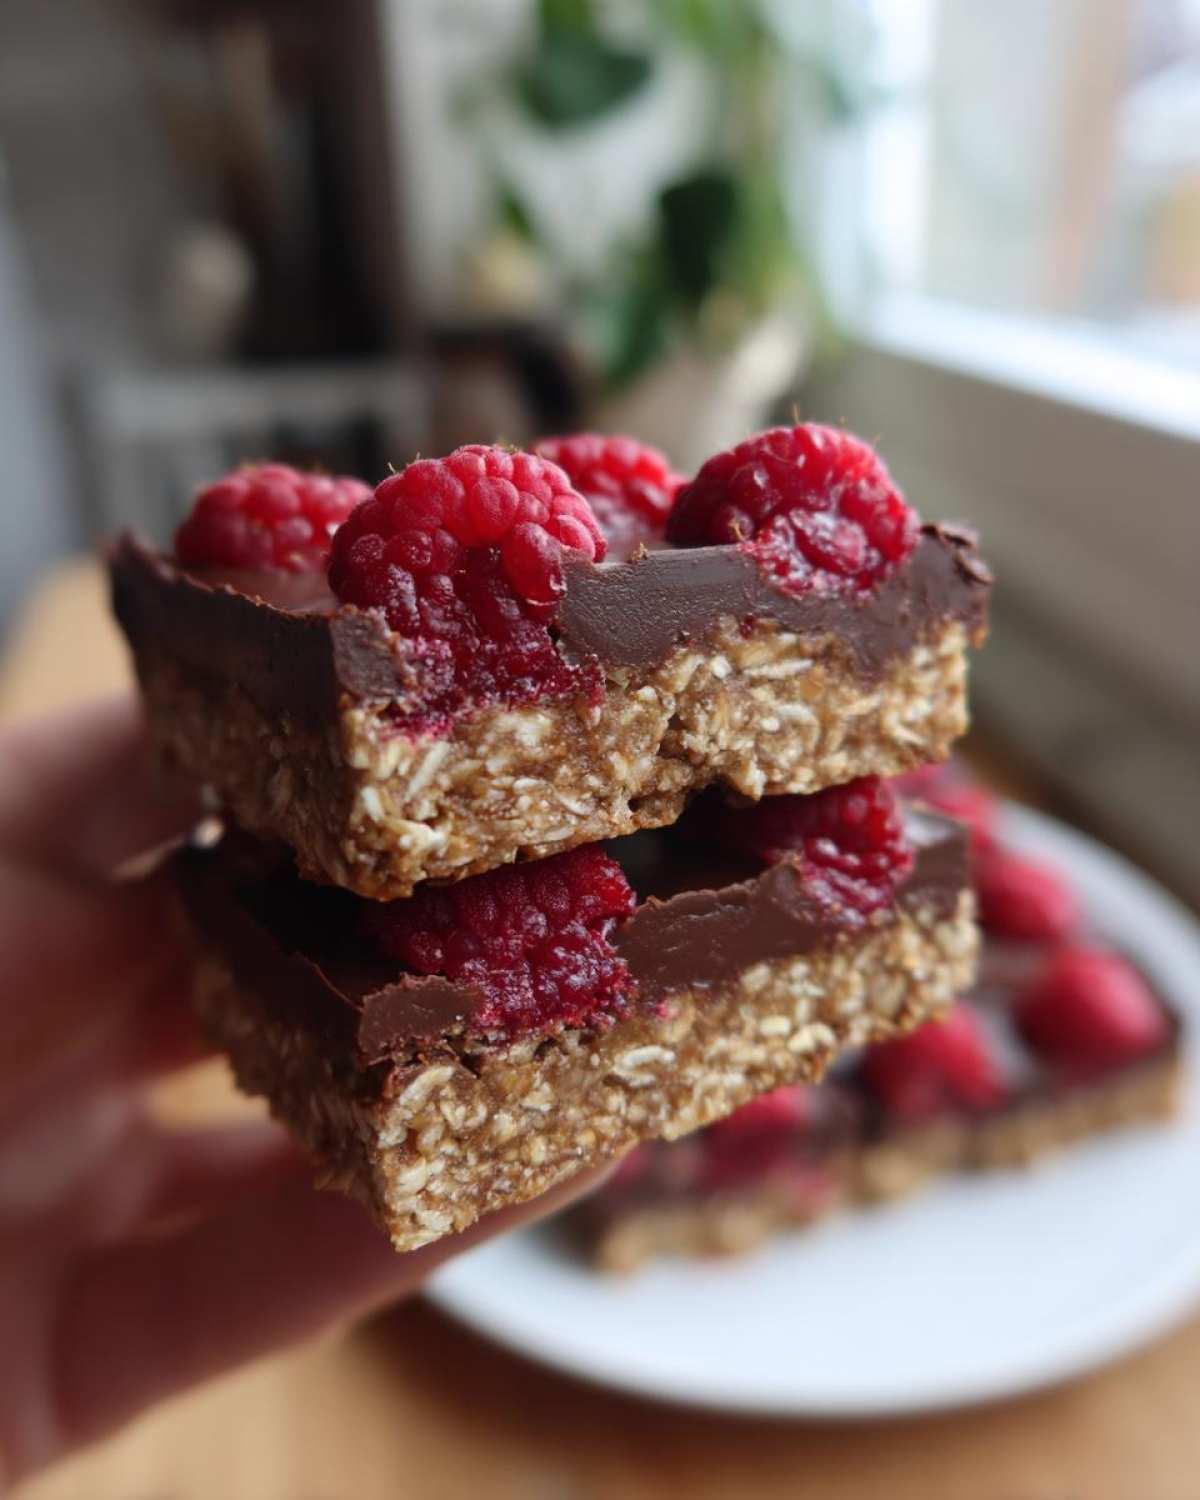
Once fully set, if you manage to not devour the entire thing immediately, storage is easy. Keep the slice tightly covered in the refrigerator. Since it relies on the cold temperature to remain firm, leaving it out on the counter for too long (like more than an hour or so) will cause the chocolate and the binding fats to soften too much. Stored correctly in the fridge, these slices stay absolutely fantastic—chewy and firm—for up to a full week!
Can you freeze them? Yes, you totally can! If you want to prep these way in advance, which is great for holiday entertaining, once the bars are cut, you can layer them between sheets of parchment paper in an airtight container. Pop that container into the freezer. They freeze beautifully because of the high fat and sugar content that keeps the oats from getting icy. I think they actually taste even better after they’ve been frozen for a week and then thawed in the fridge overnight. It just seems to firm up the base even more.
If you’re looking for other incredible make-ahead, no-fuss desserts, you have to browse my Brownie Refrigerator Cake Recipe—it’s another one that tastes better the day after you make it!
Serving Suggestions for This Simple Raspberry Dessert Idea
Since this No-Bake Raspberry Chocolate Oat Slice is so rich and flavorful on its own, you don’t need a mountain of extras to serve it up beautifully. Presentation is key, though, especially if you’re bringing these bars to a party!
My number one trick for getting clean, professional-looking squares? The knife! You absolutely must use a very sharp knife, and here’s the secret: dip the knife into hot water for about ten seconds, wipe it completely dry with a clean towel, and then make your cut. Repeat that hot-and-wipe process for every single cut you make. This melts the chocolate just enough to glide through without cracking or dragging any of the raspberry layer.
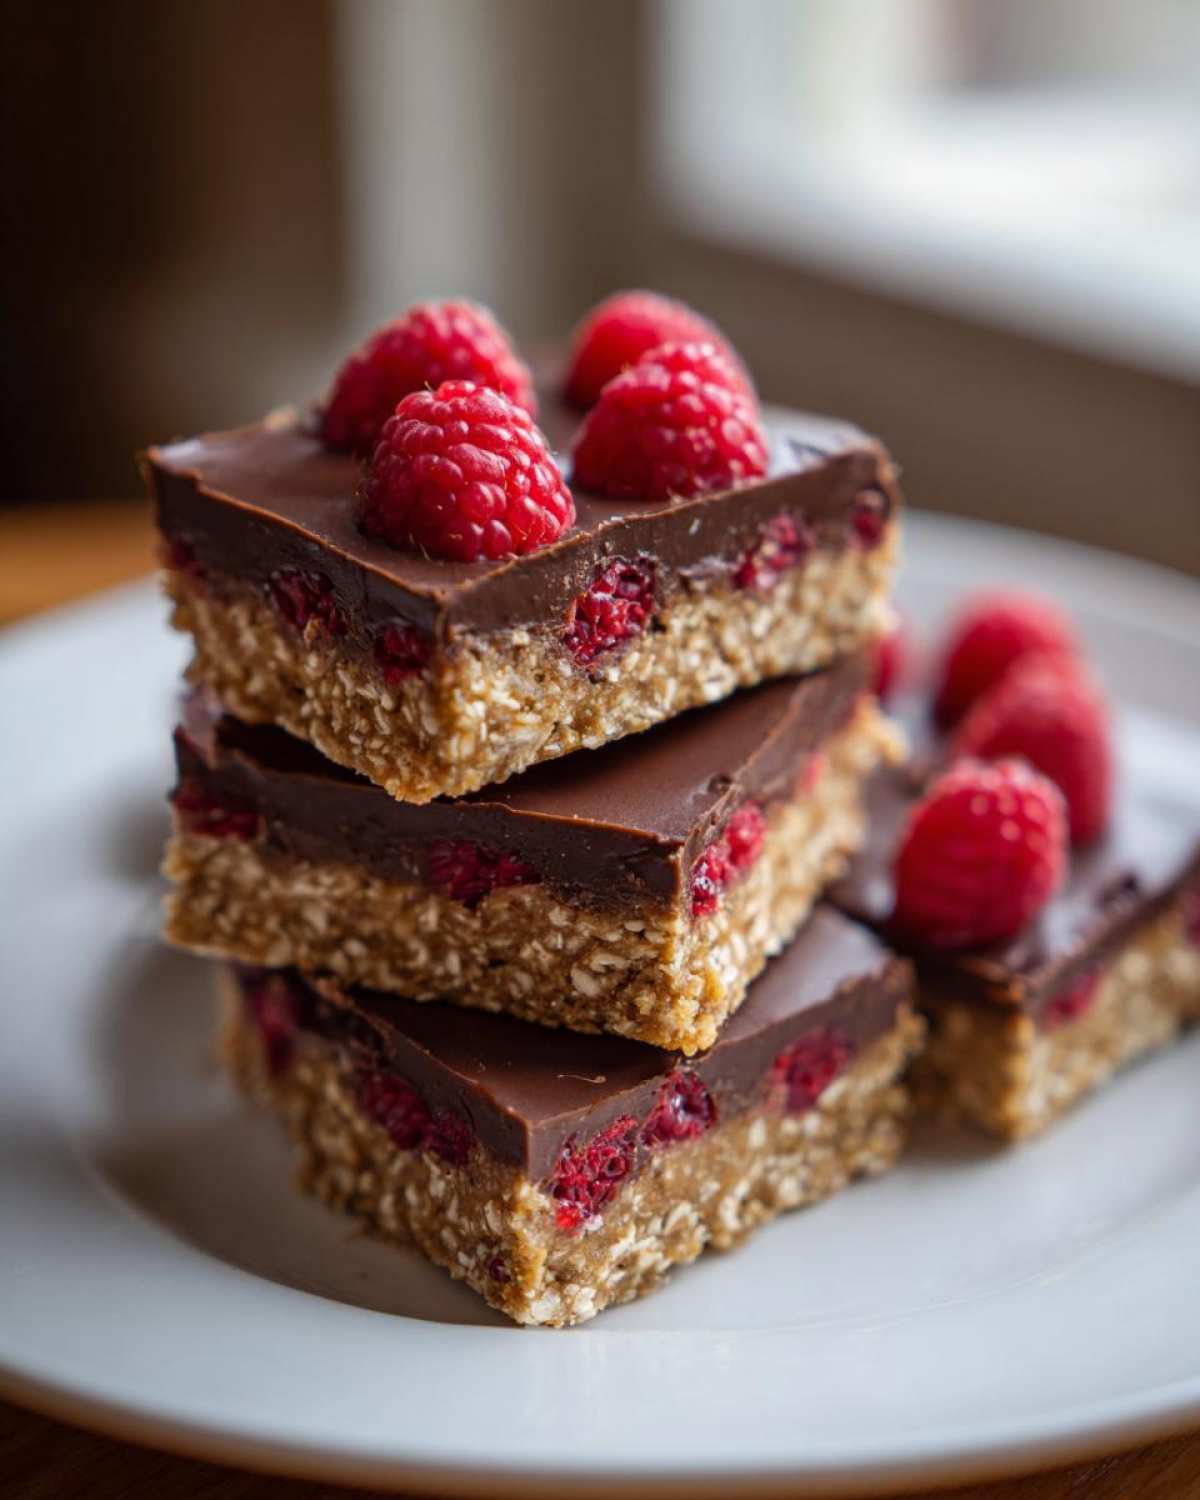
When it comes to pairings, keep it simple. These are fantastic served chilled straight from the fridge with a strong cup of black coffee, which highlights the dark chocolate notes wonderfully. If you want to dress them up, a little dollop of freshly whipped cream or a drizzle of melted white chocolate over the top just before serving adds a fantastic touch without overwhelming the tartness of the berries.
They look so pretty already, especially with those bright red raspberries peeking out on top. For a fun twist, I sometimes dust the tops lightly with powdered sugar right before serving, just for that extra visual pop. For more simple, beautiful dessert ideas that don’t need an oven, check out my guide on Simple Fruit and Chocolate Bars!
Frequently Asked Questions About the No-Bake Raspberry Chocolate Oat Slice
I know when you’re making a no-bake treat, you always have questions about how firm it will get or if you can swap out an ingredient you don’t have on hand. This slice is super forgiving, but getting the texture right is key! Here are the things people ask me most often about making these Easy Chocolate Oat Bars.
How long does the No-Bake Raspberry Chocolate Oat Slice need to chill?
This is probably the most frequent question I get! While you can technically cut the slice as soon as the chocolate layer feels firm to the touch—which might be about 90 minutes if you’re impatient—I really, really urge you to give it the full time. For the absolute best, cleanest slice, you need to chill this in the refrigerator for at least 3 hours. If you’re in a huge rush and need to serve it the same day, pop it in the freezer for about 45 minutes, but be careful not to leave it too long or it gets rock hard!
Can I use different berries instead of raspberries in this No Bake Raspberry Chocolate Dessert?
Absolutely! This is where you can get creative with your No Oven Desserts with Berries. Blueberries work beautifully, as do chopped strawberries or even dried cranberries if you want a less juicy result. The only thing you have to watch out for is moisture. If you are using fresh, softer berries like blackberries, they might release a tiny bit more juice into the chocolate layer, which can keep that layer semi-soft. If that happens, just pop it back into the fridge for an extra hour before cutting. No biggie!
I love experimenting with tart cherries if I can find them! If you are using frozen fruit, just remember my number one rule: do not thaw them first. Putting frozen fruit onto the warm chocolate helps lock everything in place immediately.
If you’re looking for another fast, chilled treat, you should check out my Easy Chocolate Chip Cookies Recipe—just kidding! That one needs the oven! But seriously, these bars are stellar.
Estimated Nutritional Breakdown for One No-Bake Raspberry Chocolate Oat Slice
Okay, let’s talk fuel! Now, before anyone gets too excited or worried, I need you to know something important. Because we’re using things like maple syrup versus honey, or what kind of nut butter is in your pantry, these numbers are just estimates based on the recipe above. Think of this as a helpful guideline, not gospel!
When I make these glorious Homemade No-Bake Energy Slices, I treat them as a treat, not an everyday snack, because they have a good hit of natural sugar and healthy fats to keep you going. But the real beauty of a no-bake recipe is that you control exactly what goes in, so you can adjust these numbers easily!
Based on my calculations for a standard 12-slice serving size, here’s what you’re looking at for just one square:
- Calories: Around 220 (Wow, pretty reasonable for something this indulgent!)
- Fat (Total): About 14 grams (Remember, a good chunk of this is coming from the coconut oil and nut butter, which are mostly good fats!)
- Carbohydrates: Roughly 23 grams
- Protein: Around 5 grams
- Sugar: About 15 grams (This is mostly natural sugar from fruit, maple syrup, and the chocolate.)
Keep in mind, if you double up on the dark chocolate or go for a higher-sugar maple syrup, those numbers will shift slightly. But honestly, when something tastes this good and sets up perfectly in the fridge, I try not to focus *too* much on the exact breakdown. Just know you’re getting oats, fruit, and chocolate bliss!
PrintNo-Bake Raspberry Chocolate Oat Slice
Make this simple, no-bake slice featuring a chewy oat base, rich chocolate layer, and tart raspberry topping. It sets quickly in the refrigerator.
- Prep Time: 15 min
- Cook Time: 0 min
- Total Time: 3 hr 15 min
- Yield: 12 servings
- Category: Dessert
- Method: Chilling
- Cuisine: American
- Diet: Vegetarian
Ingredients
- 1 1/2 cups rolled oats
- 1/2 cup unsweetened shredded coconut
- 1/2 cup smooth peanut butter or almond butter
- 1/4 cup maple syrup or honey
- 1/4 cup melted coconut oil
- 1/2 cup dark chocolate chips
- 1 tablespoon coconut oil (for chocolate layer)
- 1 cup fresh or frozen raspberries
- 1/4 cup powdered sugar (optional, for dusting)
Instructions
- Line an 8×8 inch baking pan with parchment paper, leaving an overhang for easy removal.
- In a medium bowl, combine the rolled oats and shredded coconut.
- In a separate microwave-safe bowl, combine the peanut butter, maple syrup, and 1/4 cup melted coconut oil. Microwave for 30 seconds, stir until smooth, then pour over the oat mixture.
- Mix well until all dry ingredients are evenly coated. Press this mixture firmly and evenly into the bottom of the prepared pan.
- Place the pan in the freezer while you prepare the chocolate topping.
- In a small bowl, combine the dark chocolate chips and 1 tablespoon of coconut oil. Melt slowly over a double boiler or in the microwave in 20-second intervals, stirring until smooth.
- Pour the melted chocolate evenly over the oat base.
- Arrange the raspberries over the chocolate layer. Gently press them down slightly so they adhere.
- Return the pan to the refrigerator and chill for at least 3 hours, or until the chocolate is completely firm.
- Use the parchment paper overhang to lift the slice from the pan. Cut into squares or bars before serving.
Notes
- For a firmer slice, use quick oats instead of rolled oats in the base.
- If using frozen raspberries, do not thaw them before placing them on the chocolate layer.
- Store leftovers covered in the refrigerator for up to one week.
Nutrition
- Serving Size: 1 slice
- Calories: 220
- Sugar: 15
- Sodium: 35
- Fat: 14
- Saturated Fat: 6
- Unsaturated Fat: 8
- Trans Fat: 0
- Carbohydrates: 23
- Fiber: 3
- Protein: 5
- Cholesterol: 0