

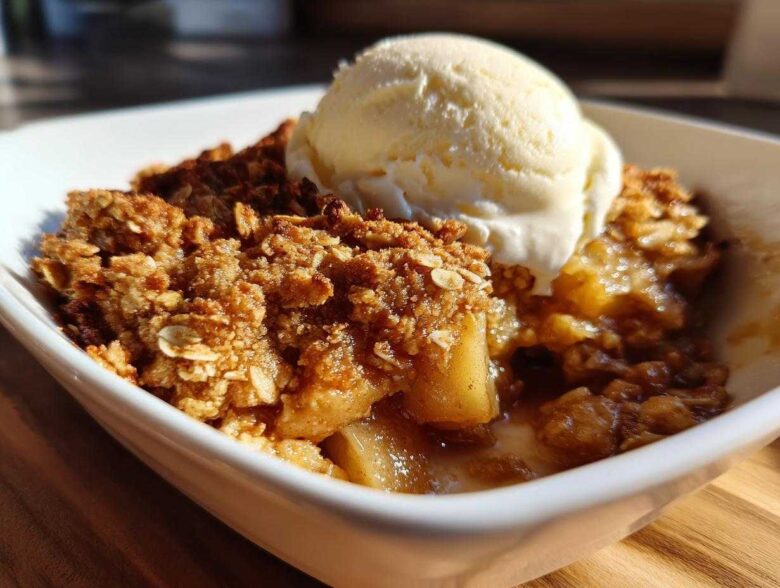
When the air finally gets that crisp autumn chill, there’s only one thing I crave: that warm, buttery scoop of pure comfort. Forget finicky pies; my go-to is always this apple crisp recipe. Seriously, this is the absolute best classic apple crisp recipe you will ever make. I’ve tweaked this a million times over the years so that the apples get perfectly tender and the topping stays impossibly crunchy, even when I hide the leftovers. It’s foolproof, which makes it my emergency baking solution when unexpected guests pop over. It smells like happiness is baking in the oven!
Why This Apple Crisp Recipe Delivers Ultimate Comfort
What makes this recipe stand head and shoulders above the rest? It’s all about getting two things right every single time: the filling and the topping. I don’t mess around when it comes to texture, and this formula never lets me down. I think you’ll love how reliable this one is!
Sweet and Tender Apples
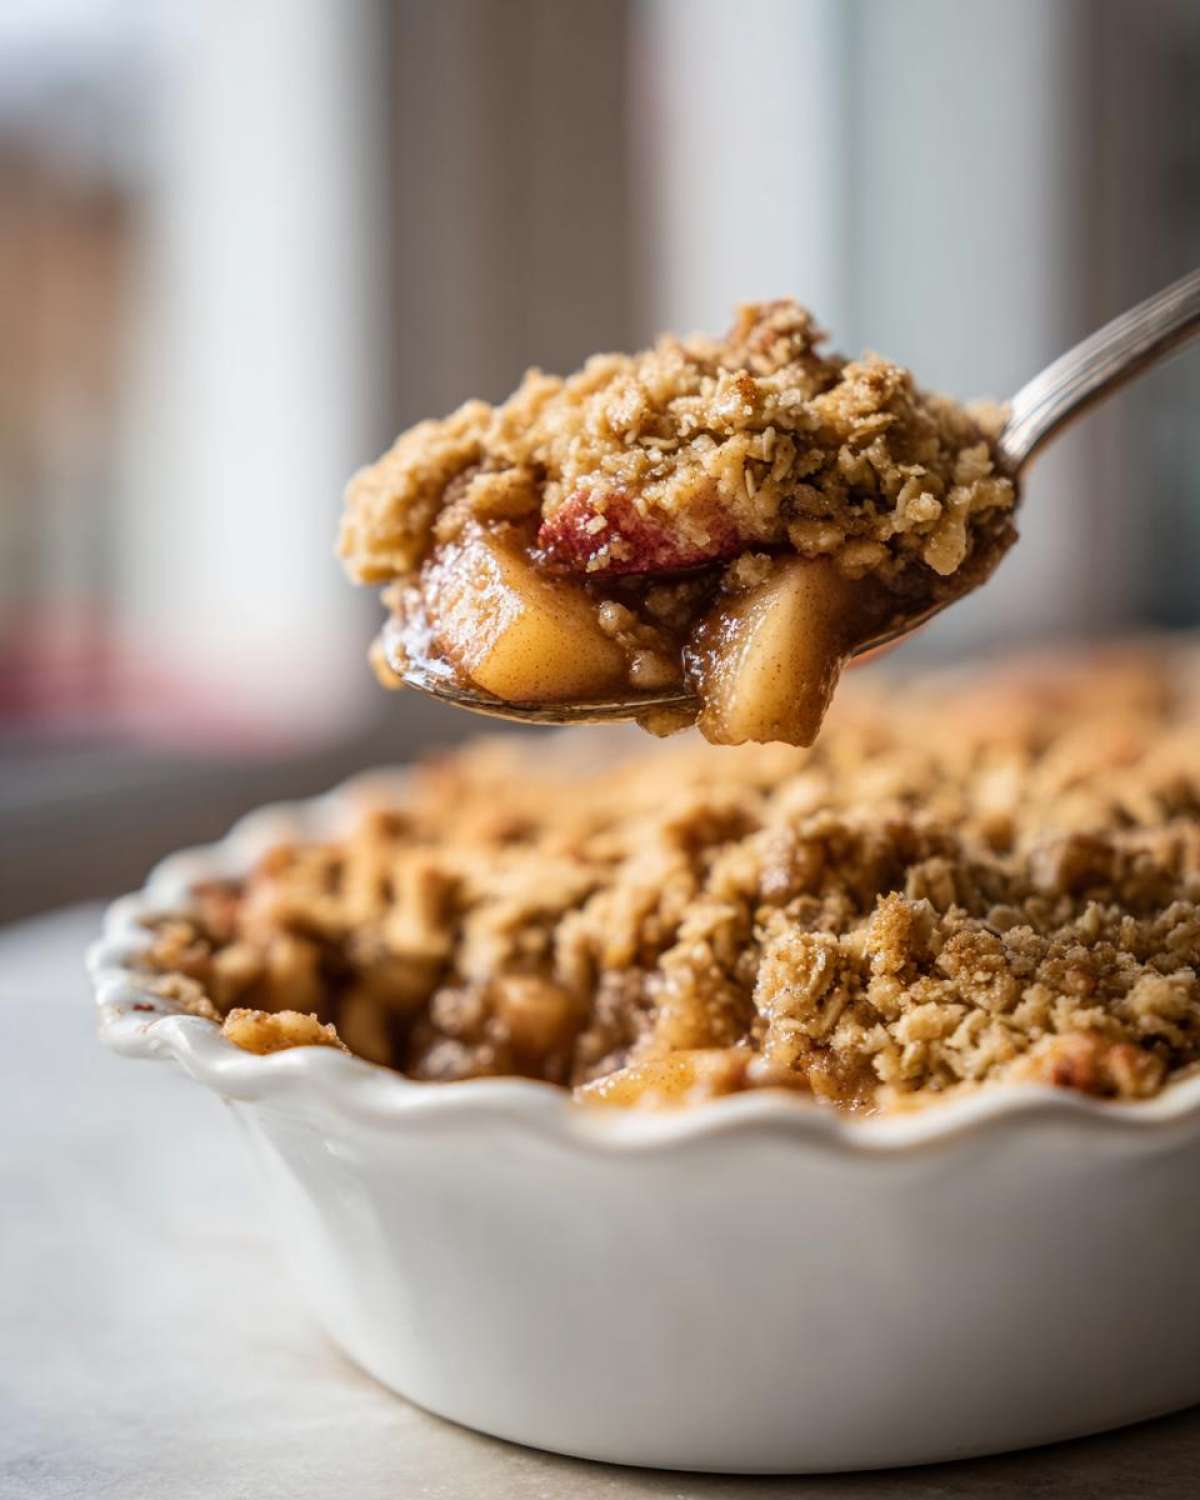
Forget mushy, watery apples; we want tender fruit that still has a little bite! We use a mix of apples—usually Granny Smith for that essential tart kick, balanced with something sweeter. The tiny bit of flour in the filling just helps that spiced syrup thicken up beautifully, holding everything together perfectly.
Buttery Crisp Topping Recipe Perfection
This is where the real magic happens. The secret to that ultimate crunch in the oat topping recipe is one very simple rule: use really cold, cubed butter. It melts slowly while baking, creating those glorious, crunchy pockets we all fight over. The rolled oats are non-negotiable—they give it that rustic, homemade feel.
Gathering Ingredients for Your Apple Crisp Recipe
Okay, let’s pull out our mixing bowls! Even though this is an incredibly easy apple crisp, getting your ingredients prepped first makes assembling it so quick—like, five minutes flat. Every component plays a huge role in delivering that perfect fall dessert flavor we’re aiming for. I’ve written everything down exactly how I measure it because precision matters, especially when it comes to achieving that perfect topping layer!
For the Sweet Apple Filling
You’ll need enough apples to fill your dish nicely—I usually aim for about six medium ones. I always try to grab a mix of tart and sweet, like Granny Smith alongside Honeycrisp, so the flavor isn’t one-note. Remember, they all need to be peeled, cored, and sliced evenly before they meet the spices.
- 6 medium apples (like Granny Smith or Honeycrisp), peeled, cored, and sliced
- 1/4 cup granulated sugar
- 1 tablespoon all-purpose flour
- 1 teaspoon ground cinnamon
- 1 tablespoon lemon juice
For the Buttery Crisp Topping
This is the rustic part! Make sure your rolled oats are the standard kind—none of that instant stuff, trust me. The most important part here is the butter: it has to be cold and cut into small cubes. Don’t even think about softening it! That cold butter is what guarantees you get those amazing crunchy bits.
- 1 cup all-purpose flour
- 1 cup rolled oats (not instant)
- 3/4 cup packed light brown sugar
- 1/2 teaspoon ground cinnamon
- 1/4 teaspoon salt
- 1/2 cup (1 stick) cold unsalted butter, cut into small cubes
Step-by-Step Instructions for the Best Apple Crisp Recipe
Listen, even if you think baking is scary, I promise this recipe is your friend. It’s just two simple batches to mix, and you’ll have that amazing Homemade Apple Crisp Dessert ready to go in under an hour total. Follow these steps exactly, and you’ll have a showstopper!
Preparing the Apples and Oven
First things first, let’s get that oven cranked up to 375 degrees Fahrenheit (that’s 190 Celsius). While it heats up, lightly grease that 8×8 dish—you don’t want any sticking later! Now, grab those tossed apples. Make sure they are completely coated in the sugar, cinnamon, and that little bit of flour. The lemon juice isn’t just for flavor; it keeps those sliced apples looking bright and fresh while they wait for the topping.
Creating the Buttery Crisp Topping
Take your dry topping ingredients—flour, oats, brown sugar, salt, and cinnamon—and give them a quick whisk just to combine everything evenly. Now for the butter! Drop those cold cubes straight in. You *must* work quickly here, either with a pastry blender or just your fingertips. We are aiming for coarse crumbs, and I mean it—stop as soon as you see those pea-sized chunks of butter. Keeping that butter cold is the secret weapon for a super crunchy layer!
Baking Your Homemade Apple Crisp Dessert
Gently sprinkle that crumbly topping right over the apples—don’t press it down, just let it rest gently on top. Pop that dish into the hot oven. It usually takes between 35 and 45 minutes. You’ll know it’s done when the topping looks deep golden brown and you can see the filling underneath bubbling enthusiastically. That bubbly filling tells you the fruit underneath is perfectly soft and ready!
Pro Apple Crisp Tips for Success
Even though this is a super simple apple crisp recipe, a couple of quick tips can take it from good to absolutely unforgettable. I always use a mixture of apples—Granny Smith for zip and Honeycrisp for sweetness. That tart/sweet balance is key to preventing the whole dessert from tasting flat!
Also, always keep an eye on that lovely oat topping. If you notice it getting too dark before the apples are fully soft—which can happen if your oven runs hot—just grab a piece of aluminum foil and loosely drape it over the dish for the last 10 minutes. That protects the crunch while the fruit finishes cooking underneath. Trust me, these little checks ensure you get that perfect texture every single time.
Serving Suggestions for Your Apple Crisp with Ice Cream
The wait is the hardest part, but seriously, you have to serve this warm! As soon as it cools just a touch—maybe ten minutes out of the oven—it’s prime time. That buttery crisp topping needs that contrast to really sing. My absolute favorite way to enjoy this is smothered with a big, frosty scoop of vanilla ice cream. The cold meeting the hot apples is just heavenly!
If vanilla isn’t your speed, this apple crisp with ice cream is fantastic with a drizzle of warmed caramel sauce, too. Honestly, any way you serve it, just make sure you have a spoon ready for that piping hot, spiced fruit!
Storage and Reheating Instructions for Leftover Apple Crisp
Even the absolute best apple crisp rarely lasts long in my house, but when it does, we need a plan! You can simply cover the baking dish tightly with plastic wrap or foil and leave it on the counter for a few hours if you plan to finish it the same day. For anything longer, straight into the fridge it goes.
Reheating is where you need a little strategy to save that topping! If you use the microwave, the topping gets soft fast, so I only go that route if I’m in a massive hurry. The oven is way better. Pop a serving (or the whole thing!) back into a 350-degree oven for about ten minutes. That quick blast of heat revives the crumbly texture perfectly. It tastes *almost* as good as when it first came out!
Variations on the Classic Apple Crisp Recipe
While my core apple crisp recipe is exactly how I think it should be—pure, simple comfort—I totally get that sometimes you want to switch things up! Don’t feel like you have to stick to the script 100% of the time. A few tiny additions can totally transform the flavor profile without messing up that critical balance between the tender baked apples and the crunchy oat topping.
For instance, if you want to add a little savory depth to that buttery crumble, toss in about a half-cup of chopped pecans or walnuts right along with the oats and flour. Toasting them first makes them extra fantastic, but tossing them in cold works just fine too! That little nutty crunch goes amazing with the brown sugar.
Spice modifications are super easy, too. If you’re feeling that deep fall flavor, swap out the extra half-teaspoon of cinnamon for half-cinnamon and half-nutmeg. Wow, the smell is incredible! Or, if you’re feeling adventurous, try adding a pinch of ground cardamom. It brings a bright, almost citrusy note that pairs surprisingly well with the sweet apples. You can find some neat ideas for other spiced drinks right here, which might inspire your next crisp tweak!
Lastly, you can always change up the fruit, though I’ll always come back to apples! If you have some pears lying around, use half apples and half firm pears. Just be aware the pears might soften up a little faster, so keep an eye on them!
Frequently Asked Questions About This Apple Crisp Recipe
Whenever I share this recipe, people always have great questions about substitutions, and I totally get it! We all bake with what we have on hand, right? I’ve tried to gather the most common things folks ask about when making an Old Fashioned Apple Crisp or wanting a Quick Apple Dessert.
Can I make this Easy Apple Crisp ahead of time?
Yes, you absolutely can! If you want to prep this as an Autumn Apple Dessert for later, I suggest assembling everything—the spiced apples in the bottom, the topping scattered over—but keep it covered tightly in the fridge for up to 24 hours. When you’re ready to bake, just add about 5 to 10 minutes extra to the baking time since it’s going into the oven cold. I wouldn’t leave it assembled for much longer than that, though, or the topping starts soaking up moisture from the apples.
What is the best flour substitute for the Oat Topping Recipe?
If you need to swap out the wheat flour for a gluten-free version, go for it! For the Oat Topping Recipe, you can substitute the all-purpose flour with a good quality 1-to-1 gluten-free flour blend. Since oats are naturally gluten-free, this swap usually works beautifully. Just make sure your oats are certified GF if you have a serious sensitivity! The texture should remain very similar, giving you that wonderfully Buttery Crisp Topping whether you use wheat or GF flour.
Another quick thought: If you’re desperate and don’t have any extra flour but have some almond meal or even quick oats, you can use those in a pinch to bulk up the topping, though it might bake up a touch denser. But honestly, the standard GF blend is the way to go!
Nutritional Snapshot for This Comfort Food Baking Treat
I love that you’re asking about the nutrition, but honestly, when I’m making my favorite apple crisp recipe, I’m usually too busy thinking about what scoop of ice cream I’m going to use to worry about counts! However, for those of you who like to keep track, I managed to pull together the estimated numbers based on my standard ingredients.
Keep in mind these numbers are just a guideline, really! If you use way more brown sugar in your crumb, or if you choose a super fatty apple, those figures are going to shift. This is just a general idea for one generous serving of this delicious Classic Apple Dessert.
- Serving Size: 1 serving
- Calories: 350
- Sugar: 30g
- Sodium: 150mg
- Fat: 18g
- Saturated Fat: 11g
- Carbohydrates: 48g
- Protein: 4g
See? Pretty reasonable for a decadent, homemade treat! Just promise me you won’t skip the ice cream if you’re feeling indulgent—it’s worth those extra calories, I swear!
PrintThe Best Classic Apple Crisp Recipe
Follow these steps to make a simple, comforting apple crisp with tender, spiced apples and a buttery, crunchy oat topping. This dessert is perfect served warm.
- Prep Time: 15 min
- Cook Time: 40 min
- Total Time: 55 min
- Yield: 6 servings
- Category: Dessert
- Method: Baking
- Cuisine: American
- Diet: Vegetarian
Ingredients
- 6 medium apples (like Granny Smith or Honeycrisp), peeled, cored, and sliced
- 1/4 cup granulated sugar (for apples)
- 1 tablespoon all-purpose flour (for apples)
- 1 teaspoon ground cinnamon (for apples)
- 1 tablespoon lemon juice
- 1 cup all-purpose flour (for topping)
- 1 cup rolled oats (not instant)
- 3/4 cup packed light brown sugar (for topping)
- 1/2 teaspoon ground cinnamon (for topping)
- 1/4 teaspoon salt
- 1/2 cup (1 stick) cold unsalted butter, cut into small cubes
Instructions
- Preheat your oven to 375 degrees Fahrenheit (190 degrees Celsius). Lightly grease an 8×8 inch baking dish.
- In a large bowl, combine the sliced apples, 1/4 cup granulated sugar, 1 tablespoon flour, 1 teaspoon cinnamon, and lemon juice. Toss gently to coat the apples evenly.
- Pour the apple mixture into the prepared baking dish and spread it into an even layer.
- In a separate medium bowl, whisk together the 1 cup flour, rolled oats, brown sugar, 1/2 teaspoon cinnamon, and salt for the topping.
- Cut the cold butter cubes into the dry topping mixture using a pastry blender or your fingertips. Work quickly until the mixture resembles coarse crumbs with some pea-sized pieces of butter remaining. Do not overmix.
- Sprinkle the oat topping evenly over the apples in the baking dish.
- Bake for 35 to 45 minutes, or until the topping is golden brown and the apple filling is bubbly and tender when pierced with a fork.
- Remove from the oven and let it cool for at least 10 minutes before serving.
Notes
- For the best texture, use a mix of tart and sweet apples.
- Serve this dessert warm, topped with a scoop of vanilla ice cream or a drizzle of caramel sauce.
- If the topping browns too quickly, loosely cover the dish with aluminum foil for the last 10 minutes of baking.
Nutrition
- Serving Size: 1 serving
- Calories: 350
- Sugar: 30
- Sodium: 150
- Fat: 18
- Saturated Fat: 11
- Unsaturated Fat: 7
- Trans Fat: 0
- Carbohydrates: 48
- Fiber: 4
- Protein: 4
- Cholesterol: 45