

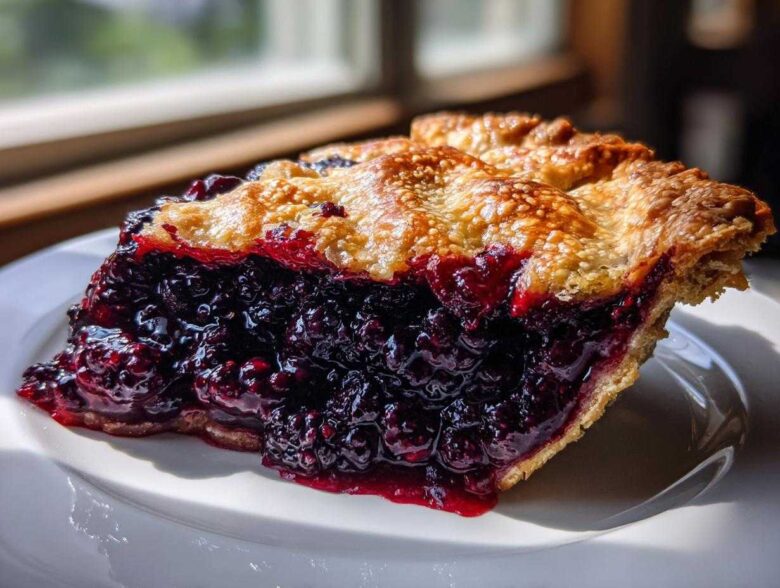
Oh, listen, nothing screams summer magic quite like biting into a slice of perfectly baked fruit pie. And truly, if you’re going to commit to baking, you have to go all the way—which means this Best Homemade Blackberry Pie with a Flaky Lattice Crust is the main event! Forget those sloppy, runny supermarket versions; my recipe guarantees that gorgeous, sweet-tart filling that just oozes out when you cut a wedge.
This specific recipe has been my absolute go-to since I first tried my neighbor’s version years ago. It’s the reason I always bring a dessert to the neighborhood potlucks, because honestly, the smell of that buttery crust baking is unbeatable. It just tastes like sunshine and freedom, you know?
Why This is the Best Homemade Blackberry Pie Recipe
If you’re going to bother making a pie, you want it to be the best, right? This blackberry pie hits all the high notes every single time. It’s incredibly reliable once you nail the chilling times. When I bring this out, people always ask for the recipe because it just screams “classic summer dessert.”
- That gorgeous, buttery, flaky crust that shatters perfectly.
- A filling that is completely juicy but never runny—thanks to one secret ingredient!
- The perfect balance of sweet sugar against the natural tartness of the berries.
Achieving the Perfect Flaky Pie Crust Secrets
The crust is honestly where the magic starts for this amazing buttery pie crust recipe. You absolutely cannot cheat on keeping that butter freezing cold. If your butter melts even a little bit while you’re mixing, you lose the layers. Those little chunks of cold butter turn to steam in the oven, creating those pockets of air that make it flaky! Handle the dough as little as humanly possible and chill it often.
Creating a Juicy Berry Filling Recipes
Nobody wants soup sneaking out of their pie when they cut a slice, trust me. That’s why we use cornstarch, and we use it generously! It keeps the juices from the blackberries nice and thick, giving you that perfect, set filling texture. That thickening power locks in the sweet-tart flavor profile, making sure every bite has that beautiful fruity pop without making a sticky mess on your plate.
Ingredients for Your Classic Blackberry Pie
Okay, let’s get down to business! To make this *best* blackberry pie, you need to make sure your ingredients are ready to go. The cold rule definitely applies to the butter and water for the crust, so have those waiting right beside your mixing bowl. Don’t skip the lemon juice—it really wakes up those blackberries!
- 2 1/2 cups all-purpose flour
- 1 teaspoon salt
- 1 cup (2 sticks) cold unsalted butter, cut into cubes
- 1/2 cup ice water, plus more if needed
- 6 cups fresh or frozen blackberries (do not thaw if frozen!)
- 1 1/2 cups granulated sugar
- 1/4 cup cornstarch
- 1 tablespoon lemon juice
- 1/2 teaspoon ground cinnamon
- 1 large egg, beaten with 1 teaspoon water (for egg wash)
How to Prepare the Best Blackberry Pie From Scratch
Alright, pulling together this amazing blackberry pie is surprisingly straightforward, but timing is everything. We need to work quickly with the cold stuff and then give the hot stuff plenty of time to rest afterward. Don’t rush the chilling, and definitely don’t rush the cooling—that’s my biggest piece of advice for a perfect, juicy berry dessert!
Making the Flaky Pie Crust
First things first, get that crust ready! Whisk your flour and salt together, then cut in the ice-cold butter. You are looking for pieces that are about the size of little peas—seriously, don’t overwork it past that stage! Slowly drizzle in that ice water until the dough barely holds together. Divide it into two disks, wrap them tight, and stick them in the fridge for at least one hour. That chill time is mandatory!
Mixing the Juicy Blackberry Filling Recipes
While your dough is getting cold, we mix the filling. Don’t get aggressive here; we want whole berries! Gently toss your blackberries with the sugar, cornstarch, lemon juice, and cinnamon. The cornstarch is our insurance policy against runniness later, so make sure it gets evenly distributed among the fruit. Just coat them lightly and set that bowl aside.
Assembling Your Blackberry Lattice Top Pie
Now for the fun part! Roll out one disk into your 12-inch circle and ease it into your pie plate. Spoon in all the beautiful blackberry filling. Next, roll out your second disk or cut beautiful strips for the blackberry lattice top pie. If you’re doing a lattice, weave those strips gently—remember to lift every other strip when placing the cross strips so they interlock beautifully. Crimp the edges tight and brush the whole thing generously with your egg wash. That wash makes the crust truly glow!
Baking and Setting the Blackberry Pie
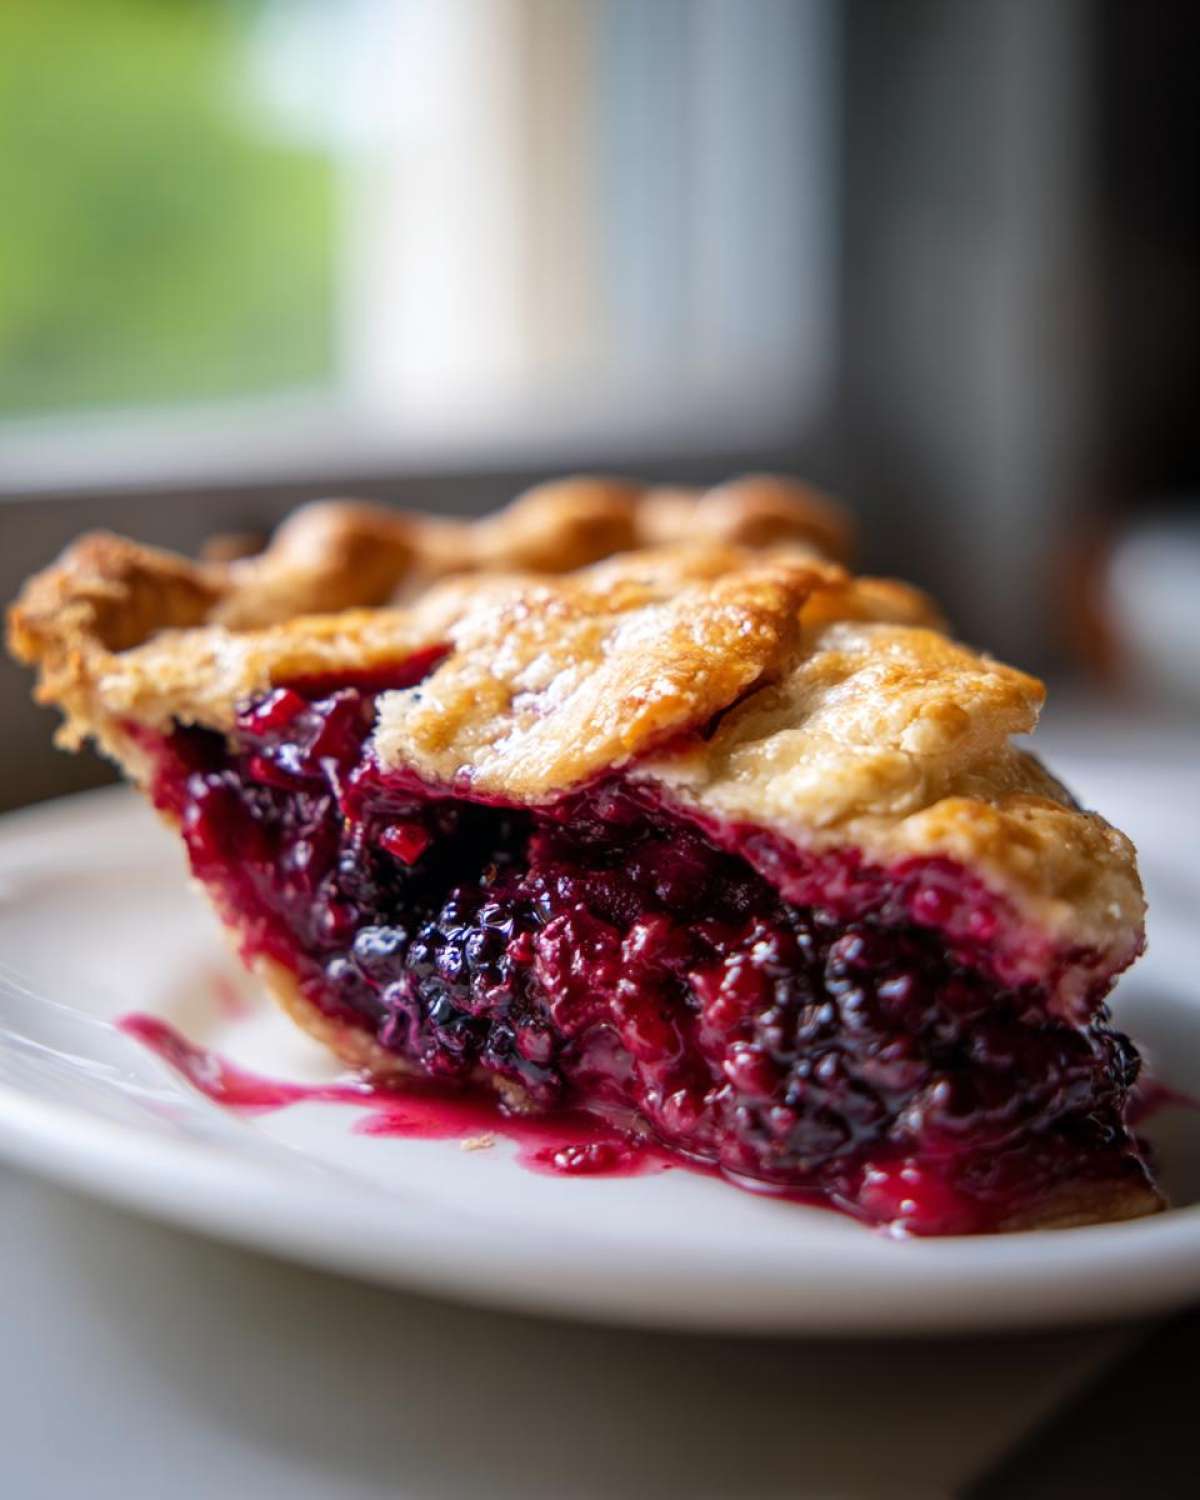
We start hot to set that flaky bottom! Preheat the oven to 425°F and bake the pie for 15 minutes. Then, drop the temperature down to 375°F and let it bake for another 40 to 50 minutes until the filling is thick and bubbling like lava—you want to hear that bubble! The single most important step for this stunning blackberry pie is cooling it completely. I mean it, 3 to 4 hours on a wire rack. If you cut it hot, all that glorious juice leaks out. Patience rewards you!
Tips for Success with Your Blackberry Pie
I’ve learned a few tricks over the years making this blackberry pie so that it turns out flawless instead of frustrating. The biggest mistake beginners make? Not letting the pie cool long enough! If you slice into that hot pie, the cornstarch hasn’t had time to fully gel, and you’ll end up with a puddle instead of a gorgeous, set filling. Wait the full four hours!
Also, remember that little secret about the sugar I mentioned in the ingredients note? If you want a deeper, almost molasses note—which goes stunningly with the berries—try swapping out about a quarter cup of that white sugar for packed light brown sugar. It adds a delicious complexity!
And here’s a quick tip for baking days when you’re worried about the crust edges burning before the center is done: keep a small ring of aluminum foil handy. Cut a slit in it and place it loosely over the edges once they start looking perfectly golden brown, usually halfway through the second baking phase. This lets baking continue without scorching your beautiful crust!
Make Ahead Pie Filling Guides for Your Blackberry Pie
Summer parties can get crazy busy, and honestly, who wants to deal with sticky berries right before the guests arrive? That’s why I love making a big batch of this blackberry pie filling ahead of time. It’s super easy to assemble the fruit and thickeners a day or two early. I just mix the berries, sugar, cornstarch, and spices together gently—don’t crush them!
Once it’s mixed, I put it right into an airtight container and store it in the fridge. It lasts perfectly fine for about three days before I use it. When you’re ready to bake your blackberry pie, you just pour that chilled filling right into your unbaked, chilled bottom crust. It saves so much time on pie day!
Serving Suggestions for this Old Fashioned Blackberry Dessert
You’ve worked hard on this incredible old fashioned blackberry dessert, so let’s serve it up right! Honestly, the classic pairing is non-negotiable: a huge, slightly melting scoop of good vanilla bean ice cream on the side. If you’re feeling fancy, skip the ice cream and go for a dollop of fresh, homemade whipped cream with just a tiny hint of vanilla extract.
When the weather starts to cool down a bit (or if you just prefer a warm drink), this pie is spectacular alongside a strong, hot latte or a freshly brewed coffee. The slight bitterness really cuts through the sweetness of the filling beautifully. That warm aroma rising off the slice? Perfection!
Storage and Reheating Instructions for Blackberry Pie
So, you’ve got leftover blackberry pie—lucky you! Because this is such a juicy fruit pie, you really shouldn’t leave it on the counter uncovered, especially if it’s warm out. I let mine cool completely, and then I cover the whole thing loosely with foil (or plastic wrap if necessary) and stash it in the fridge. It keeps beautifully for about three days.
If you’re keen to eat a slice next day, don’t just microwave it—you’ll ruin that flaky bottom crust instantly! Instead, wrap your single slice snugly in foil and pop it in a toaster oven or a regular oven set low, like 300°F, for about 10 minutes. That warms the fruit through while keeping the crust nicely crisp underneath. Trust me on this!
Frequently Asked Questions About Blackberry Pie
I get so many questions about my blackberry pie, especially when folks are new to baking fruit desserts. It’s totally normal to wonder about substitutions or techniques! Here are the three questions I get asked the most about making this classic dessert.
Can I use frozen blackberries in this blackberry pie recipe?
Oh, absolutely you can! We definitely use fresh in the summer, but honestly, frozen ones are perfectly fine for that sweet-tart flavor any time of year. The key thing is this: whatever you do, don’t thaw them first! If you thaw them, you release all that liquid and you’ll definitely get a runny mess. Keep them frozen solid, pour them right in, and just expect to add maybe 5 to 10 extra minutes to that second phase of baking time.
What is the secret to a truly flaky pie crust?
Are you ready for the golden rule? It’s temperature, temperature, temperature! The secret to that amazing, shattering, flaky texture is making sure everything going into the dough is ice cold—the butter, the water, everything. Even chill your flour for 15 minutes if your kitchen is warm! Remember those little pea-sized chunks of butter? They have to stay solid until they hit the heat, which is why minimal handling is so important for the flaky pie crust secrets. It’s what makes this pie stand out!
How do I prevent my fruit pie from being too runny?
This is the big one that plagues so many bakers! You’ve got two main defenses here. First, make sure you measure your cornstarch exactly as written. It’s the chemical magic that thickens up all those lovely blackberry juices while baking. Second, and this is crucial, you have to let the blackberry pie cool down completely! Seriously, 3 to 4 hours resting on the counter. That cooling time is when the thickener sets up properly. If you rush it, it’s going to ooze everywhere, no matter how much cornstarch you use. Have faith in the waiting game!
Estimated Nutritional Information for Blackberry Pie
So, I know we aren’t baking this classic blackberry pie for health food reasons, but it’s always good to have a general idea, right? These numbers are just an estimate for one slice based on the ingredients listed above. Please remember these values can shift around depending on exactly how much butter finds its way into the crust!
- Serving Size: 1 slice
- Calories: 450
- Sugar: 35g
- Fat: 25g (15g Saturated)
- Carbohydrates: 58g
- Protein: 5g
Consider this helpful info for planning your day, but mostly, just enjoy that perfect, buttery slice!
Share Your Perfect Summer Baking Experience
Whew! If you made it through this guide, you’re ready to bake the *best* blackberry pie! When you finally pull that golden, bubbling masterpiece out of the oven—please, please tell me about it!
Did you manage to wait the full four hours for it to set? Are you team lattice or team solid top? Drop a comment down below! I absolutely love seeing your creations, and it helps other readers know they aren’t crazy for loving this classic combination just as much as I do. Seriously, hearing how your blackberry pie turned out makes my whole week!
PrintThe Best Homemade Blackberry Pie with Flaky Crust
A classic recipe for a juicy, sweet-tart blackberry pie featuring a buttery, flaky homemade crust, perfect for summer gatherings or holidays.
- Prep Time: 45 min
- Cook Time: 65 min
- Total Time: 110 min
- Yield: 8 servings
- Category: Dessert
- Method: Baking
- Cuisine: American
- Diet: Vegetarian
Ingredients
- 2 1/2 cups all-purpose flour
- 1 teaspoon salt
- 1 cup (2 sticks) cold unsalted butter, cut into cubes
- 1/2 cup ice water, plus more if needed
- 6 cups fresh or frozen blackberries (do not thaw if frozen)
- 1 1/2 cups granulated sugar
- 1/4 cup cornstarch
- 1 tablespoon lemon juice
- 1/2 teaspoon ground cinnamon
- 1 large egg, beaten with 1 teaspoon water (for egg wash)
Instructions
- Prepare the crust: In a large bowl, whisk together the flour and salt. Cut in the cold butter using a pastry blender or your fingers until the mixture resembles coarse crumbs with pea-sized pieces of butter remaining.
- Gradually add the ice water, one tablespoon at a time, mixing until the dough just comes together. Do not overmix. Divide the dough in half, flatten each half into a disk, wrap in plastic, and chill for at least 1 hour.
- Prepare the filling: In a separate bowl, gently combine the blackberries, sugar, cornstarch, lemon juice, and cinnamon. Set aside while you roll out the dough.
- Preheat your oven to 425 degrees Fahrenheit (220 degrees Celsius).
- Roll out one disk of dough on a lightly floured surface into a 12-inch circle. Carefully transfer the dough to a 9-inch pie plate. Trim the edges, leaving a 1-inch overhang.
- Pour the blackberry filling into the pie shell.
- Roll out the second disk of dough. Cut into strips for a lattice top, or roll out whole for a solid top. If using a solid top, cut several vents in the top crust.
- Place the top crust over the filling. Crimp the edges of the top and bottom crusts together to seal. Brush the top crust lightly with the egg wash.
- Place the pie on a baking sheet to catch any drips. Bake for 15 minutes at 425 degrees Fahrenheit.
- Reduce the oven temperature to 375 degrees Fahrenheit (190 degrees Celsius). Continue baking for 40 to 50 minutes, or until the crust is golden brown and the filling is bubbling thickly. If the edges brown too quickly, cover them loosely with foil.
- Cool the pie completely on a wire rack for at least 3 to 4 hours before slicing. This allows the filling to set properly.
Notes
- For a richer flavor, substitute 1/4 cup of the granulated sugar with packed light brown sugar.
- If you use frozen berries, do not thaw them first, but you may need to add 5 to 10 minutes to the total baking time.
- To make the crust extra flaky, use only ice-cold water and handle the dough as little as possible.
Nutrition
- Serving Size: 1 slice
- Calories: 450
- Sugar: 35
- Sodium: 210
- Fat: 25
- Saturated Fat: 15
- Unsaturated Fat: 10
- Trans Fat: 0
- Carbohydrates: 58
- Fiber: 4
- Protein: 5
- Cholesterol: 60