

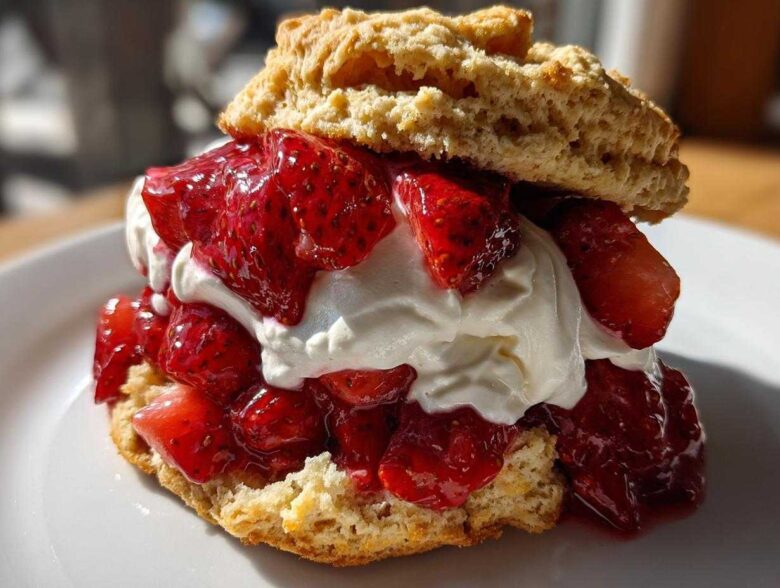
Oh, summer when it finally hits! You know what I crave every single year? Something unbelievably fresh, piled high with sweet berries, and eaten outside where the juice drips down your hand. Forget those heavy, dry cake versions you sometimes see. For me, if it’s not the Classic Shortcake Recipe, I’m not interested! We are making real, honest-to-goodness shortcake today, and that means tender, flaky biscuits that practically melt in your mouth. If you’re looking for a truly fantastic biscuit—one that pairs perfectly with those sweet macerated strawberries—you might also want to check out how I make my spiced chai tea scones, they have a similar structure! Trust me, spending ten minutes working with cold butter is worth every second when you bite into that light, fluffy base. This recipe is my secret weapon for the best Summer Berry Desserts, hands down!
Why This Biscuit Shortcake Recipe is the Best Summer Berry Desserts Choice
I’ve tried every type of shortcake imaginable—the sponge cake ones, the light sponge roll ones—but nothing beats the authentic biscuit base. It’s just superior for soaking up those incredible strawberry juices! Why do I stand by this specific Classic Shortcake Recipe? Well, it comes down to a few non-negotiables that turn a simple dessert into something unforgettable. You’ll see why this makes our list of favorite Simple Summer Baking projects.
- Next-Level Flakiness: We use ultra-cold ingredients and minimal mixing. This keeps the butter intact so it steams in the oven, creating those beautiful, flaky layers you just don’t get in a cake.
- Speedy Assembly: Honest baking doesn’t have to take all day! From the moment you start mixing the dough to pulling those biscuits out, it’s incredibly fast. Perfect for those last-minute dessert crises.
- Texture Contrast: The slight crumbly snap of the warm biscuit against the soft macerated strawberries and the billowy homemade whipped cream? It’s heaven. It’s not just sweet; it’s texturally perfect.
- Maximum Juice Absorption: A good biscuit base acts like a delicious sponge, soaking up all that sweet syrup the strawberries create. That’s the best part, really!
Ingredients for Fluffy Shortcake Biscuits and Macerated Strawberries
Okay, let’s talk ingredients because this is where we win or lose the battle for the best fluffy shortcake. For biscuits that genuinely flake instead of crumbling to dust, temperature is your absolute best friend. I cannot stress this enough: your butter and cream must be seriously cold—like, straight-from-the-deep-freeze cold for the butter, and your cream needs to be ice-cold, too. We aren’t making muffins here; we are aiming for tender layers! Gather up everything below, and let’s get prepping these amazing fresh strawberry desserts components.
For the Fluffy Shortcake Biscuits
- 2 cups all-purpose flour (the classic workhorse!)
- 1 tablespoon baking powder (for a nice high lift)
- 1/2 teaspoon salt
- 1/4 cup granulated sugar (just a touch for flavor in the dough)
- 1/2 cup cold unsalted butter, cut into small pieces (Don’t even think about softening this!)
- 3/4 cup cold heavy cream (This is the liquid that brings the dough together.)
For the Fresh Strawberry Desserts Topping
This part is what everybody waits for. Macerating the berries—letting the sugar draw out their sweet juices—is non-negotiable for the ultimate shortcake experience. Don’t skimp on the vanilla when you whip the cream, either!
- 1 quart fresh strawberries, hulled and sliced
- 1/4 cup granulated sugar for macerating strawberries
- 1 cup heavy cream (for whipping—make sure this is cold too!)
- 1 teaspoon vanilla extract (the good stuff makes a difference!)
- 2 tablespoons extra granulated sugar for brushing the tops of the biscuits
How to Prepare the Ultimate Strawberry Shortcake
This process moves fast once you get going, so have everything ready! We are aiming for those perfectly layered biscuits and juices pooling beautifully around the berries. Since these are biscuits, not actual cake layers, timing is everything, which is why we start the berries steeping while the oven heats up. You can find my favorite tips on getting the absolute flakiest dough in this guide to homemade biscuits if you need a quick refresher before diving in.
Making the Biscuit Shortcake Dough
First things first: get that oven hot! You need to preheat your oven to 425 degrees Fahrenheit immediately, and line a baking sheet with parchment paper—it makes cleanup so much easier later. In a great big bowl, whisk together your flour, baking powder, salt, and that initial 1/4 cup of sugar for the dough. Now, the fun (and slightly messy) part: cut in that 1/2 cup of ice-cold butter with a pastry blender or your fingertips until it honestly looks like coarse crumbs. Don’t overwork it, or you’ll melt the butter! Gently stir in the 3/4 cup of cold heavy cream until the dough just comes together—I mean it, do not overmix! Dump that shaggy dough onto a lightly floured surface. Pat or gently roll it out to about 3/4 inch thick. Grab a 3-inch biscuit cutter and push straight down to cut your rounds (never twist that cutter, or you’ll seal the edges!). Place them on your sheet, brush the tops lightly with a little extra cream, and sprinkle them with that reserved 2 tablespoons of sugar.
Baking and Preparing the Macerated Strawberries
Now, these go right into that hot oven for 12 to 15 minutes, or until they turn beautifully golden brown. While they bake, we create the magic topping. In a separate bowl, toss your sliced, hulled strawberries with their 1/4 cup of sugar. You need to let these hang out for at least 15 minutes; this is macerating! You’ll know it’s working when you see a lovely pool of sweet, red juice forming at the bottom of the bowl.
Whipping Cream and Assembling Your Shortcake
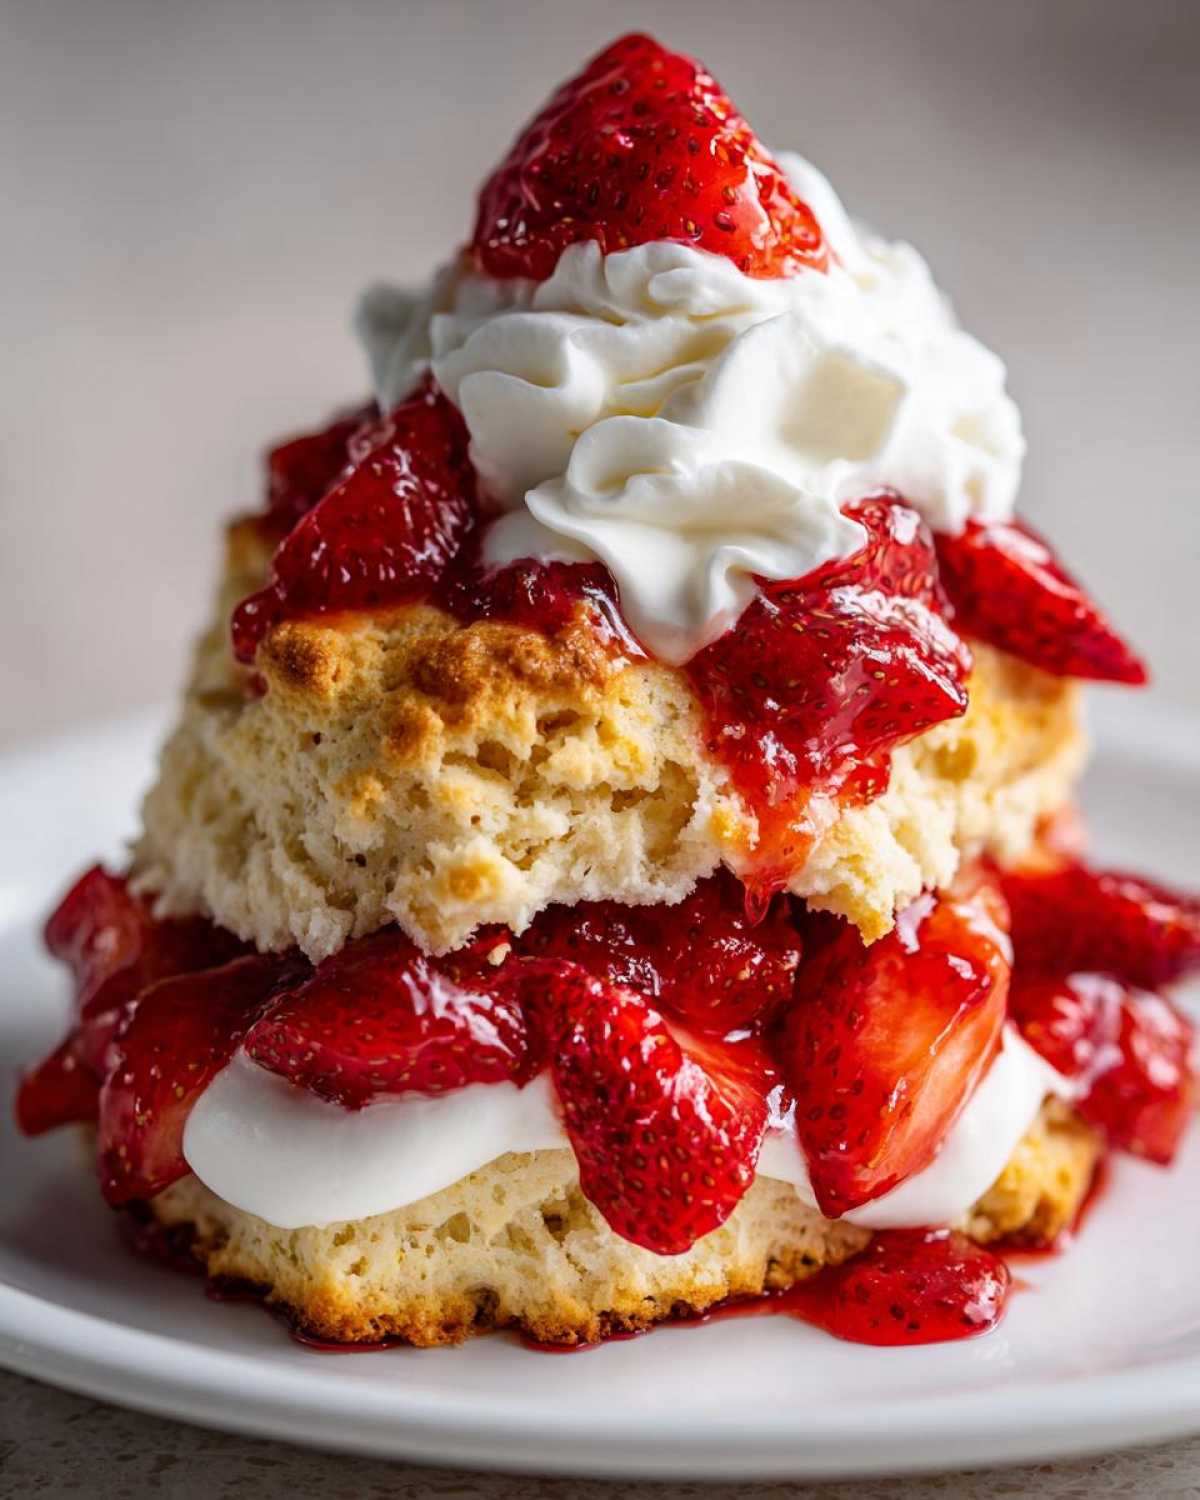
As soon as the biscuits come out, put them on a cooling rack to rest for just a moment so they aren’t scorching hot. While they cool slightly, whip the remaining 1 cup of heavy cream with the vanilla extract until you hit soft peaks. Don’t over-whip this—we want luscious, soft peaks, not butter! When you’re ready to serve this whipped cream dessert, split each biscuit in half horizontally. Place the bottom half on a plate, spoon a ridiculous amount of those juicy strawberries over it, follow that up with a big cloud of whipped cream, pop the top biscuit on, and heap a little more topping right on top. You absolutely must serve this immediately for the best experience!
Tips for Success When Making This Classic Shortcake Recipe
Honestly, mastering a biscuit that’s simultaneously tender inside and slightly crisp on the outside takes a little finesse, but it’s totally achievable! I’ve absorbed all the wisdom from my recipe notes and years of trial-and-error, and I want to pass on the absolute must-knows so your shortcake layers turn out perfect every time. Always remember, this is a Simple Summer Baking project, so don’t let the science scare you!
One of the biggest insider secrets I learned—the one that truly makes biscuits flaky—is how you handle the cutter. Please, whatever you do, never twist your biscuit cutter once you push it down into the dough. You want a clean, straight cut. Twisting seals the edges of the dough, which prevents that gorgeous vertical rise and locks in the steam that creates those beautiful layers. See? Little things make a huge difference in a good homemade biscuit recipe!
Remember those notes about substitutions? If you’re out of strawberries for some wild reason, don’t stress about it. My notes tell you that you can absolutely substitute them with other seasonal finds. Peaches are glorious when macerated, and blueberries work incredibly well, too. You’ll still get that amazing ‘summer berry’ experience, just with a different color profile!
Also, lean into the coldness factor. If you look at the recipe, I keep stressing cold butter and cold cream. That’s not just flavor advice; it’s science! The colder the fat, the better it separates into those distinct layers during baking. If you find your dough warming up while you’re cutting the rounds, stick the whole tray back into the fridge for about five minutes. It sounds tedious, but it’s the difference between a crumbly mess and a fluffy shortcake masterpiece. It’s worth referencing these basic tips every time you bake!
Variations on the Fruit Used in Your Shortcake Dessert
While the strawberry version is iconic—the undisputed queen of Berry Desserts—we certainly don’t live in a world where we *only* eat strawberries, right? Part of the joy of having a fantastic, reliable shortcake base recipe is that you can easily riff on the topping whenever your heart desires or whatever looks best at the farmer’s market!
Macerating works beautifully with almost any soft, juicy fruit. Think about summer peaches! They are just magnificent when sliced, hit with a little sugar, and allowed to weep their sweet juices alongside that tender biscuit. If you love baked fruit desserts, you should seriously check out how amazing these individual mini berry galettes turn out—totally different concept, but they make the best use of beautiful fresh fruit, too!
Here are a few ways you can switch things up on your shortcake installment:
- Peaches and Cream: Thinly slice ripe peaches, toss them with sugar and maybe a tiny pinch of ginger, and let them sit. The texture stays firmer than strawberries, which is lovely.
- Blueberry or Mixed Berry: Small berries like blueberries don’t need much maceration time, maybe only 5 minutes. If you use a mix of raspberries and blackberries, they tend to break down faster, creating an amazing, slightly tart sauce that melts into the biscuit.
- Tropical Twist: Try sliced, slightly sweetened kiwi and pineapple. It takes the whole approach in a completely different, bright direction!
No matter what fruit you choose, make sure you spoon those delicious juices over the biscuit layers before adding the whipped cream. That sweet, fruity liquid is the key to turning a good dessert into a showstopper!
Storage and Reheating Instructions for Leftover Shortcake Components
Here’s the hard truth about any perfect shortcake assembly: once you put that beautiful mountain of biscuit, juicy strawberries, and billowy cream together, you must eat it right then and there! Seriously, don’t even try saving an assembled shortcake. The biscuit will get soggy almost immediately once it soaks up all that strawberry juice, and the homemade whipped cream turns weepy. We are aiming for airy perfection, not a soupy mess, right?
However, if you have extras of the individual components, we can absolutely save those for another day! This is crucial if you want to keep this as an Easy Fruit Dessert available throughout the week without having to rebake.
Storing the Biscuits: If you have leftover biscuits (which is rare around my house, I admit!), let them cool completely. Place them in an airtight container. They will keep just fine at room temperature for a good two or three days. If they feel a little stale the next day, don’t panic! Just pop them into a 350-degree oven for about five minutes, and they freshen right up. They get that nice, crisp exterior again.
Storing the Fruit and Cream Separately: Keep the macerated strawberries sealed up tight in the fridge. Since the sugar draws the moisture out, they aren’t going anywhere, and they actually keep releasing those delicious juices, concentrating the flavor! They usually last about four days. For the whipped cream, if you have any leftovers, store it in a very tightly sealed container in the coldest part of your fridge. It usually lasts best for about two days before it starts to lose its structure.
When you are ready for round two, just grab a fresh biscuit, scoop on the saved berries, and top it with a fresh dollop of cream. Perfect!
Frequently Asked Questions About Making Perfect Shortcake
People ask me all the time about the fine details of this recipe. It’s great that you’re thinking ahead! Getting the biscuit right is foundational to a superior shortcake experience, so I wanted to tackle some of the most common queries I receive. We want you to succeed with this glorious easy fruit dessert!
What makes this biscuit a true shortcake base?
This is such a good question because the term ‘shortcake’ is used so loosely these days! What separates this biscuit from a regular buttermilk biscuit, or even from a sponge cake layer, is the high amount of fat—that’s the butter, honey! We use a lot of butter relative to the liquid. That high fat content coats the flour particles, which stops gluten from developing too much. When you bake it, the cold butter melts and creates steam pockets, resulting in that desirable crumbly, tender texture that characterizes a real shortcake. It’s intentionally less ‘bready’ than a dinner roll!
Can I use pre-made whipped topping instead of homemade whipped cream dessert?
Look, if you are truly in a pinch and need a Quick Dessert Idea to get out the door, I won’t stop you. But oh my goodness, you’ll be missing out on so much amazing flavor! The homemade whipped cream dessert using heavy cream, a touch of sugar, and real vanilla adds a richness and lightness that those aerosol cans just can’t replicate. The homemade stuff stays fluffier longer when it sits on the slightly warm biscuit too. For the very best result that honors this Classic Shortcake Recipe, cream your own heavy cream!
What is macerating and why is it vital for fresh strawberry desserts?
Macerating is just a fancy French word for the process of letting fruit sit with sugar for a while. When you toss your sliced berries with sugar, the sugar pulls the internal juices out of the strawberries through osmosis. This draws out their natural sweetness AND creates that incredible, intense strawberry syrup that pools around the base of your shortcake. If you skip this step, your berries are just—well, they’re just plain slices of fruit, not glorious, juicy shortcake toppings! Definitely do the 15-minute sit; it’s essential for the whole flavor profile of the easy fruit dessert.
Can I make the biscuit dough ahead of time?
You technically *can* mix the dry ingredients and cut in the butter hours ahead of time, but I wouldn’t recommend it if you want the absolute fluffiest biscuit. If you must make it ahead, mix the dry ingredients and butter, then toss the whole bowl in the fridge. Only add the cold cream right before you are ready to cut and bake. The moisture from the cream mixes with the flour over time, and that’s what starts the gluten development you’re trying to avoid until the last second! For the best texture, keep prep time minimal.
Estimated Nutritional Information for One Serving of Shortcake
I always feel a little bad looking at the nutrition information for homemade treats because, let’s be real, this isn’t exactly a low-sugar affair! But when you’re making something this wonderful—a true celebration of fresh strawberry desserts—you have to enjoy it for what it is: pure, comforting indulgence. Remember, this information is based on dividing the whole recipe evenly across 6 servings, so your portion size might vary slightly depending on how generously you stack those biscuits and cream!
We use real butter and heavy cream in our homemade biscuit recipe, so you’ll see the fat content is there, but that’s what delivers the incredible texture we love. This is a genuine look at what you’re taking in when you enjoy one serving of this glorious shortcake!
| Nutrient | Amount (Estimated) |
|---|---|
| Serving Size | 1 shortcake |
| Calories | 450 |
| Sugar | 28g |
| Fat | 26g |
| Saturated Fat | 16g |
| Carbohydrates | 50g |
| Protein | 7g |
| Sodium | 310mg |
See? Nothing to be scared of when you’re enjoying the height of summer berry season! Just remember this is a comfort food dessert, meant to be savored, not counted too closely!
Share Your Fluffy Shortcake Creations
Whew! Now that you’ve mastered the art of the flaky biscuit and created that perfect peak of whipped cream, I absolutely need to know how it went! Making a shortcake is such a rewarding experience, especially when you see the smiles it brings, and I really want to hear about your results. Did your biscuits rise perfectly? Did your family fight over the last spoonful of the strawberry juice?
If you loved making this Classic Shortcake Recipe—and I sincerely hope you did!—please, please let me know in the comments below. If you have a minute, giving this recipe a rating (a solid five stars if it brightened your day!) helps other bakers find the best summer berry desserts out there. It helps me know what to perfect next!
Don’t just keep the joy to yourself! Snap a picture of your masterpiece, piled high with fruit and cream, and share it on social media. Seeing your beautiful stacks gives me such a lift! You can tag me on whatever platform you use—it’s the best compliment a home cook can receive. And if you’re looking for even more inspiration or want to see what else is coming out of my kitchen next, you can always pop over to my main recipe hub for more Simple Summer Baking ideas. Happy eating, everyone!
PrintClassic Strawberry Shortcake with Biscuit Layers
A recipe for traditional shortcake using tender, flaky biscuit layers topped with macerated fresh strawberries and homemade whipped cream.
- Prep Time: 20 min
- Cook Time: 15 min
- Total Time: 35 min
- Yield: 6 servings
- Category: Dessert
- Method: Baking
- Cuisine: American
- Diet: Vegetarian
Ingredients
- 2 cups all-purpose flour
- 1 tablespoon baking powder
- 1/2 teaspoon salt
- 1/4 cup granulated sugar plus 2 tablespoons for topping
- 1/2 cup cold unsalted butter, cut into small pieces
- 3/4 cup cold heavy cream plus 1 cup for whipping
- 1 quart fresh strawberries, hulled and sliced
- 1/4 cup granulated sugar for macerating strawberries
- 1 teaspoon vanilla extract
Instructions
- Preheat your oven to 425 degrees Fahrenheit. Line a baking sheet with parchment paper.
- In a large bowl, whisk together the flour, baking powder, salt, and 1/4 cup sugar.
- Cut in the cold butter using a pastry blender or your fingers until the mixture resembles coarse crumbs.
- Stir in the 3/4 cup cold heavy cream until just combined. Do not overmix.
- Turn the dough out onto a lightly floured surface. Gently pat or roll the dough to about 3/4 inch thickness.
- Use a 3-inch round biscuit cutter to cut out 6 to 8 rounds. Place them on the prepared baking sheet.
- Brush the tops lightly with a little extra heavy cream and sprinkle with the remaining 2 tablespoons of sugar.
- Bake for 12 to 15 minutes, or until the biscuits are golden brown. Let them cool slightly on a wire rack.
- While the biscuits bake, prepare the strawberries. In a medium bowl, gently toss the sliced strawberries with the 1/4 cup sugar. Let them sit for at least 15 minutes to macerate.
- In a separate bowl, whip the remaining 1 cup of heavy cream with the vanilla extract until soft peaks form.
- To assemble, split each warm or cooled biscuit in half horizontally. Place the bottom half on a plate.
- Spoon a generous amount of macerated strawberries and their juices over the bottom half.
- Top with a dollop of whipped cream. Place the top half of the biscuit on the cream. Add more strawberries and cream on top before serving immediately.
Notes
- For flakier biscuits, make sure your butter and cream are very cold before mixing.
- You can substitute mixed berries for strawberries if you prefer a different flavor profile.
- If you prefer a sweeter biscuit, increase the sugar in the dough to 1/3 cup.
Nutrition
- Serving Size: 1 shortcake
- Calories: 450
- Sugar: 28
- Sodium: 310
- Fat: 26
- Saturated Fat: 16
- Unsaturated Fat: 10
- Trans Fat: 0
- Carbohydrates: 50
- Fiber: 3
- Protein: 7
- Cholesterol: 85