

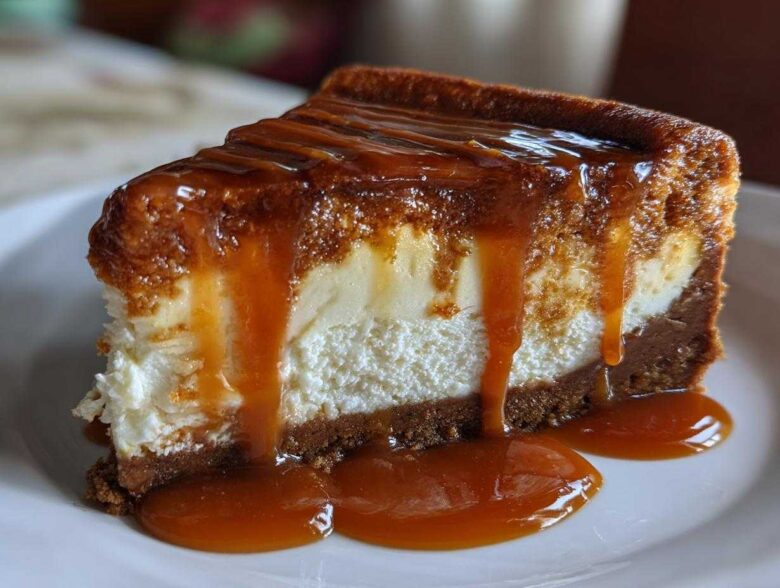
Oh my goodness, if you’re looking for a dessert that screams celebration, stop right here! We’re diving into pure, glorious indulgence with what I promise is the absolute **best salted caramel cheesecake** you will ever attempt. Forget those fussy, tricky baking projects; this one is surprisingly straightforward, yet it delivers that rich, melt-in-your-mouth creamy texture we all dream about. I spent years trying to get a baked cheesecake that didn’t crack or slump, and trust me, this specific method completely unlocked it for me.
Why This Salted Caramel Cheesecake Recipe Works (The Secret to Creamy Cheesecake)
The reason this salted caramel cheesecake recipe always turns out perfect is because we treat it gently, unlike some rustic bakes. Flavor is one thing, but that signature creamy texture? That comes down to two non-negotiables: ingredients at room temperature and the water bath. Seriously, take your cream cheese, eggs, and sour cream out way before you even think about turning on the oven. This stops you from over-beating everything when you start mixing.
Then, we rely on the water bath, or *bain-marie*. It sounds fancy, I know, but it just means baking the pan inside a larger tray of water. This creates a steamy environment that bakes the filling slowly and evenly, which is the main defense against cracks. If smooth, decadent desserts are your goal, this technique is your best friend. You really get the texture you see in those fancy bakery shops with this method!
Achieving the Best Homemade Cheesecake Texture
Okay, here’s that big tip about mixing: Once those eggs go in, I mean it—mix them until they are *just* incorporated. Don’t grab a whisk or turn the mixer on high speed! Overmixing whips air into the batter, and when that air tries to escape while baking, boom, you get cracks and a grainy top. We want that velvety smooth result, so keep your speed low and stop as soon as the last streaks of yellow disappear. That careful approach guarantees a truly creamy cheesecake every single time.
If you’re skipping the water bath because you’re feeling brave, you absolutely must check out how I handle my decadent flourless chocolate cake recipe to see how I manage temperature control in other bakes!
Ingredients for Your Easy Salted Caramel Cheesecake
Gathering your ingredients is half the fun, right? Getting everything ready beforehand makes the mixing process flow so smoothly, which, as we discussed, is key for a creamy cheesecake. You’ll need about 1 1/2 cups of Biscoff cookie crumbs for the base. We mix those crumbs with 1/4 cup of granulated sugar and then bind it all together with 6 tablespoons of unsalted butter once it’s melted—easy peasy!
Now for the star of the show, the main filling that makes this an easy cheesecake recipe and a definite must-try whenever you need decadent desserts.
Biscoff Crust Components
Yes, we really are using Biscoff cookies, because their subtle spice pairs so beautifully with the salty caramel! You need that 1 1/2 cups of cookie crumbs, 1/4 cup of granulated sugar to help it set up nicely, and 6 tablespoons of unsalted butter that you’ll melt down perfectly before combining everything into that nice sturdy base.
Salted Caramel Cheesecake Batter Ingredients
This is where the magic gets rich! You absolutely must use three 8-ounce packages of cream cheese, and remember, they need to be fully softened—no shortcuts here if you want that amazing best homemade cheesecake texture. We mix that with 1 1/2 cups of granulated sugar, 1 teaspoon of vanilla extract, and just a tiny pinch of salt to enhance the sweet and salty element. For binder and volume, grab 3 large eggs. Then, for moisture inside the cake, we whisk in 1/2 cup of sour cream along with 1/2 cup of salted caramel sauce right into the batter. That little bit of caramel mixed in keeps the whole thing incredibly moist!
Step-by-Step Instructions for Your Baked Salted Caramel Cheesecake
This is where we turn those beautiful ingredients into something truly spectacular. Don’t be intimidated by the steps for this salted caramel cheesecake; we’re going slow and steady to make sure you get that award-winning texture! Remember to start by preheating your oven to 325°F (160°C). Before anything else, grab heavy-duty foil—you’ll need several layers—because we are wrapping that 9-inch springform pan tightly to protect it during the water bath.
Preparing the Biscoff Crust and Water Bath Setup
First things first, let’s get that amazing crust ready. In a bowl, we mix our wet and dry crust components together: the Biscoff crumbs, that 1/4 cup of sugar, and the 6 tablespoons of melted butter. Mix it until every crumb looks moist! Press that mixture firmly into the bottom of your foil-wrapped pan. It needs a quick 10-minute bake at 325°F to set up properly. While that’s happy in the oven, prepare your roasting pan—the one that will hold the water bath later. Once the crust is done, pull it out and let it cool off slightly while you tackle the filling.
Mixing the Creamy Cheesecake Filling
Time to beat that cream cheese until it’s fluffy along with the 1 1/2 cups of sugar, vanilla, and salt. Remember what I said about gentle mixing? Once that’s smooth, you add your 3 large eggs, one at a time. Mix each one in just until it disappears—seriously, stop the mixer right there. If you overdo it, the whole thing goes wrong! Finally, gently fold in the 1/2 cup of sour cream and that 1/2 cup of salted caramel sauce we saved for inside the cake. Folding keeps the air bubbles we worked so hard to maintain!
Baking and Cooling the Salted Caramel Cheesecake
Pour that luscious batter over your cooled crust. Now, set the springform pan into that larger roasting pan you prepared earlier. Carefully pour hot water into the roasting pan until it comes about halfway up the sides of your cheesecake—there’s your water bath! Bake this beauty for 60 to 70 minutes. You’ll know it’s done when the edges look set, but the center still gives you a little wobble when you nudge the pan gently. Then comes the crucial part: Turn the oven off, crack the door open just a tiny bit, and let the cheesecake cool down inside that humid environment for a full hour. Don’t rush this! After that hour, take it out, let it come to room temperature, and then you *must* chill it for at least 6 hours, though honestly, overnight is best for the ultimate texture.
For tips on other decadent bakes, you might love my thoughts on maple walnut blondies!
Tips for Success with Your Salted Caramel Cheesecake Recipe
Even though I’ve tried to make this the most foolproof salted caramel cheesecake recipe out there, a couple of little tricks really push it into the realm of perfection. First thing, and I can’t stress this enough: room temperature ingredients are your quiet heroes here. When your cream cheese, eggs, and sour cream are all soft and pliable, they blend without needing a lot of aggressive mixing. That means less air, which means a smoother, creamier finish!
Now, about that water bath—what if your roasting pan isn’t big enough, or you’re just nervous about the whole setup? That’s totally okay! You can still get great results, especially if you’re aiming for a rich dessert recipe quality. My alternative tip is to just skip wrapping the pan, but place a shallow pan filled with boiling water directly on the rack underneath your cheesecake pan. That steam barrier does almost the same job of keeping those edges from drying out too fast. It’s a great trick I often use when I make my cherry almond oatmeal crisp, too!
Serving Suggestions for This Decadent Dessert
Once your beautiful, chilled salted caramel cheesecake has set perfectly in the fridge—and trust me, that long chill is worth it—it’s time for the grand finale! To really make this visually stunning, wait until right before you slice into it to add that final, glorious layer of topping. Take that remaining cup of salted caramel sauce and drizzle it liberally over the top. Don’t be shy! You want those stunning caramel ribbons running down the sides.
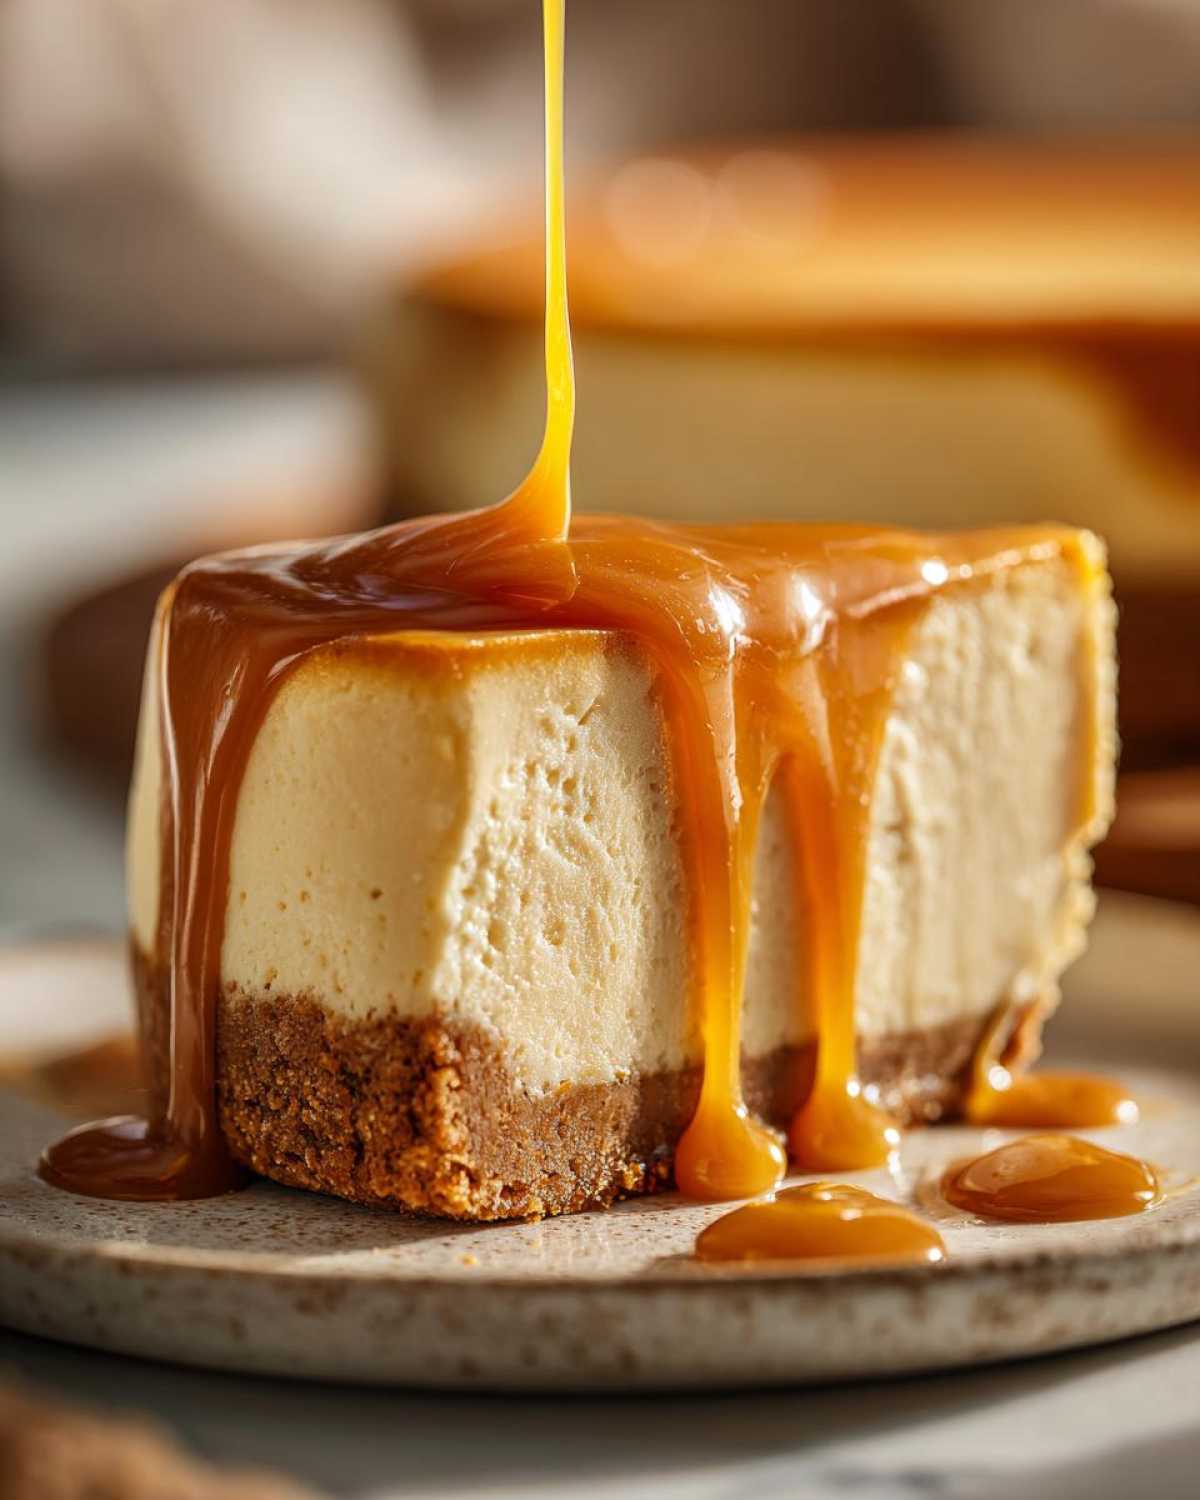
For a perfect sweet and salty dessert presentation, a sprinkle of flaky sea salt right over the top of the caramel looks gorgeous and really emphasizes that flavor contrast. If you want to serve it alongside a warm drink, this cheesecake pairs unbelievably well with a creamy coffee treat. I highly recommend making a caramel vanilla oat milk latte to go alongside your slice!
Storage and Make-Ahead Options for Your Cheesecake
This is such a fantastic dessert for planning ahead, especially when you’re tackling holiday menus or big gatherings! Since this is a dense, rich bake, it actually gets better after a bit of chill time. Always keep your finished salted caramel cheesecake tightly wrapped in the refrigerator. It holds up beautifully for about 4 to 5 days. If you’re prepping this for a party, you can totally make it a day ahead and just hold off on adding that final caramel drizzle until serving time.
It freezes like a dream too, which is great for future caramel dessert ideas! Just make sure it’s fully chilled first. Wrap the whole cheesecake (or even individual slices!) extremely well in plastic wrap, making sure to get a good layer, and then foil over that. It keeps well in the freezer for about a month. When you want to eat it, just move it to the fridge to thaw slowly overnight. It’s one of my favorite shortcuts for making sure I always have a delicious dessert ready for unexpected guests. If you like planning snacks ahead, you should check out my recipe for no bake gingerbread energy balls!
Frequently Asked Questions About Salted Caramel Cheesecake
Whenever I share this recipe, people always have a few burning questions, especially since we’re aiming for that truly rich dessert recipes quality by baking it. I totally get it; you want to make sure you get that picture-perfect finish! Let’s jump into the most common things folks ask me about this decadent bake.
Can I make a no bake cheesecake caramel version?
That’s a great question! Since this recipe focuses on the depth of flavor you can only get from baking, it’s technically a baked cheesecake. You absolutely *can* make a no-bake version, and I’ve seen some great ones, but the texture is just completely different. A no-bake caramel version relies on gelatin or just chilling to set, so it tends to be lighter and almost mousse-like. You won’t get that dense, truly creamy cheesecake experience we’ve built toward here, but it’s an option if you need something super fast!
What is the best way to prevent cracks in my baked cheesecake?
Ah, the dreaded crack! If you remember anything from our instructions, remember the water bath and the cooling process. Those are the heavy lifters here. The steam from the water bath keeps the outside from setting before the inside, eliminating stress that causes cracks. After baking, turning the oven off and letting the cake cool inside for a full hour acts as a slow transition from hot to cool reality. That gradual temperature change is key to keeping your surface smooth and crack-free, ensuring you have a perfect slice of best homemade cheesecake!
What if I don’t have Biscoff cookies for the crust?
Don’t panic if you can’t find Biscoff or just don’t have any on hand! We loved the Biscoff here because of that cinnamon spice it brings, but this is still an easy cheesecake recipe even if you swap it out. The absolute best substitute is a standard Graham cracker crust. Just use the same amount of crumbs, sugar, and melted butter ratio, and you’ll have a wonderfully sturdy base. You could even use shortbread cookies if you want something a little richer and buttery. Just make sure to press it down firmly!
If you’re looking for other easy dessert plans for making delicious food ahead of time, you can always look at my tips for no bake peanut butter oat bars!
Nutritional Estimate for This Salted Caramel Cheesecake
Listen, I’m a home cook, not a nutritionist, so please take these numbers with a giant grain of salt! This is meant to be a guideline for one slice of this magnificent, rich creation, based on the ingredients list we worked through. This is definitely one of those rich dessert recipes you save for special occasions, so don’t worry too much about the daily count!
When we consider a single serving—that glorious slice of decadent goodness—here is the estimated breakdown:
- Serving Size: 1 slice
- Calories: 450
- Sugar: 45g (Yep, it’s sweet!)
- Fat: 28g
- Saturated Fat: 17g
- Carbohydrates: 48g
- Protein: 7g
- Cholesterol: 120mg
- Sodium: 350mg
Because we used real butter and full-fat cream cheese to achieve that unbelievably creamy cheesecake texture, the fat content is what you’d expect for an ultimate caramel dessert like this. It’s worth every single bite, trust me! If you’re looking for lighter dessert ideas overall, maybe check out the lower calorie stuff, but if you’ve made this salted caramel cheesecake, you’re aiming for indulgence!
Share Your Sweet and Salty Dessert Creations
Now that you’ve gone to all that effort to create this incredible salted caramel cheesecake—which, by the way, is the pinnacle of sweet and salty dessert perfection—I desperately want to know how it turned out! Honestly, seeing your creations brings me so much joy. Did the Biscoff crust hold up? How gorgeous was that caramel drizzle?
Please, please take a second after you’ve devoured your slice to rate the recipe right here on the page. A simple 5-star rating really helps other bakers know that this recipe is trustworthy for their next big baking project. Leave a comment below detailing any little tweaks you might have made—maybe you added pecans, or perhaps you tried making your own caramel sauce from scratch! I always learn so much from hearing about your kitchen adventures.
And if you snapped a picture—and I know you did, because this is one stunning cake—please tag me on social media! Seeing our community making up these ultimate caramel desserts together is the best part of running this blog. If you’re looking for another simple, delicious treat to make soon, my recipe for salted caramel chia pudding is a perfect lighter option for a weekday craving!
PrintEasy Baked Salted Caramel Cheesecake with Biscoff Crust
A recipe for a rich, creamy baked cheesecake featuring a spiced Biscoff cookie crust and a homemade salted caramel topping.
- Prep Time: 25 min
- Cook Time: 70 min
- Total Time: 8 hours 35 min
- Yield: 12 servings
- Category: Dessert
- Method: Baking
- Cuisine: American
- Diet: Vegetarian
Ingredients
- 1 1/2 cups Biscoff cookie crumbs
- 1/4 cup granulated sugar
- 6 tablespoons unsalted butter, melted
- 3 (8 ounce) packages cream cheese, softened
- 1 1/2 cups granulated sugar
- 1 teaspoon vanilla extract
- 1/4 teaspoon salt
- 3 large eggs
- 1/2 cup sour cream
- 1/2 cup salted caramel sauce (for batter)
- 1 cup salted caramel sauce (for topping)
Instructions
- Preheat your oven to 325°F (160°C). Wrap the outside of a 9-inch springform pan tightly with heavy-duty aluminum foil.
- Combine Biscoff crumbs and 1/4 cup sugar in a bowl. Pour in melted butter and mix until the crumbs are evenly moistened. Press the mixture firmly into the bottom of the prepared springform pan.
- Bake the crust for 10 minutes. Remove from the oven and let it cool slightly.
- In a large bowl, beat the softened cream cheese, 1 1/2 cups sugar, vanilla extract, and salt until smooth. Scrape down the sides of the bowl.
- Beat in the eggs one at a time, mixing just until combined after each addition. Do not overmix.
- Gently mix in the sour cream and 1/2 cup of salted caramel sauce until just incorporated.
- Pour the batter over the cooled crust. Place the springform pan into a larger roasting pan. Carefully pour hot water into the roasting pan until it reaches halfway up the sides of the springform pan (this is a water bath).
- Bake for 60 to 70 minutes, or until the edges are set but the center still jiggles slightly when gently nudged.
- Turn off the oven, crack the oven door open slightly, and let the cheesecake cool inside the oven for 1 hour.
- Remove the cheesecake from the water bath and foil. Cool completely on a wire rack, then chill in the refrigerator for at least 6 hours, or preferably overnight.
- Before serving, drizzle the remaining 1 cup of salted caramel sauce over the top of the chilled cheesecake.
Notes
- For the creamiest texture, bring your cream cheese, eggs, and sour cream to room temperature before starting.
- If you do not have a water bath, bake the cheesecake on the center rack and place a shallow pan of water on the rack below it to add humidity.
- Use high-quality store-bought salted caramel sauce or make your own for the best flavor.
Nutrition
- Serving Size: 1 slice
- Calories: 450
- Sugar: 45
- Sodium: 350
- Fat: 28
- Saturated Fat: 17
- Unsaturated Fat: 11
- Trans Fat: 0
- Carbohydrates: 48
- Fiber: 1
- Protein: 7
- Cholesterol: 120