

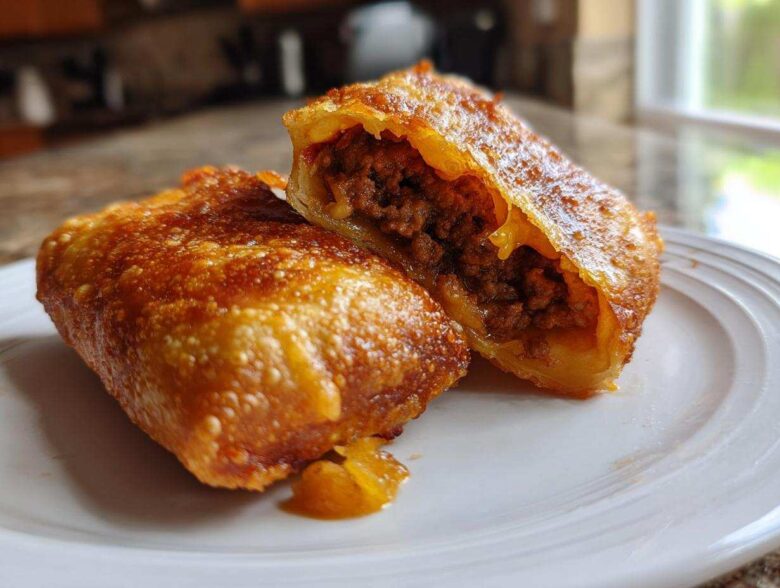
Oh my gosh, you know those nights when you just need that deep, satisfying crunch, that ultimate comfort food hug that only deep-fried deliciousness can give? But then you remember you don’t want the grease bomb that comes with it? I totally get it! That’s why I spent ages tinkering until I nailed the Ultimate Crispy Beef Chimichangas recipe. Seriously, these are my new weeknight go-tos. The best part? I’ve figured out how to get that unbelievable, shatteringly crisp shell whether you’re daring enough for the traditional deep-fry method, or if you want to try my newer, slightly lighter options using the oven or the air fryer. Trust me, you’ll be amazed at the crunch factor we achieve without all the fuss!
Why You Will Love These Easy Chimichangas
Honestly, I developed this recipe because I was tired of waiting for Friday night to feel like a real Tex-Mex party. These Easy Chimichangas deliver amazing flavor in a snap. Here’s why they instantly earned a permanent spot on our menu:
- They are perfect for Quick Weeknight Dinners—we’re talking totally ready to eat in about 35 minutes!
- You get maximum crunch factor, whether you go classic fried or try out the baked version.
- The seasoned beef filling is rich, savory, and super cheesy—it reminds me of my favorite Mexican comfort food joints.
- You don’t have to mess with making rice or refried beans; these are a satisfying meal all on their own.
- They freeze beautifully, making them absolute lifesavers for busy weeks ahead.
- This is such a versatile base; you can easily swap the beef for chicken or load up on extra cheese if you’re feeling decadent! Check out how I make easy steak fajitas when I want something different but similar!
Ingredients for the Best Beef Chimichanga Recipe
Okay, listing ingredients is the least exciting part, I know! But stick with me, because having everything ready to go before you start cooking is the single biggest secret to keeping your prep time short. When everything is measured out, assembling these babies is a breeze. We’re aiming for that perfect filling-to-tortilla ratio here, so pay attention to the amounts!
Here’s what you’ll need for about eight glorious, crispy chimichangas. If you want to make a double batch for leftovers (and trust me, you should), just double everything up! For that extra cheesy goodness, I always recommend grating your own cheese straight from a block. It melts so much better than the pre-shredded bags. If you want an amazing dip to go with these, check out my recipe for quick, creamy homemade nacho cheese!
- 1 tablespoon vegetable oil (just for those onions, not for frying yet!)
- 1 pound ground beef (I usually go for 80/20, gives the best flavor)
- 1 small onion, chopped finely
- 1 packet (1 ounce) of your favorite taco seasoning mix
- 1/2 cup water
- 8 medium flour tortillas (make sure they are good burrito size, they need room to wrap!)
- 1 cup shredded Monterey Jack cheese (for that good stretch!)
- 1 cup shredded cheddar cheese (for color and flavor kick)
- Vegetable oil for frying (if you choose the classic deep-fried route—and you should try it at least once!)
Mastering the Best Chimichanga Filling
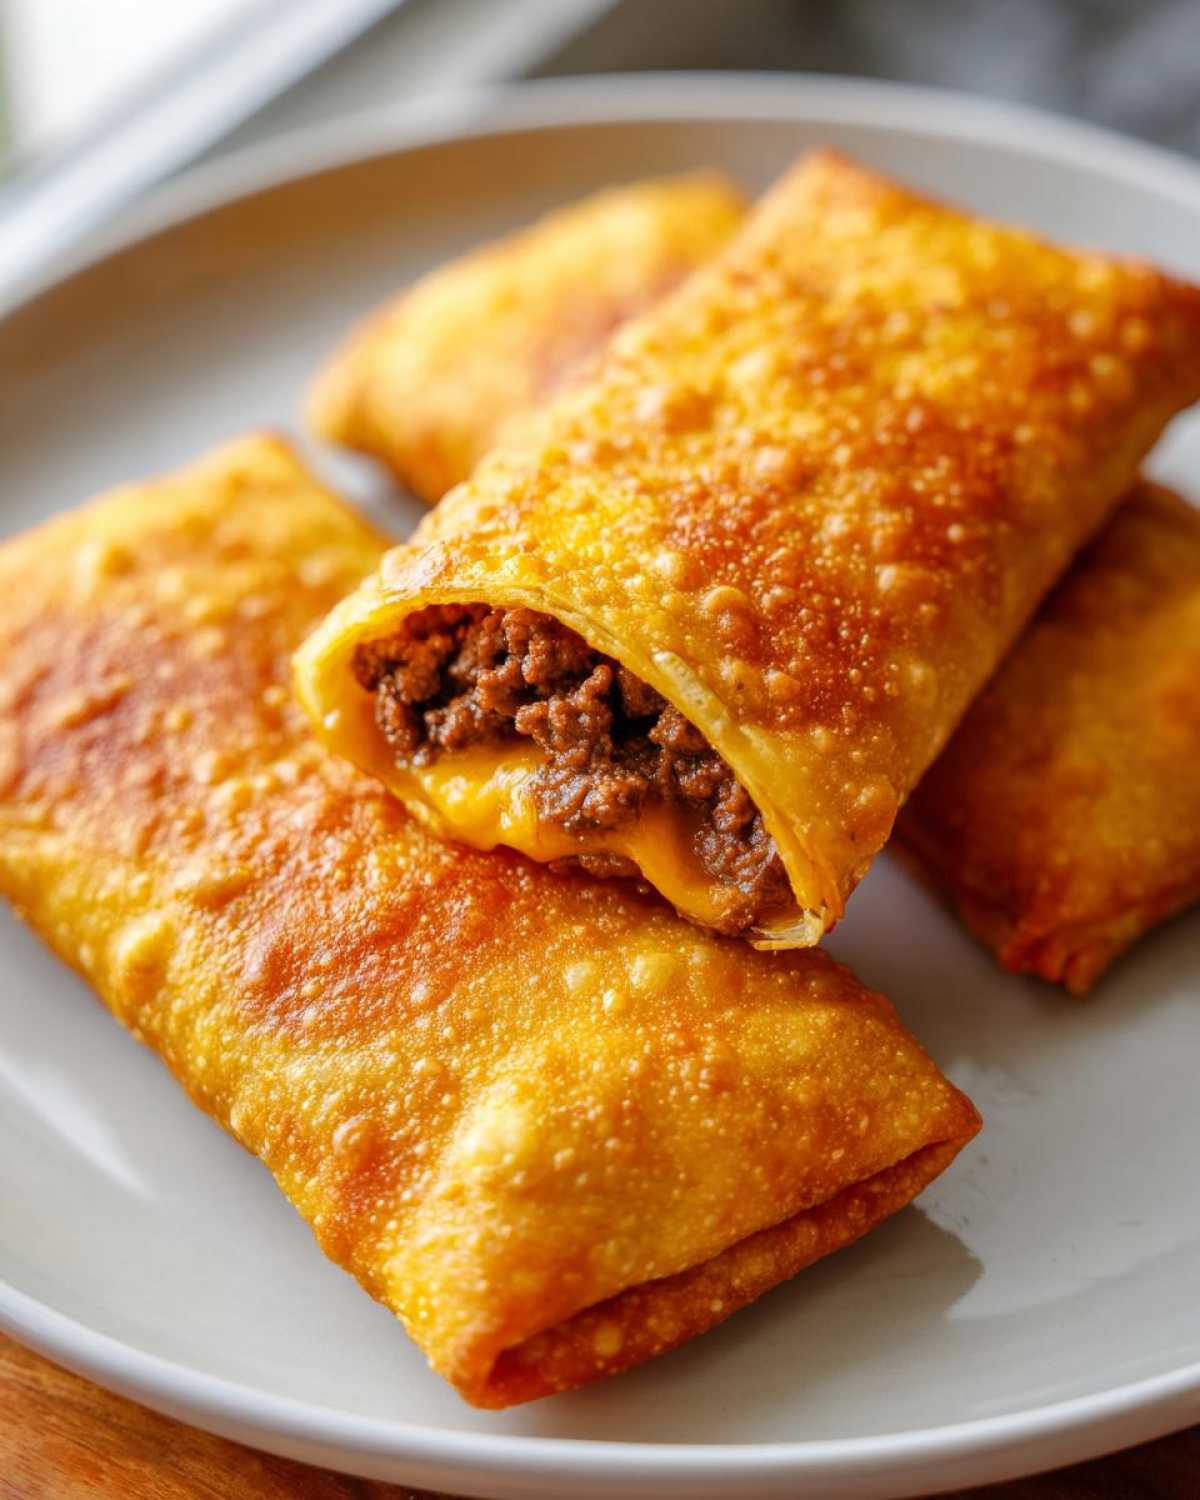
This filling is the heart and soul of our Beef Chimichanga Recipe, so we can’t rush it! We start simple: get that tablespoon of oil hot in a big skillet, then toss in your finely chopped onion. You want them soft and sweet—about three minutes should do the trick. Next comes the ground beef. Break it up really well as it browns. The most important part here is draining off every last drop of excess fat! Seriously, you want the meat savory, not swimming in grease, because wet filling equals a soggy chimichanga shell, and we are aiming for Crispy Chimichangas!
Once it’s drained, toss in your taco seasoning packet and the water. Let that simmer down for five minutes. It smells amazing, right? You want the liquid mostly gone so the seasoning sticks beautifully to the meat. Let it cool a touch before you start assembling; you don’t want cheese melting prematurely. If you want to see more ways to customize the filling, check out my thoughts on the best chimichanga filling variations.
Expert Tip for Perfect Beef Chimichangas Flavor
Here’s my little secret for taking the flavor up a notch from basic ground beef. Before you add the water, right after the seasoning hits the hot meat, crank the heat up just a hair and let the meat ‘toast’ with the spices for about 60 seconds. This is called blooming the spices, and trust me, it wakes up every bit of flavor in that taco mix! It pulls out earthy notes you’d miss if you just dumped the water in immediately. It’s a small step, but it makes these Homemade Chimichangas taste so much more authentic!
Step-by-Step Instructions for Homemade Chimichangas
Now that we have that beautifully seasoned, perfectly spiced beef mixture, it’s time for the assembly! Look, this is where most people accidentally create flavor explosions in their oil because they don’t seal them right. We need compact, tightly packed rolls. Lay your slightly warmed tortilla down flat. Spoon a generous amount of the cooled beef and a good sprinkle of both cheeses near one edge—don’t go all the way to the sides yet!
Next, fold those sides inward, overlapping them slightly right over the filling. Then, you’re going to roll it up tightly, like you mean business, from the bottom edge all the way up. If you made them truly packed, you might secure that final seam with a toothpick—it’s my insurance policy for those super crunchy homemade chimichangas! Just remember to pull it out before you eat!
How to Roll Your Chimichangas Tightly
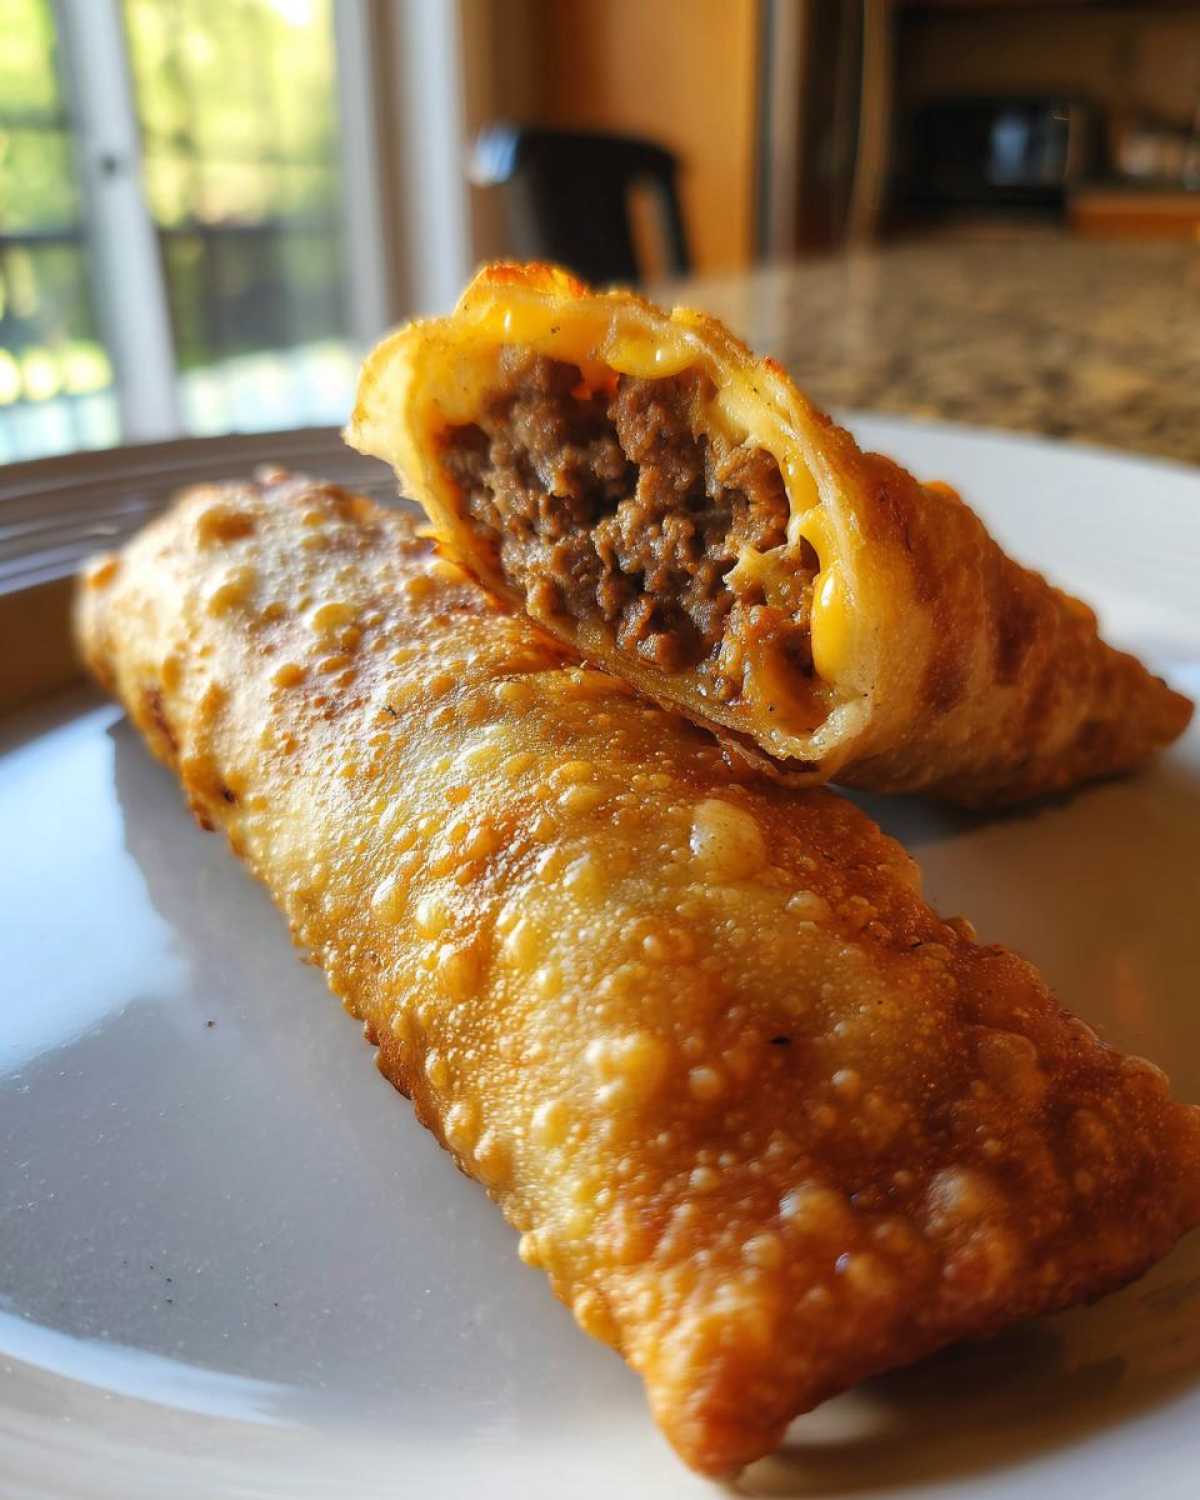
Tucking is everything here! Think of it like wrapping a present, but edible. Fold in the left and right edges first—this traps the filling inside. Then, starting from the bottom edge closest to you, pull that edge up and over the filling, tucking it underneath firmly. Keep that tension high as you roll it forward toward the top edge. A tight roll is the difference between a perfect, golden brown cylinder and a messy blowout in your fryer basket. If the tortilla corners are flapping a bit, just fold them in as you roll; this seals the ends!
Achieving Crispy Chimichangas: Frying vs. Baking vs. Air Frying
This is the big decision, isn’t it? How are you going to turn that soft burrito into a glorious, crunchy masterpiece? If you want that truly authentic, shatteringly crisp texture—the kind you get from a fantastic Fried Burritos Recipe—then deep frying is definitely the way to go. But hey, I know we don’t all want deep-fried every time, so I’ve perfected the oven and air fryer methods too. They give you fantastic browning and crunch, just in a slightly lighter package. No matter which one you choose, the key is making sure those rolls are sealed tight before they hit the heat!
Deep Frying for Ultimate Crispy Chimichangas
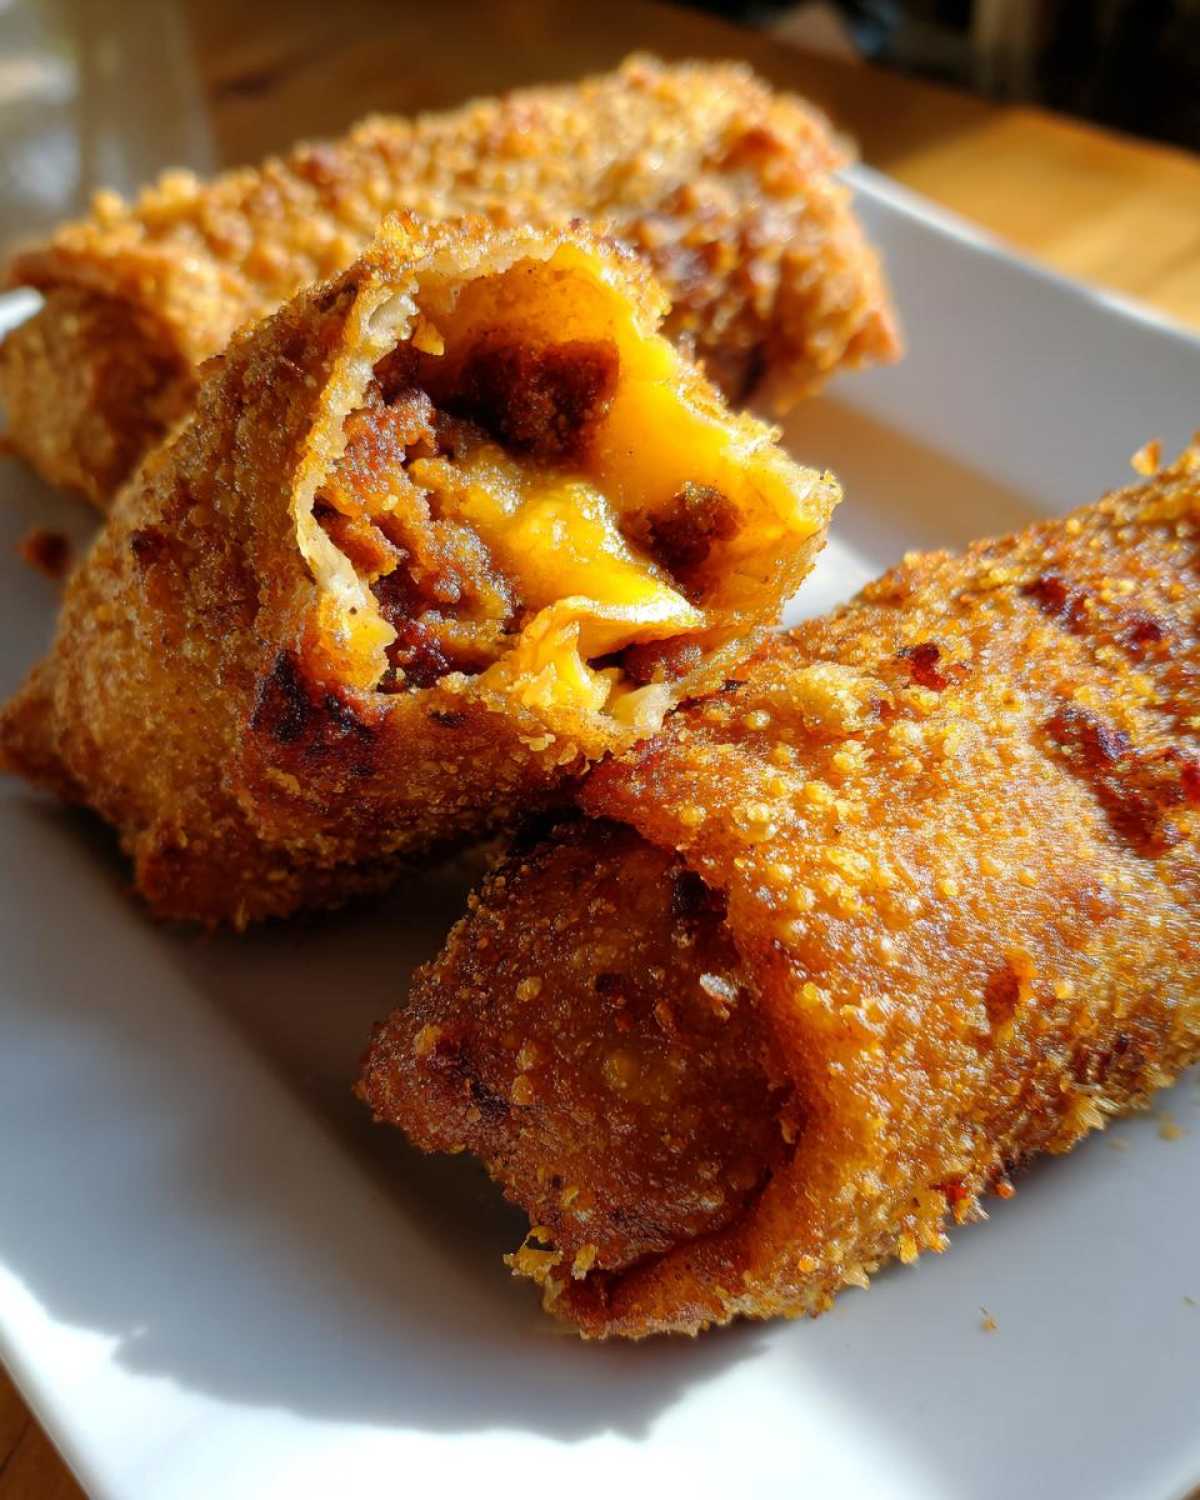
When I want the real deal, I pull out my Dutch oven. You need about two inches of vegetable oil heated up to exactly 350°F (175°C). Use a thermometer, please! Too cold and they soak up oil; too hot and they burn before the inside gets warm. Carefully drop them in seam-side down, just two or three at a time so you don’t drop the oil temperature too much. They cook fast—only about two to three minutes per side until they’re that gorgeous, deep golden brown. Pull them out right into a colander lined with paper towels to drain off every last drop of excess oil. That quick drain is crucial for keeping them crispy! Learning to work with hot oil takes practice, much like getting crispy baked chicken wings perfect.
Making Healthier Baked Chimichangas
If we’re leaning toward a Healthy Chimichanga Recipe, the oven is my pal. Preheat it nice and hot to 400°F (200°C). Before they go in, you need to brush both sides of your rolled chimichangas with oil—don’t skip this or they’ll come out dry and doughy. Lay them out on a parchment-lined baking sheet. They’ll need about 15 to 20 minutes total, but you absolutely must flip them halfway through. This ensures both sides get gorgeously golden and crisp. If you want perfectly consistent results in the oven, checking out tips on quick baked recipes always helps me stay on track!
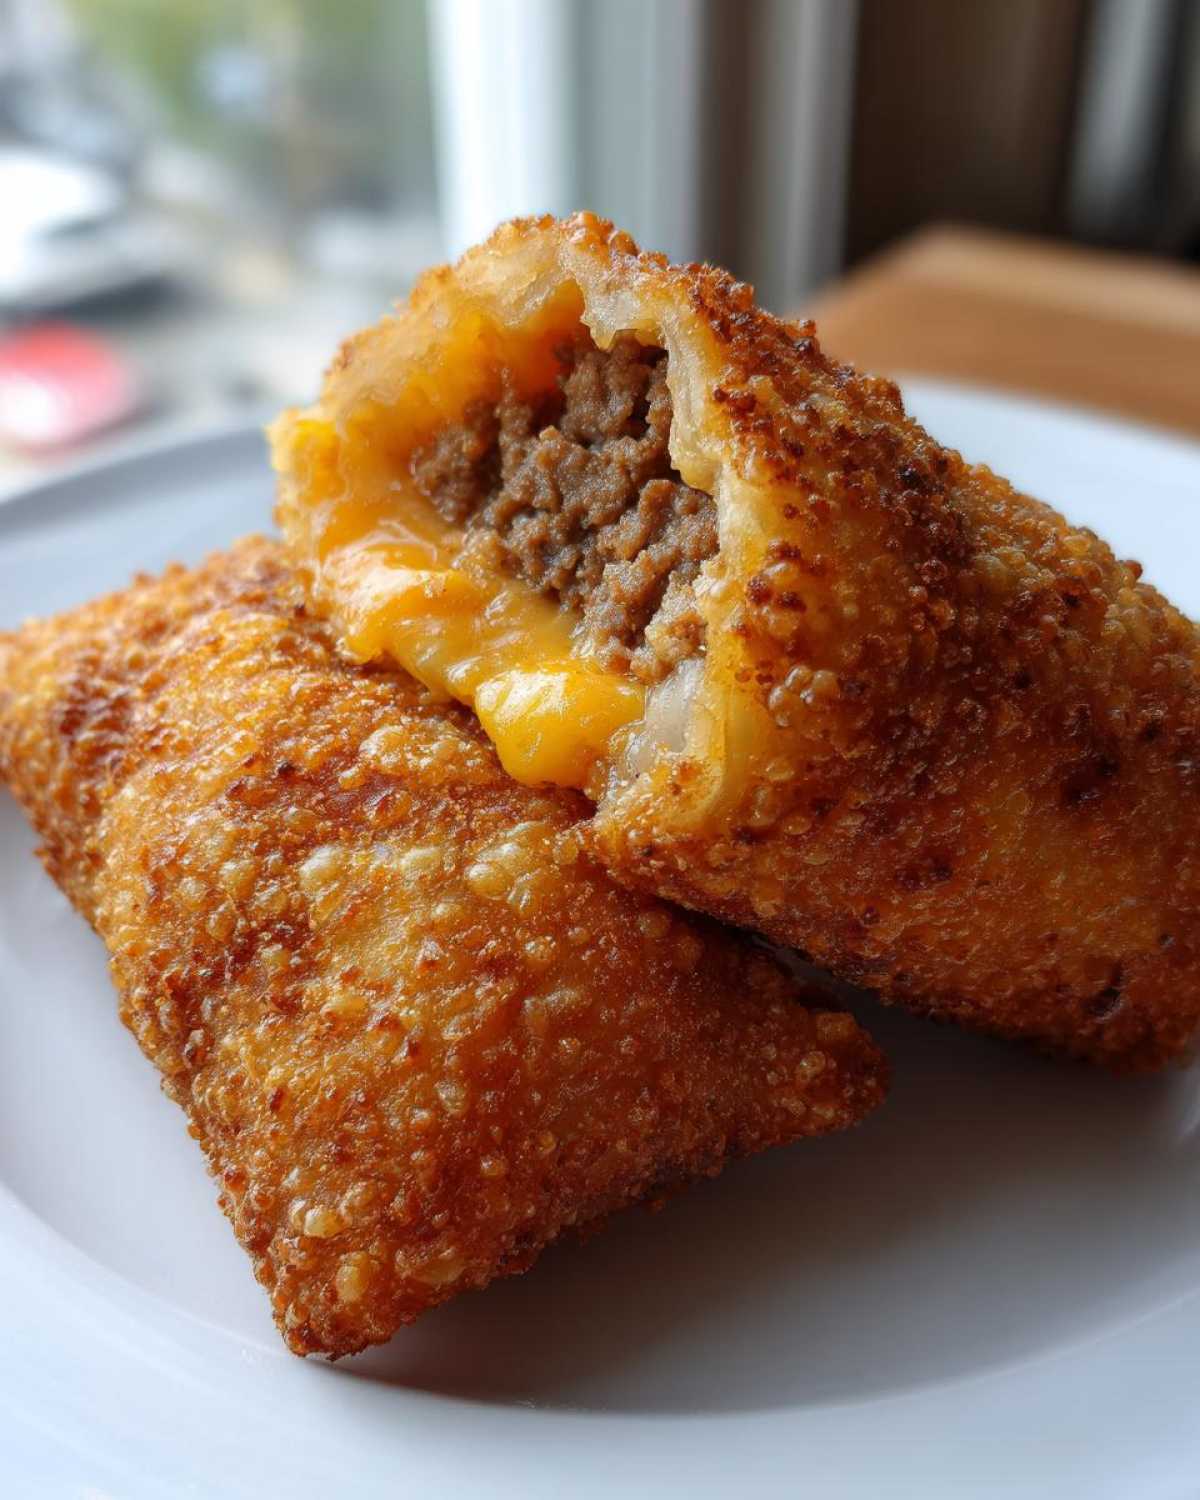
And for the air fryer crowd—yes, it works brilliantly! I usually set mine to 375°F (190°C) and give them a good spray with cooking oil. They usually take about 8 to 10 minutes, and you’ll want to flip them halfway here too. If you’re keen on mastering your air fryer, I’ve put together some general tips after testing it on everything from potatoes to these air fryer baked potato recipes!
Serving Suggestions for Your Tex Mex Dinner Ideas
So, you’ve got your hot, crispy, cheesy Chimichangas coming out of the fryer or oven—now what? A chimichanga deserves to be dressed up! These aren’t just great on their own; they really shine when you pile on the fresh, cool toppings. I’m huge on texture contrast, so you need something creamy and something sharp to cut through all that richness, right?
My go-to serving setup involves a big platter with little bowls of toppings so everyone can build their perfect plate. You absolutely need guacamole—freshly mashed is best, even if you just use salt, lime, and maybe a tiny bit of finely minced garlic. Sour cream or Mexican crema is a must for cooling everything down.
For the acidity that every great Tex-Mex meal needs, I usually make a simple pico de gallo fresh. But if you want something a little heartier on the side? Don’t bother with boring rice! I often whip up my quick stovetop cheesy rice recipe—it’s nearly as fast as the chimichangas themselves and works perfectly as a creamy base layer if you decide to smother your chimichanga in chili or queso.
If you need something green that isn’t guacamole, a simple shredded lettuce tossed with a splash of lime juice and a pinch of cumin provides that perfect crunch. Seriously, don’t overthink the sides; your chimichanga is the star, it just needs the right supporting cast!
Make Ahead Freezer Meals: Preparing Chimichangas in Advance
I want to let you in on something that has saved my weeknights more times than I can count: these Chimichangas are absolutely phenomenal as a make-ahead freezer meal! This is where having a giant batch ready to go pays off huge. You want to prepare the chimichangas completely, completely uncooked, right after you roll them up—that’s the key! We are freezing them *before* they hit the oil or the oven.
Once you have them tightly rolled, take each one and wrap it individually first in plastic wrap, making sure it’s sealed up securely. Then, wrap that plastic-wrapped beauty in a layer of aluminum foil. The double wrapping is important to prevent freezer burn, especially because they are flour-based. Once they are wrapped up, toss them all into a heavy-duty freezer bag. I usually label the bag with the date, although frankly, they never last long enough for me to worry about three-month freshness! You can find more amazing tips for meal prepping on my general make ahead freezer meals post.
The best part about this method is that you don’t even need to thaw them. Yes, you heard me right! When you’re ready for dinner, just pull out the number you need, unwrap them completely from the plastic and foil, and cook them just like you planned to cook fresh ones. If you’re frying, just let the oil come up to temperature and be mindful that they’ll need a little extra time to cook through since they are starting frozen. For the oven or air fryer, just add about three to five extra minutes to the listed cooking time on the recipe card. It’s honestly the perfect way to always have restaurant-quality Mexican Comfort Food ready in minutes!
Frequently Asked Questions About Chimichangas
I always get so many questions when people make these for the first time, usually about swapping out ingredients or keeping them hot while the whole batch finishes cooking. Don’t stress if you need clarity! I’ve gathered up the most common things my friends and readers always ask me about making the perfect batch of these savory pockets.
Can I use chicken instead of beef in my Chimichanga Recipe?
Oh, absolutely! That’s one of the joys of this recipe—it’s so adaptable. If you have leftover rotisserie chicken, just shred it up and toss it with half the taco seasoning and about a quarter cup of water to moisten it up before you mix in the cheese. That’s an instant Chicken Chimichanga Recipe! Even if you’re starting fresh, quickly dicing some chicken breast and sautéing it until cooked through before seasoning works just as well as the ground beef. It gives you a completely different, but equally delicious, flavor profile.
What is the best way to keep Chimichangas warm without losing crispness?
This is the eternal struggle when cooking for a crowd! If you managed to get a batch golden brown but still have more to cook, you can absolutely keep the first batch warm without them getting soggy. Don’t stack them! Stacked chimichangas steam each other instantly. Instead, set up a wire cooling rack inside a shallow baking sheet. Pop that tray into your oven on the absolute lowest setting it can manage—around 200°F is perfect. This gentle warming keeps them hot while the airflow around the wire rack prevents condensation from ruining that gorgeous, hard-earned crispness you worked so hard for!
How cheesy is the filling? Can I add more cheese?
I always aim for maximum melt factor, so the base recipe gives you a nice ratio, but if you are aiming for truly Cheesy Chimichangas, I say go for it! We use two cups total for eight chimichangas, but if you feel like doubling that cheese to three cups, go ahead. The trick is to make sure the cheese is evenly distributed with the beef mixture before you roll. If you use too much cheese on the edges, it might ooze out entirely during cooking. If you’re looking for an air fryer version specifically focusing on chicken and cheese, I did a whole deep dive on those results!
My tortillas crack when I roll them. What am I doing wrong?
That is so frustrating, especially if you’re using store-bought ones that have been sitting on the counter too long! The flour tortillas get brittle if they dry out. Before you even start assembly, you need to warm them slightly. You can microwave a stack of 4 or 5 wrapped in a damp paper towel for about 20 seconds—just enough to make them pliable, not hot. This elasticity lets them stretch a bit as you roll them tightly. If you want to see exactly what I mean, I’ve got some great visual examples in my guide on easy air fryer chicken cheese chimichangas!
Nutritional Estimates for Beef Chimichangas
Okay, let’s talk numbers. I know we aren’t exactly making salad here, bless the cheesy, crispy hearts of these beauties! But it’s good to have a general idea of what’s in our favorite Mexican Comfort Food, especially since cooking method makes such a huge difference. The estimates below are based on having one chimichanga, assuming you used the classic deep-frying method because that’s usually the highest count.
Just remember, this is my best guess based on standard ingredient amounts, and you know how it goes—if you use extra sour cream on top or pack in way more cheese, those numbers are going up! Also, if you follow my tips for the Baked Chimichangas, you can shave quite a bit off that fat and calorie count, which is motivating! For more detailed breakdowns, you can always check out my dedicated nutrition guide here.
- Serving Size: 1 chimichanga (fried)
- Calories: Approximately 450
- Fat: Around 25g (This is why the air fryer is my friend sometimes!)
- Saturated Fat: Roughly 10g
- Carbohydrates: About 35g
- Protein: A solid 24g—so they are filling!
- Sugar: Usually very low, about 3g
- Sodium: Around 550mg (Taco seasoning can add up, keep that in mind!)
If you use the air fryer or bake these instead of frying, you’ll see the fat content drop significantly, making them a much lighter option for a quick meal. Either way, they deliver incredible flavor for what they are—a fantastic, satisfying meal!
Share Your Crispy Chimichangas Experience
Now that you’ve got the secrets to making these Ultimate Crispy Beef Chimichangas—whether you went with the deep fryer or perfected the baking technique—I really, really want to hear about them!
Did you try the air fryer method for the first time? Did you sneak in extra cheese for truly Cheesy Chimichangas? Tell me everything! These recipes live and breathe because folks like you try them out in your own kitchens and send back feedback. Your experience helps everyone else who wants to make the perfect Tex-Mex night happen. Rating the recipe stars tells me if I nailed that crunch factor, and reading your notes helps me keep this recipe sharp and authentic.
If you snap a picture of your gorgeous golden rolls—maybe topped with some amazing salsa or served alongside my cheesy rice—please tag me! You can always get in touch with any questions or just to tell me how much your family loved them over on my contact page. Happy cooking, and enjoy every single crunchy bite!
PrintUltimate Crispy Beef Chimichangas (Baked or Fried)
Make satisfying, crispy beef chimichangas at home. This recipe provides instructions for both deep-frying for maximum crispness or baking/air frying for a lighter option.
- Prep Time: 15 min
- Cook Time: 20 min
- Total Time: 35 min
- Yield: 8 servings
- Category: Dinner
- Method: Frying, Baking, or Air Frying
- Cuisine: Tex-Mex
- Diet: Low Fat
Ingredients
- 1 tablespoon vegetable oil
- 1 pound ground beef
- 1 small onion, chopped
- 1 packet (1 ounce) taco seasoning mix
- 1/2 cup water
- 8 medium flour tortillas (burrito size)
- 1 cup shredded Monterey Jack cheese
- 1 cup shredded cheddar cheese
- Vegetable oil for frying (if not baking/air frying)
Instructions
- Heat 1 tablespoon of vegetable oil in a large skillet over medium heat. Add the chopped onion and cook until soft, about 3 minutes.
- Add the ground beef to the skillet. Cook, breaking it up with a spoon, until browned. Drain any excess fat.
- Stir in the taco seasoning mix and water. Bring to a simmer and cook for 5 minutes, allowing the liquid to reduce and the meat to absorb the flavor. Remove from heat and let cool slightly.
- Lay a tortilla flat. Place about 1/4 cup of the seasoned beef mixture and a sprinkle of both cheeses near one edge.
- Fold the sides of the tortilla inward over the filling. Roll the tortilla tightly from the bottom edge up to seal the filling inside, creating a compact burrito shape. Secure with a toothpick if necessary. Repeat with remaining filling and tortillas.
- **For Frying:** Heat 2 inches of vegetable oil in a deep pot or Dutch oven to 350°F (175°C). Carefully place chimichangas seam-side down into the hot oil, two at a time. Fry for 2-3 minutes per side until golden brown and crispy. Remove and drain on paper towels.
- **For Baking:** Preheat your oven to 400°F (200°C). Lightly brush both sides of the rolled chimichangas with oil. Place on a baking sheet lined with parchment paper. Bake for 15-20 minutes, flipping halfway through, until golden and crisp.
- **For Air Frying:** Preheat air fryer to 375°F (190°C). Lightly spray chimichangas with cooking spray. Air fry for 8-10 minutes, flipping halfway, until golden brown.
- Remove any toothpicks before serving hot with your favorite toppings like salsa, sour cream, or guacamole.
Notes
- For make-ahead freezer meals, wrap uncooked, tightly rolled chimichangas individually in plastic wrap and then foil. Freeze for up to 3 months. Bake or air fry directly from frozen, adding a few extra minutes to the cooking time.
- Use cooked shredded chicken instead of beef for a quick chicken variation.
- If you prefer a softer tortilla, briefly warm the tortillas in the microwave before rolling to prevent cracking.
Nutrition
- Serving Size: 1 chimichanga (fried)
- Calories: 450
- Sugar: 3
- Sodium: 550
- Fat: 25
- Saturated Fat: 10
- Unsaturated Fat: 15
- Trans Fat: 0
- Carbohydrates: 35
- Fiber: 2
- Protein: 24
- Cholesterol: 65