

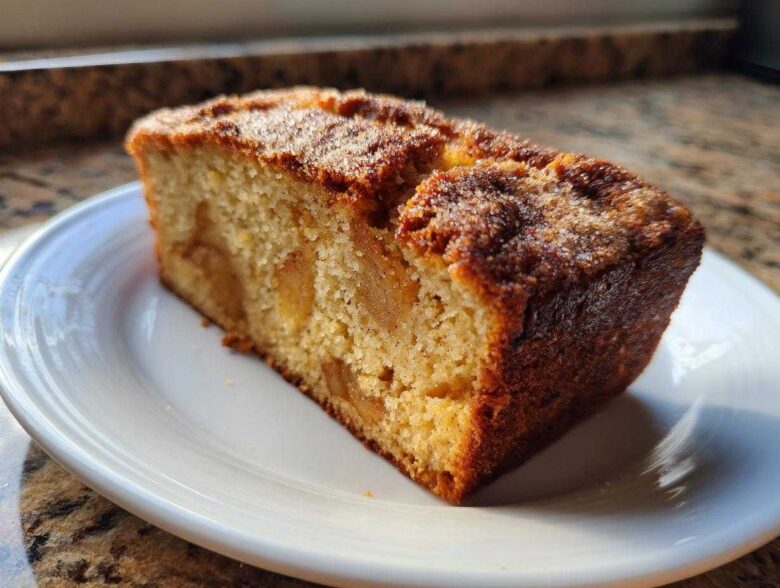
Oh, stop what you are doing right now! If you need that absolutely show-stopping, unbelievably moist cake for the holidays—or let’s be honest, just because it’s Tuesday—I have the recipe you’ve been searching for. Forget dry, crumbly messes; my family’s recipe for Jewish apple cake is legendary for staying tender days after it comes out of the oven. I’ve fiddled with it over the years, but I always come back to this exact method because, wow, does it deliver on moisture and spice! You might also check out my recipe for chai tea infused scones if you’re looking for more spiced goodness.
This isn’t some fussy layer cake either. It comes together quickly, usually while I’m drinking my morning coffee, and it’s become our absolute go-to for Rosh Hashanah gatherings. Trust me when I say this is the most reliable, melt-in-your-mouth recipe you’ll ever try. I promise you’re going to love baking this!
Why This Classic Jewish Apple Cake Recipe Works (Moisture Secrets)
Everyone asks me, “How do you get your Jewish apple cake so incredibly moist? Mine always turns out a little dry!” Honestly, the secret is twofold: we skip the butter and we use orange juice like it’s going out of style. Butter is lovely, but for a cake that needs to stay tender for days, you need oil.
Vegetable oil coats the flour proteins differently than solid fat does, which is why you get that beautiful, almost springy texture instead of something heavy. Then there’s the orange juice. It adds that bright, necessary zing but also keeps the crumb wonderfully soft. It beats just using milk any day of the week! This combination is key to what makes this recipe truly dependable, unlike other recipes that rely on applesauce or sour cream.
Achieving the Perfect Tender Apples in Your Jewish Apple Cake
For the apples, you want to reach for something firm. My favorite hands-down are Granny Smiths—they hold their shape perfectly during that long bake time. If you use something too soft, they just dissolve into sweet mush, and we want nice chunks of tender apple in every bite!
You need about three cups, peeled, cored, and diced. I try to keep the dice on the smaller side, maybe half an inch, so they distribute evenly throughout the batter. If you dice them too big, you risk huge air pockets when you pull the cake out later. Just be sure you toss them gently when you fold them in, not beat them! If you want a quick fix for apple cravings while this bakes, you absolutely must check out my instant apple cinnamon mug cake recipe.
Gathering Ingredients for Your Moist Apple Cake Recipe
Okay, let’s get our shopping list sorted! Baking is a science, especially when we’re aiming for that legendary moist texture, so please try to measure everything exactly. Don’t eyeball the dry stuff! This cake doesn’t have a ton of fancy additions, which is why those core ingredients have to be perfect.
I always make sure I have these items assembled before I even turn on the oven. It just makes the whole assembly process so much smoother, and trust me, you do *not* want to be hunting for the vanilla while your oil and sugar are creamed together!
Here is exactly what you need to gather for a perfect 12-serving cake:
- 3 cups all-purpose flour
- 2 teaspoons baking soda
- 1 teaspoon salt
- 2 teaspoons ground cinnamon (for the main batter)
- 1 cup vegetable oil
- 2 cups granulated sugar
- 4 large eggs
- 1 cup orange juice (freshly squeezed is best, but bottled works)
- 1 teaspoon vanilla extract
- 3 cups peeled, cored, and diced apples (about 6 medium apples—remember Granny Smiths!)
- 1/2 cup brown sugar (this is for the flavor burst in the middle!)
- 1 teaspoon ground cinnamon (this extra bit is just for the topping layer)
See? Pretty straightforward stuff, right? The magic happens when they combine! If you’re looking for something to enjoy alongside this amazing cake, I highly recommend prepping some warm cinnamon baked apples to snack on while you wait for the main event to cool.
Step-by-Step Instructions for the Best Jewish Apple Cake
Alright, time to put on our aprons! Getting this Jewish apple cake right is all about following the order, especially when we start mixing. First things first, get that oven cranked up to 350 degrees F right away. I use a 10-inch tube pan, or sometimes a trusty Bundt pan, lined with just a little butter and flour—no need for actual parchment unless you really want the extra security.
We handle the dry stuff and the wet stuff entirely separately first. In one bowl, whisk together the flour, baking soda, the first teaspoon of cinnamon we listed, and the salt. Don’t just dump them together; whisking makes sure those leaveners are perfectly distributed, which is important for an even rise.
Now for the wet side! In a big bowl—and I mean big, because we’re adding a lot of volume—whisk the oil and granulated sugar until they look happy together. Then, beat in the eggs, one by one. Make sure that first egg is fully incorporated before letting the next one jump in. Finish this wet batch by stirring in the orange juice and vanilla extract until it’s smooth as silk. I love sipping on a warm cinnamon almond coffee while I do this part!
Mixing the Batter for a Fluffy Jewish Apple Cake
This is where you need to listen to me closely: Do. Not. Overmix. Once you start adding those dry ingredients to the wet, mix it on low speed, only until you see that last streak of flour disappear. Seriously, stop the mixer! Overmixing develops gluten, and gluten means tough cake. We want tender apples nestled in a fluffy cloud, not a bread loaf!
Once the main batter is combined, take a wooden spoon or spatula, and gently fold in those diced apples. I mean *gently*. You’re just tucking them in, promising them a lovely spot in the final cake.
Creating the Cinnamon Apple Cake Topping Layer
This is our secret trick for creating that fantastic flavor pocket in the middle! Pour about half of the apple-studded batter straight into your prepared pan. Keep the rest in the bowl for a second.
In a tiny little bowl (a ramekin works perfectly), mix your brown sugar with the remaining teaspoon of cinnamon. Sprinkle this mixture evenly right over that layer of batter already in the pan. It will sink a little, which is exactly what we want. Then, just carefully pour the rest of the batter on top of that sweet cinnamon layer. The cake bakes up with this lovely, spiced surprise right in the middle!
Baking and Resting Times for Your Jewish Apple Cake
The air should be smelling incredible by now! It’s time to get this beautiful Jewish apple cake into the heat. Remember, you preheated your oven to 350 degrees F, so slide that pan right onto the center rack. Depending on whether you used a deep tube pan or a wider Bundt, the baking time can vary a bit, but you are generally looking at 60 to 75 minutes.
Now, I know we all want to peek constantly, but try to wait at least 60 minutes before you even think about testing it. When the time is up, you need to perform the skewer test! Don’t rely solely on sight, even though lightly browned edges are a good sign. Take a wooden skewer—or a long piece of dry spaghetti, if you’re like me and lose all your skewers—and stick it right into the center of the cake.
If it comes out clean, perfect! If you get wet batter sticking to it, give it another 5 to 8 minutes and check again. We are looking for just a few moist crumbs clinging to the wood, which tells us the apples are soft but the interior is baked through.
Once you confirm it’s done, pull it out, but don’t unmold it yet! This is a very important patience step. These cakes are full of fruit and oil, so they are structurally softer when piping hot. Let that pan sit on a wire rack for a full 15 minutes. That little bit of cooling time allows the cake walls to firm up just enough.
After the 15 minutes are up, put your cooling rack over the top of the pan, hold them both tight together, and flip! Invert that cake carefully onto the rack. Leave it upside down for a bit until it cools completely before slicing. It’s tough waiting, I know, but slicing hot apple cakes just leads to sad, broken wedges. For the world’s best cinnamon reward, check out some apple cinnamon rolls while you wait for this to cool!
Tips for Making a Perfect Cinnamon Apple Cake
If you’ve followed everything so far, you are already on track for the most famous fall bake in our family! But since you asked for tips to nail that gorgeous crust and ensure this magnificent Jewish apple cake slides out of the pan in one piece, let me share a few things I’ve learned the hard way. Don’t you dare skip the grease job on the pan!
The biggest worry people have is sticking. Because this cake is dense with fruit and oil, it can cling to the sides something awful if you aren’t careful during preparation. I swear by using a heavy-duty, non-stick Bundt pan rather than a standard tube pan if I can help it. The fluted sides look just lovely when you turn it out, and the shape handles the dense batter so well.
When you grease the pan, don’t just use a quick spray of cooking oil. You need something sturdy! I use soft butter or shortening and make sure I use a pastry brush to get into every single little crevice and corner. Then, I dust it heavily with flour. If you can see any shiny spots where the pan metal is showing through, go back and coat it again! That sugar and cinnamon topping we layer in the middle needs a clear path to slide right off onto the cooling rack.
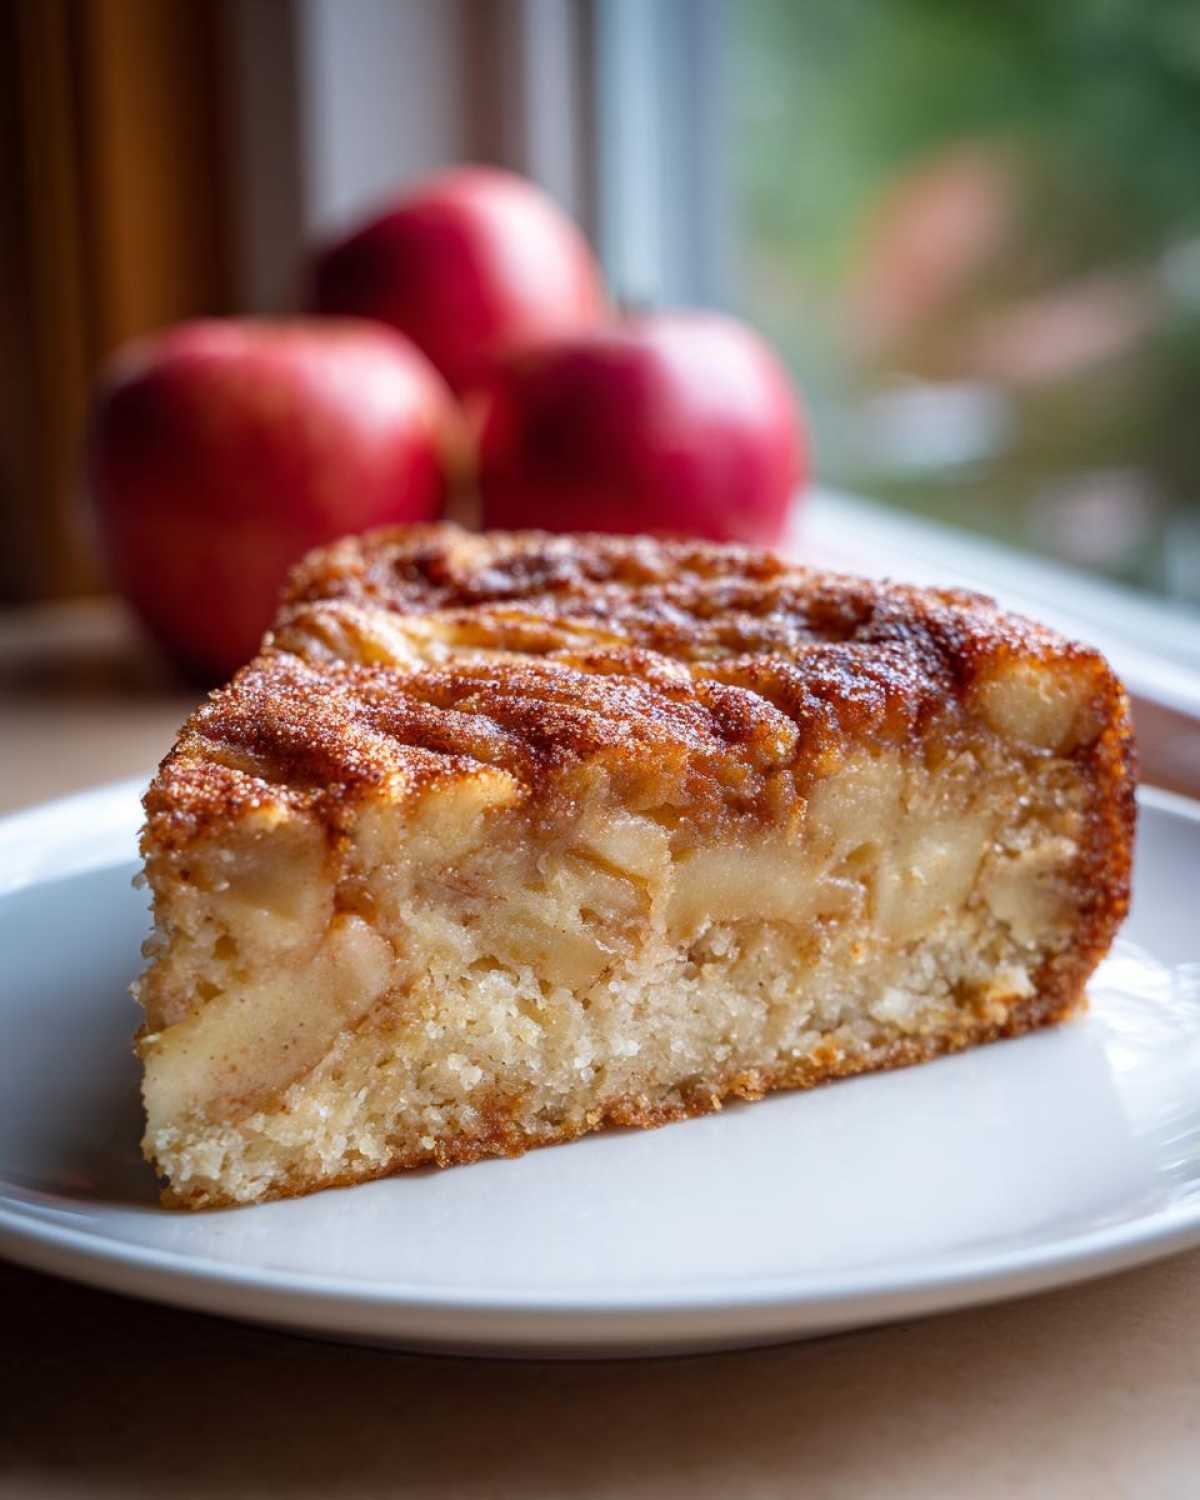
And let’s talk about that glorious topping! That simple mix of brown sugar and that second teaspoon of cinnamon is what gives you that beautiful, slightly caramelized crust around the edges and throughout that middle layer. It doesn’t burn; instead, it melts down just enough to create a shiny, sweet sheath over the cake. If you love those warm spice flavors, you might want to whip up a batch of spiced orange biscotti to dip into your coffee alongside this amazing cake!
Finally, while this cake is wonderful plain, some people like a little something extra. If you want a glaze, keep it light! A simple drizzle of orange juice mixed with powdered sugar works, but honestly, this cinnamon apple cake is so flavorful and moist on its own that I rarely bother. If you’re already on a roll, though, and feeling the autumn energy, you could try pairing it with my recipe for hot cinnamon apple cider donuts for a full fruit and spice immersion!
Variations and Serving Suggestions for Jewish Apple Cake
Okay, we’ve made the cake—now we get to talk about how to switch things up! This core recipe for the Jewish apple cake is wonderfully flexible. It’s perfect as is, dusted with a little icing sugar if you want, but sometimes you need a different shape or maybe you’re serving it outside of a formal holiday meal.
If you’re short on time or just need individual portions, this batter works beautifully as a loaf cake! Just divide the batter evenly between two 9×5 inch loaf pans. Be warned, though: since the loaves are deeply shaped, they will need less time in the oven—about 15 to 20 minutes less than the Bundt or tube pan. Keep that skewer handy!
When it comes to serving, I usually just slice it thick and serve it room temperature alongside a hot cup of coffee. It needs no adornment! But if you feel like dressing it up a bit, a very thin glaze made from powdered sugar and a splash of orange juice is lovely. Just remember, you want just enough to add shine, not so much that it hides that beautiful crust we worked so hard to seal in!
For a fun brunch spread, maybe alongside some sparkling apple cider sangria, this cake is a superstar. It’s sweet enough to feel special but robust enough to handle a hearty breakfast plate.
Making a Dairy Free Apple Cake Options
This is one of my favorite things about this recipe, and it’s a big reason why it sticks around in rotation! If you’ve got guests who keep kosher or follow a dairy-free diet for any reason, you don’t have to tweak a single thing here. That’s right—this recipe is naturally dairy free!
We use oil instead of butter, and the liquid is orange juice instead of milk or buttermilk. That means zero butter concerns, zero milk worries, and you can feel totally confident serving this at any gathering, holiday or otherwise, where you might need a reliably dairy-free dessert. It’s just pure apple goodness, no substitutes needed!
Storage and Make-Ahead for This Apple Cake for Holidays
One of the greatest qualities of this cake—besides how absolutely wonderful it tastes when fresh—is that it actually gets *better* the next day! You can absolutely make this cake a day ahead of your holiday celebration, and I highly encourage you to do so. It gives those spices time to really marry up with the brown sugar and apples.
Since this fantastic cake is made with oil and fruit, it actually stores really well at room temperature. Just make sure it’s completely cooled first, otherwise, you are just trapping steam inside, which leads to sogginess! Once it’s totally cool, just cover it loosely with foil or place it in an airtight container.
Leave it on your counter, and it should stay perfectly moist and delicious for a solid three to four days. That’s fantastic news when you’re juggling cooking for Rosh Hashanah or any big autumn event. No last-minute baking required!
Now, what about freezing? Yes, you totally can freeze this! If you need to make it a week or two out, wrap the cooled cake tightly. I like to do a double wrap: first with plastic wrap, making sure to squeeze out all the air, and then wrap it again in a layer of aluminum foil. This protects it from freezer burn.
When you pull it out to thaw, just leave it wrapped on the counter until it comes to room temperature, then unwrap it. It will taste almost exactly like it just came out of the oven. If you’re looking for something sweet to have on hand for when you need a quick energy boost later in the season, you might want to check out my recipe for no-bake gingerbread energy balls!
Frequently Asked Questions About Traditional Jewish Baking
I know you might have a few lingering questions about this recipe or baking in general! It’s only natural when you’re attempting a family classic. I’ve gathered the questions I get most often—especially around the holidays—so we can get you baking with total confidence. We want every slice of your cake to be perfect!
Is this truly a Rosh Hashanah dessert?
Absolutely! Apples and honey are central to the celebration of Rosh Hashanah, symbolizing the hope for a sweet new year. While there are many wonderful symbolic foods, this cake has absolutely earned its spot as a gorgeous, crowd-pleasing Rosh Hashanah dessert. It’s moist, it’s sweet, and it uses apples, so it hits all the right notes for the celebration. It’s a beloved tradition in many homes, and now it can be in yours too!
What is the best way to slice a Bundt Pan Apple Cake?
This is a great question because these cakes are so dense and filled with fruit, they can sometimes tear if you use a standard knife while they are still warm. Since we waited for it to cool completely (patience pays off!), you should use a long, thin, sharp knife. Think of the kind you use for slicing bread, but thinner, if possible. Hold the knife straight down and use a smooth, gentle sawing motion rather than just pressing down hard. If you’re worried about the crust cracking, you can actually run your knife under very hot water for a minute, dry it quickly, and then slice. The slight heat helps it glide through that spongy crumb and the cinnamon layer without smashing it!
Can I use applesauce instead of just fruit in this Jewish Apple Cake?
While applesauce is famous in other cake recipes for adding moisture, for this specific recipe, I really stick to the diced, fresh apples. Why? Because the **Jewish apple cake** relies on those distinct chunks of apple providing texture and pockets of moisture release during the bake. Applesauce tends to blend right into the batter and can make the cake feel a little too gummy since we are already using a higher amount of oil. If you want extra moisture, stick to using freshly squeezed orange juice, but keep those beautiful apple pieces intact!
Why does this cake stay moist so much longer than others?
It’s all down to the fats and the liquid balance! Remember how we talked about using vegetable oil instead of butter? Oil is 100% fat, while butter is mostly fat mixed with water and milk solids. That extra water in butter can sometimes encourage drying out as it evaporates. The oil coats everything perfectly and stays liquid at room temperature, which keeps the final product incredibly soft for days. Pair that with the natural liquid from the oranges, and you have built-in moisture insurance. You can read more about other aspects of traditional Jewish baking techniques on my site!
Nutritional Snapshot of This Classic Apple Cake
Everyone wants to enjoy a slice of this amazing cake without feeling guilty, right? So, I went ahead and put together the estimated nutritional breakdown for a standard slice of this cake. Just be warned—because every apple is a different size and we all measure things slightly differently in our kitchens, these numbers are just a helpful guide, not a guarantee, okay?
This data is based on dividing the recipe into 12 generous slices, which is how my family usually cuts it when it comes out of the tube pan. It’s important to remember that while it has sugar, the complexity from the fruit and oil helps balance things out compared to a simple white cake.
If you are looking for other delicious ways to sneak some healthy flavor into your day, you should really take a look at my recipe for healthy pumpkin spice granola bars!
Here is the estimated breakdown:
- Serving Size: 1 slice
- Calories: 350
- Sugar: 35g
- Sodium: 250mg
- Fat: 17g
- Saturated Fat: 2g
- Unsaturated Fat: 15g
- Trans Fat: 0g
- Carbohydrates: 48g
- Fiber: 2g
- Protein: 4g
- Cholesterol: 75mg
Enjoying a single slice of this moist apple cake recipe really feels like a treat, and knowing the ingredients that go into it, I feel great about sharing it at any gathering!
PrintClassic Moist Jewish Apple Cake
A reliable recipe for a moist, flavorful Jewish Apple Cake, perfect for holidays or autumn enjoyment, featuring tender apples and a sweet crust.
- Prep Time: 25 min
- Cook Time: 70 min
- Total Time: 95 min
- Yield: 12 servings
- Category: Dessert
- Method: Baking
- Cuisine: Jewish
- Diet: Vegetarian
Ingredients
- 3 cups all-purpose flour
- 2 teaspoons baking soda
- 1 teaspoon salt
- 2 teaspoons ground cinnamon
- 1 cup vegetable oil
- 2 cups granulated sugar
- 4 large eggs
- 1 cup orange juice
- 1 teaspoon vanilla extract
- 3 cups peeled, cored, and diced apples (about 6 medium apples)
- 1/2 cup brown sugar
- 1 teaspoon ground cinnamon (for topping)
Instructions
- Preheat your oven to 350 degrees F. Grease and flour a 10-inch tube pan or bundt pan.
- In a medium bowl, whisk together the flour, baking soda, 1 teaspoon of cinnamon, and salt. Set aside.
- In a large bowl, whisk the vegetable oil and granulated sugar until combined. Beat in the eggs one at a time, mixing well after each addition.
- Stir in the orange juice and vanilla extract until the batter is smooth.
- Gradually add the dry ingredients to the wet ingredients, mixing on low speed until just combined. Do not overmix.
- Gently fold in the diced apples using a spatula.
- Pour half of the batter into the prepared pan.
- In a small bowl, mix the brown sugar and the remaining 1 teaspoon of cinnamon. Sprinkle this mixture evenly over the batter in the pan.
- Pour the remaining batter over the cinnamon-sugar layer.
- Bake for 60 to 75 minutes, or until a wooden skewer inserted into the center comes out clean.
- Let the cake cool in the pan on a wire rack for 15 minutes.
- Invert the cake onto the rack and allow it to cool completely before slicing.
Notes
- Use firm, slightly tart apples like Granny Smith for the best texture after baking.
- For a dairy-free cake, this recipe naturally contains no dairy ingredients.
- If you prefer a loaf cake, divide the batter between two 9×5 inch loaf pans and reduce the baking time by about 15-20 minutes.
Nutrition
- Serving Size: 1 slice
- Calories: 350
- Sugar: 35
- Sodium: 250
- Fat: 17
- Saturated Fat: 2
- Unsaturated Fat: 15
- Trans Fat: 0
- Carbohydrates: 48
- Fiber: 2
- Protein: 4
- Cholesterol: 75