

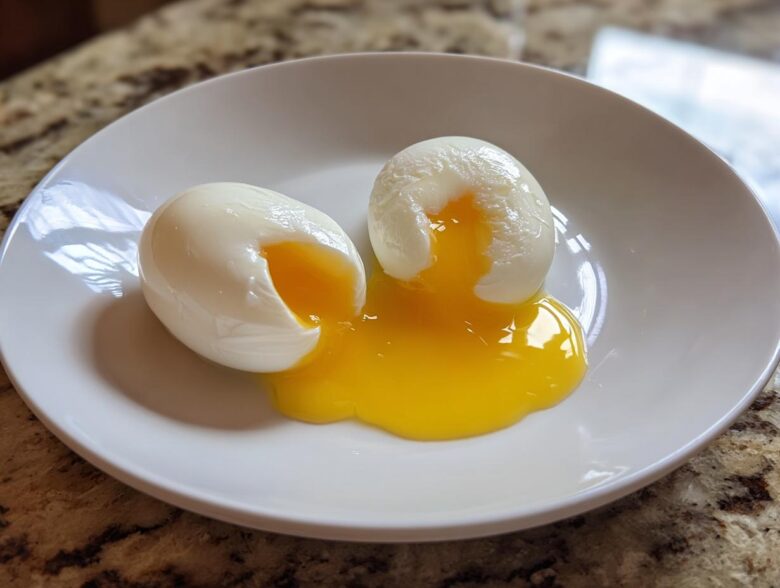
Oh, friends, can we just talk about breakfast for a second? There is truly nothing that says ‘fancy weekend treat’ quite like a beautifully cooked egg, right? But if you’re like I was for years, the mere thought of trying to make **poached eggs** sends you straight into a panic. You picture those sad, wispy clouds of egg white floating away in the water, leaving you with basically nothing but sadness and wasted yolks.
Forget that mess! Seriously, stop scrolling through all those confusing tips. I spent way too long messing around with swirls and fancy gadgets, but I finally cracked the code. This isn’t some complicated restaurant trick; this is the simplest, nearly foolproof method I have for achieving those **perfect poached eggs**—firm whites that hold their shape and yolks that just ooze perfectly when you slice into them. Trust me, once you nail this, you’ll be pouring these creamy beauties over everything. Check out the great breakfast ideas we have if you need inspiration!
Why This Method Creates Perfect Poached Eggs
So, what’s the big difference between my method and the ones that end up looking like scrambled soup? It boils down to three things we have total control over: using fresh eggs, getting the water temperature just right, and that tiny bit of vinegar. This is hands-down the **best way to poach eggs** if you want those beautiful, tight shapes, which is what gives you those coveted **silky poached eggs**.
We aren’t doing any crazy stirring or swirling once the egg is in, which cuts down on all the mess people worry about. The goal is to let the ingredients do the heavy lifting so you just get that perfect, clean crescent shape every single time. It’s surprisingly simple!
The Critical Role of Egg Freshness in Poached Eggs
Listen up, because this is the most important **poached egg cooking tip** I can give you: use the freshest eggs you can find. When an egg is super fresh, the white—that watery stuff surrounding the yolk—is actually thick and gelatinous. This thick albumen (*that’s the technical word, fancy huh?*) stays tightly wrapped around the yolk when it hits the hot water.
Older eggs? The white is thinner and separates way too easily in the poaching liquid, which is where all those messy strands come from. If you can, check the date on the carton, or better yet, grab some from a local farmer! It makes a world of difference.
Gathering Your Ingredients for Perfect Poached Eggs
Okay, the great news is that this spectacular breakfast doesn’t require stocking up on specialty gear or exotic ingredients. Seriously, you probably have everything you need right now for **easy poached egg recipe** success! Precision here really helps build the trust we need, so pull out your measuring spoons for this part.
For two servings, here is exactly what you’ll need. We are talking simple building blocks for what will soon become a masterpiece for your healthy breakfast!
- 2 large eggs (The size matters for timing, so stick with large!)
- 4 cups water (This gives the egg plenty of space to move.)
- 1 tablespoon white vinegar (Don’t skip this yet, I promise to explain!)
- A tiny pinch of salt, if you want (But it’s totally optional.)
If you peek back at the ingredient list, you see we are sticking strictly to the essentials here. Using quality, fresh ingredients are the first step to mastering **how to poach eggs** successfully.
Ingredient Notes and Substitutions for Poached Eggs
Let’s talk about that vinegar for a hot second. White vinegar might sound weird when you’re making something that’s supposed to taste amazing, but it’s crucial for technique—it helps the egg white proteins rapidly tighten up when they hit the heat. That means we get a nice, tight little package instead of a watery mess you have to chase around the pan. It’s one of the best **simple egg hacks**!
Now, if you are absolutely against adding any vinegar (maybe you’re serving them to someone super sensitive), you can skip it. Just know you *have* to rely even more heavily on super fresh eggs and getting that water temperature spot-on. Also, if you have five extra minutes before you start, letting your eggs sit on the counter for 15 minutes to come closer to room temperature helps them cook more evenly. Nobody wants a hot white shell around a super cold yolk!
Step-by-Step Instructions: How to Poach Eggs
Alright, here is where the magic actually happens! Don’t stress about this part; it’s more about water temperature than fancy hand movements. We are using the four cups of water and one tablespoon of white vinegar setup we talked about before. This section is the core of mastering **how to poach eggs** without any drama. You’ll want to get your medium saucepan set up and gently bring that water up to heat right now.
Remember, we are aiming for a gentle simmer. That means small bubbles clinging to the bottom of the pan, not a full-on rolling boil that could tear the delicate egg apart. If it’s boiling hard, turn the heat down instantly. This patient pre-heating is essential for success!
Preparing the Water and Cracking the Egg
Before the water even gets hot, have your first egg ready. This is non-negotiable for me: crack your egg gently into a small bowl or, if you have one, a clean ramekin. Why do I insist on this? Because sliding a cracked egg directly from the shell into the water is a recipe for disaster nine times out of ten. The ramekin lets you gently load the egg right where you need it.
Once the water is gently simmering, take a spoon and give the water a good, brisk stir to create a slow, gentle whirlpool right in the center of the pan. That swirling just helps the egg white wrap around itself as it enters—a surefire technique for the **best way to poach eggs** and keep things looking neat. Now, slide that egg from the ramekin right into the center of that whirlpool we just made.
Cooking Time for Runny Yolk Eggs
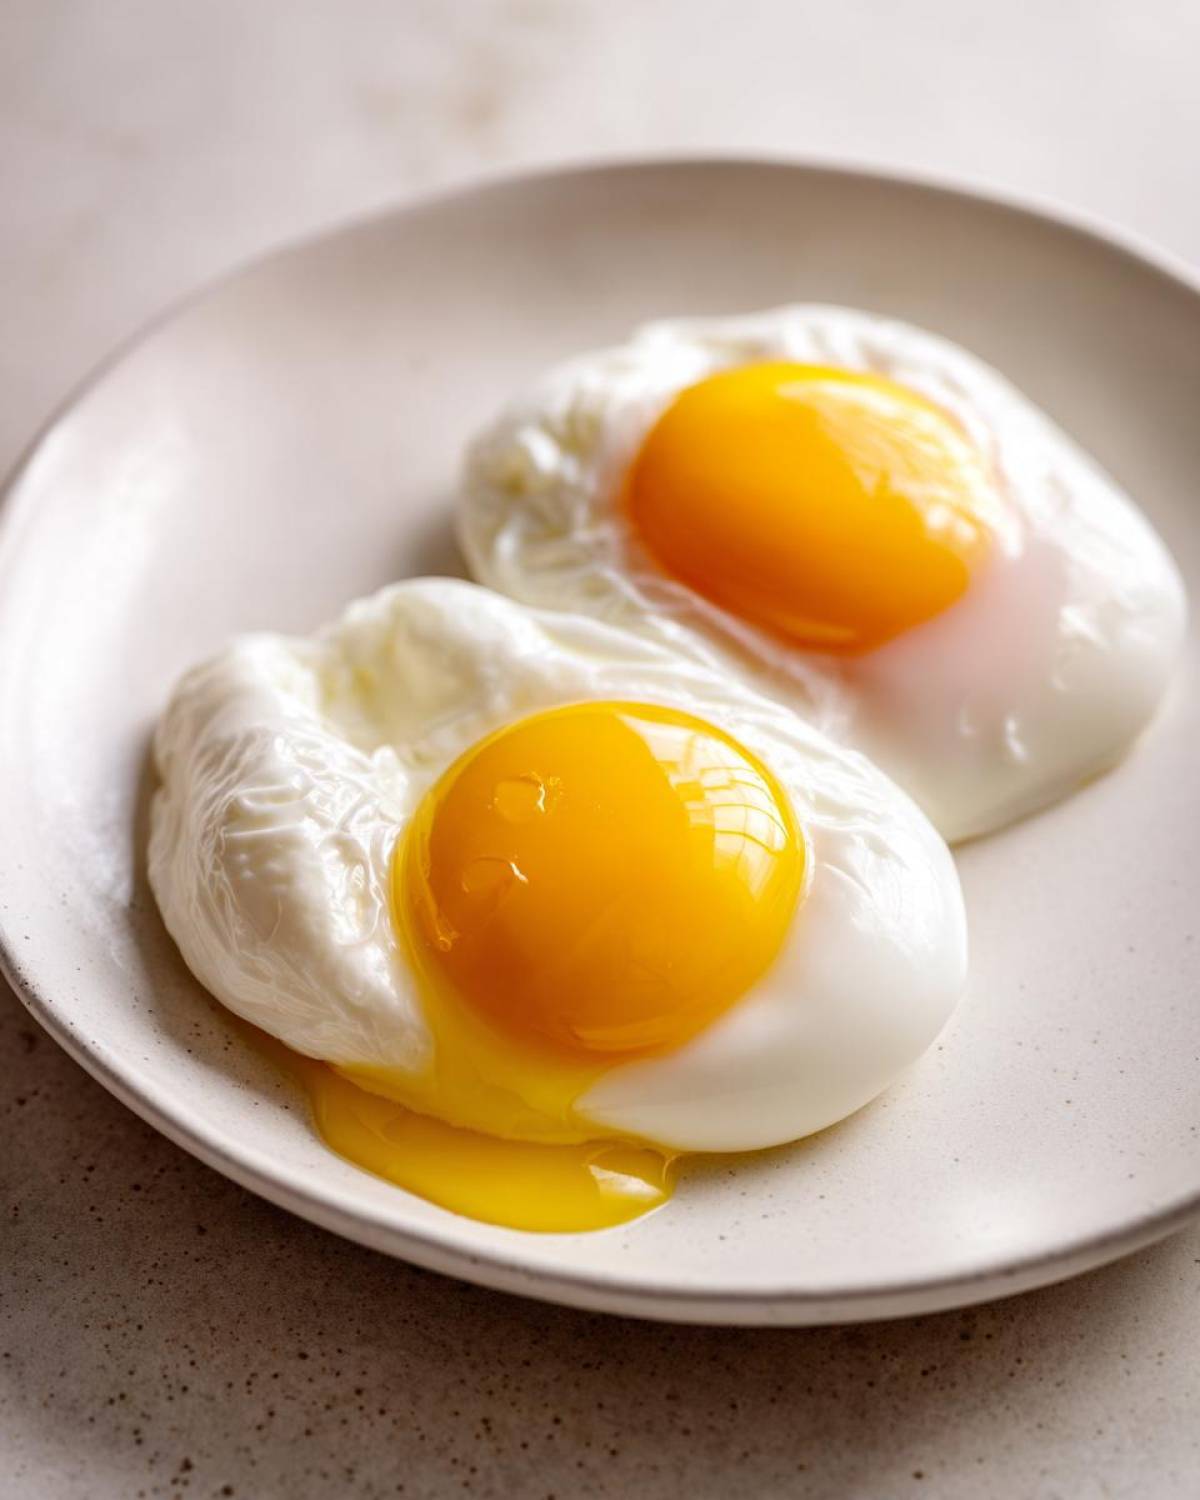
Once the egg is in, stop stirring! Seriously, hands off until it’s time to pull it out. The swirling you did at the beginning is all the help the egg needs to start holding its shape. We are aiming for those glorious **runny yolk eggs**, so you need a timer. For a perfect, gooey center, aim for three minutes exactly. If you like it just a tiny bit less liquidy, go four minutes.
If you are using a very large pan with lots of water, it might take an extra 30 seconds compared to my smaller setups. I always lift mine with a slotted spoon right around the 3:30 mark, give it a little wiggle check, and if the white is firm all over but the yolk still wobbles happily, it’s done! I find it extremely helpful to check out this blog if I need quick inspiration while my water heats up!
Tips for Poaching Eggs Without Mess
You know how I keep harping on about avoiding those weird, stringy bits of egg white? Well, that’s what we’re tackling here—how to execute **poaching eggs without mess**, making your breakfast cleanup almost as easy as the cooking itself. It only takes one extra tiny step before you even turn on the stove, and it’s a game-changer for guaranteed clean presentation!
The absolute best advice I have for keeping things tidy is to pre-strain your eggs. Remember how I told you older eggs have thinner whites? Those thinner whites are the primary source of chaos in the water. So, right after you crack your egg into that little ramekin or small bowl, gently tilt the bowl over a fine-mesh sieve (like the one you use for dusting powdered sugar). You’ll see the very thin, watery part of the white drip right through. That extra watery runoff is what causes all the mess!
The thicker, gel-like white, which is what you want, stays behind cradling that perfect yolk. Then, you can gently slide that perfectly contained egg into your prepared hot water. It minimizes the floating bits dramatically. Here are a few other things that really help keep things streamlined for your **simple egg hacks**:
- One at a Time, Always: Don’t try to be ambitious and drop in three or four eggs at once. When you crowd the pan, the water temperature drops too fast, and the eggs just smash into each other. Stick to poaching one or maybe two maximum if your pan is very large, and always refresh the water if it looks murky between batches.
- Don’t Skip the Vinegar (If You Can Help It!): Seriously, that tablespoon of vinegar mentioned in the recipe is your friend here. It acts almost like a net, tightening the proteins in the white almost instantly, locking everything in place before the water has a chance to pull it every which way.
- Use the Slotted Spoon Gently: When you lift your finished egg out, don’t aggressively shake the spoon under the water. Gently lift it to the surface, let it rest there for just a second so the initial drip falls back into the pan, and then go straight to your paper towel. Blot softly on the bottom to wick away surface water, not squeeze the egg! You don’t want to crush those **runny yolk eggs** right before serving them over your morning toast.
Make-Ahead and Reheating for Poached Eggs
I know what you’re thinking: “This sounds great, but I can’t exactly poach eggs individually every single morning before work!” You are absolutely right. Life is busy, especially when you’re juggling a big weekend brunch or just trying to get everyone fed during the week. The beautiful thing is, you can absolutely prepare these ahead of time! This is one of my favorite expert secrets because it takes all the pressure off the morning rush.
The trick is to stop the cooking process right before they are technically “done.” So, if you usually cook them for 3.5 minutes for that perfect runny yolk, you’ll only cook them for about 3 minutes total. Pull them out when the white is set but still feels a little soft—almost like a very delicate Jell-O consistency.
The Ice Bath Trick: As soon as that short cooking window is up, immediately transfer those slightly underdone eggs into a big bowl of ice water. Yes, ice water! This shocking cold stops the residual heat from cooking the yolk any further. They will chill down quickly, and you can keep them submerged in the cold water in the fridge for up to two days looking pristine.
When you are ready to serve up some **healthy breakfast eggs**, heating them back up is just as easy. You don’t want to shock them again with boiling water because that can break down the whites and make them tough. Instead, get your water quite hot, but keep it *off* the direct heat source so it’s steaming but definitely not simmering—we’re talking maybe 170°F or so, just before boiling. Gently place your cold eggs into that hot water for about 45 seconds to a minute. That quick, gentle warm-up is all they need to reach that perfect, ready-to-serve temperature and texture. It’s totally foolproof for making ahead!
Serving Suggestions for Your Poached Eggs
Now that you’ve mastered the delicate art of making **perfect poached eggs**, it feels criminal to eat them alone, doesn’t it? Honestly, once you see that yolk flow out, you’ll want to show them off! This perfect texture is the key to elevating any simple meal into something that looks like it came straight from a fancy **brunch recipes with poached eggs** menu. They are so versatile; they honestly deserve more credit than they get.
My favorite thing right now is keeping it super simple. We spent all this time getting the technique right, so let’s celebrate that perfectly tender white and flowing center!
Classic Brunch Recipes with Poached Eggs
When I’m feeling ambitious on a Sunday, I pull out the Hollandaise, but even that classic plate of Eggs Benedict is only as good as the egg beneath it, right? If you use my technique, you’re already halfway to the best Eggs Benedict your friends have ever had. The classic version requires Canadian bacon and an English muffin, of course.
And don’t forget Eggs Florentine! That’s where we swap the meat for some lightly sautéed spinach. Either way, the runny yolk acts as the most divine sauce you could ask for. But as I said before, you don’t need to go all out for an amazing meal. Sometimes, all you need is a thick slice of toasted sourdough and a pat of good butter…
Speaking of simple, if you want the absolute easiest application for your perfectly cooked eggs, you have to check out how I use them in my poached eggs for avocado toast guide. It’s the ultimate quick, satisfying, and healthy-ish breakfast!
Alternative Poaching Methods: Oven and Microwave Hacks
Now, I have to be honest with you all: while the stovetop simmering method detailed above is truly the best way to master **master egg poaching** and get that gorgeous, classic shape, I know sometimes life needs a shortcut. We all end up in moments where we just can’t babysit a saucier of water, right? So, because I want you to succeed in getting those runny centers regardless of what kitchen disaster you’re trying to avoid, I’ll share the other popular methods.
Think of these as emergency options, okay? They work in a pinch, but they won’t give you that perfect, traditional, elegant shape that our main recipe delivers. They are great **simple egg hacks** when you have so many other things going on!
Oven Poached Eggs Tutorial (The Sheet Pan Save)
This is handy if you are cooking breakfast for a big crowd—say, for a holiday brunch. You line a baking dish with foil (for easy cleanup, because we love that!), you add about half an inch of water to the bottom, and then you gently crack your eggs right into the water on the pan. It’s basically baking them in a little water bath!
Pop that pan into a preheated 350°F oven. The baking time is longer, usually around 10 to 15 minutes, depending on how many you have in there and how runny you want that yolk. What you get is a well-set white that looks more firm than shiny, but it’s perfectly cooked and easy to slide right onto your English muffin. It’s a fantastic way to get large batches done!
Microwave Poached Egg Method (The Speedy Option)
If you are in a massive hurry and only need one egg, the microwave is your friend, but you have to be extremely careful! Water splatter happens easily here, so we have to be smart about it. Fill a microwave-safe mug halfway with water and add that essential splash of vinegar—it’s even more important here to help everything set quickly. Gently crack one egg into the water.
Here is the crucial safety step for the **microwave poached egg method**: Stick a toothpick right through the yolk. Yes, really! If you skip this part, the pressurized steam inside the yolk can cause the egg to explode, and trust me, cleaning exploded egg off the inside of your microwave is not my definition of a fun morning. Microwave on medium power for about 30 to 60 seconds. Start low! You want to end up with **soft boiled texture eggs** that you can blot dry and serve immediately. They are definitely not as pretty as the stovetop version, but they get the job done when you need speed!
Frequently Asked Questions About Poaching Eggs
Okay, I know we covered a ton of ground, from the basics of getting your water hot to the fancy make-ahead techniques. But usually, even after the best instructions, a few little nagging questions pop up! That’s totally normal—learning any new kitchen skill, even **how to poach eggs**, takes a little practice. Here are the ones I get asked the most often by people trying to perfect their **runny yolk eggs**.
Can I poach eggs without vinegar?
Yes, you absolutely can! That white vinegar is really there to act as a gentle insurance policy. It helps the protein in the egg white set up super fast when it hits the hot water, which is what keeps the white tightly wrapped around the yolk for that perfect shape. If you skip it, don’t panic! Just make absolutely sure your water is at that perfect, gentle simmer, not boiling, and you rely on super fresh eggs. You might just get a few more wisps, but they’ll still be delicious.
How do I know when my poached egg is done?
This is the make-or-break moment! You need to learn the feel, not just the timer. Once your 3.5 minutes are up, gently scoop one out with your slotted spoon and test it slightly. The outside white should feel completely firm—no squishiness left there at all. Then, gently wiggle the spoon; if the yolk still jiggles underneath that firm white layer, you’ve hit the jackpot for **soft boiled texture eggs**! If there’s no jiggle at all, you went a minute too long, but hey, you still made a perfectly cooked egg!
What is the best pan size for poaching eggs?
If you use one of those big, wide skillets, you end up spreading out your water too thin, which causes two problems: the temperature drops too quickly, and the egg has too far to travel to wrap itself up neatly. I swear by using a smaller, deeper saucepan—one that holds about 4 cups of water comfortably. Having that depth allows the water to hold its heat better and keeps the egg contained in one nice little swirling area, which is fantastic for getting those tidy edges.
Nutritional Snapshot for Healthy Breakfast Eggs
I know some of you are tracking macros or just like knowing what you’re fueling up with, especially when you’re choosing something as wonderful and low-fat as our **healthy breakfast eggs**! Since we aren’t loading these up with bacon or heavy butter like some other brunch items, poached eggs are actually a fantastic, lean source of protein to start your day off right. They really showcase what wholesome food can look like!
Here is a little breakdown based on one large, perfectly cooked egg using our basic recipe. Keep in mind that these are just estimates, of course, because the exact nutrient profile depends on the size and diet of the chicken that laid the egg, right? But it gives you a great baseline!
- Serving Size: 1 egg
- Calories: About 70 kcal
- Protein: 6.3g (Hello, staying full until lunch!)
- Fat: 4.8g (Mostly the good, unsaturated kind!)
- Carbohydrates: Less than 1g
- Sugar: Only 0.6g
- Sodium: Around 71mg
See? It’s almost pure, straightforward goodness! It’s so easy to see why I love serving these up for a quick weeknight dinner sometimes, too. If you’re looking for more ways to incorporate lean protein into your morning routine, you absolutely must check out my guide on more ideas for healthy breakfast eggs. It’s full of ways to enjoy eggs throughout the week!
PrintHow to Poach an Egg Perfectly Every Time
Follow these steps to consistently make poached eggs with set whites and runny yolks using a simple water and vinegar method.
- Prep Time: 2 min
- Cook Time: 5 min
- Total Time: 7 min
- Yield: 2 servings
- Category: Breakfast
- Method: Stovetop Poaching
- Cuisine: General
- Diet: Low Fat
Ingredients
- 2 large eggs
- 4 cups water
- 1 tablespoon white vinegar
- Pinch of salt (optional)
Instructions
- Fill a medium saucepan with 4 cups of water and add 1 tablespoon of white vinegar. Bring the water to a gentle simmer over medium heat. You want small bubbles forming on the bottom, not a rolling boil.
- Crack one egg into a small bowl or ramekin. This makes transferring the egg easier.
- Stir the simmering water gently to create a slow vortex or whirlpool in the center of the pan.
- Carefully slide the cracked egg into the center of the whirlpool. The swirling motion helps gather the white around the yolk.
- Cook the egg for 3 to 4 minutes for a runny yolk, or up to 5 minutes for a slightly firmer yolk. Do not stir while the egg cooks.
- Use a slotted spoon to carefully lift the poached egg out of the water.
- Gently blot the bottom of the egg on a paper towel to remove excess water before serving.
- Repeat the process for the second egg, refreshing the water if necessary.
Notes
- Use the freshest eggs possible; older eggs have thinner whites that spread more easily in the water.
- If you prefer not to use vinegar, you can omit it, but the vinegar helps the egg white coagulate faster.
- For multiple eggs, poach them one or two at a time to maintain water temperature and prevent crowding.
- If you want to make several eggs ahead of time, cook them for about 30 seconds less than desired, plunge them into an ice bath, and then reheat them in hot (not simmering) water just before serving.
Nutrition
- Serving Size: 1 egg
- Calories: 70
- Sugar: 0.6
- Sodium: 71
- Fat: 4.8
- Saturated Fat: 1.6
- Unsaturated Fat: 3.2
- Trans Fat: 0
- Carbohydrates: 0.6
- Fiber: 0
- Protein: 6.3
- Cholesterol: 186