

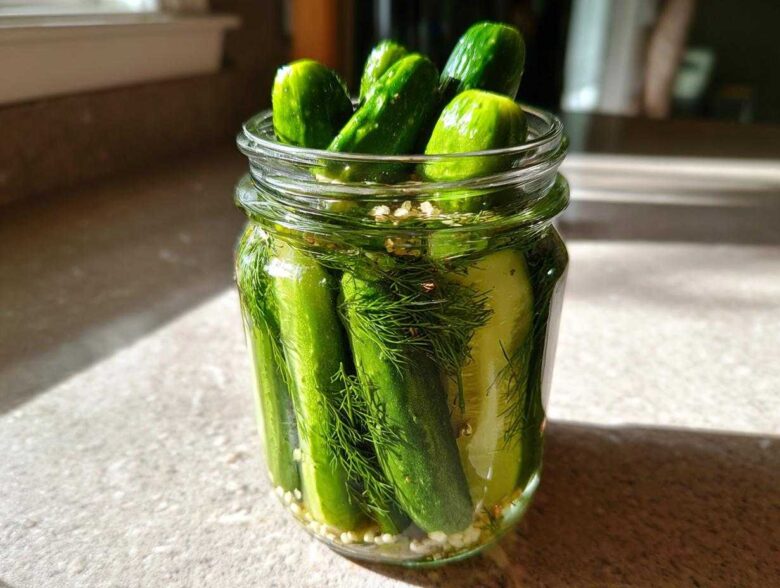
Oh my goodness, have you seen the beautiful Kirby cucumbers at the market lately? They practically scream, “Pickle me!” I am here today to share the recipe that completely changed my snack game—we are making Ultra-Crispy Garlic Dill Refrigerator Pickles that are actually ready in 24 hours. Forget waiting weeks for fermentation or messing around with hot water canners! Explore more great kitchen stories on my blog. These refrigerator pickles are the easiest preserving you will ever do, and the crunch factor is just unreal.
I love grabbing these straight out of the fridge for an afternoon snack. They’re tangy, packed with fresh garlic flavor, and so much better than anything store-bought. Trust me, once you try this quick pickling method, you’ll never look back!
Why You Will Love These Ultra-Crispy Refrigerator Pickles
Seriously, why would you buy pickles when you can whip these up in less time than it takes for takeout to arrive? I whip up a pint of these every Sunday, and they are usually demolished by Tuesday. These aren’t just good; they are game-changing. Check out my easy chicken fajita skillet recipe too if you need a quick dinner pairing for them!
- They are unbelievably crunchy! We’re talking genuinely crispy refrigerator pickles that snap instead of squish.
- Speed is the name of the game—they are totally ready to eat in just 24 hours. Hello, 24 hour pickles!
- Zero fuss! This is the ultimate no canning pickles technique; just mix, pour, and wait.
- The flavor is intensely fresh because we use whole garlic cloves and fresh dill right in the jar.
- This quick pickles recipe uses basic pantry staples, so you probably have everything already.
- Perfect for beginners! If you’ve never made homemade pickles before, this is where you start.
Gathering Ingredients for Perfect Refrigerator Pickles
Alright, gathering your supplies is half the fun! When we talk about refrigerator pickles, especially ones that need to stay crunchy, the quality of your cucumbers really matters. Don’t skimp here; fresh equals crunch, always!
Here is exactly what you need for one perfect pint jar. If you’re making a bigger batch, just double or triple this list, but always keep your brine ratio the same.
- Two pounds of pickling cucumbers, like Kirby or Persian. Make sure to trim off those little blossom ends—that’s my biggest secret tip for keeping them firm!
- Four cloves of garlic—and they need to be smashed! I literally just drop the side of my big knife on them to crack ’em open.
- Half a cup of plain white vinegar (it needs to be the standard 5% acidity, nothing fancy).
- One and a half cups of water. Tap water is fine for the brine.
- One tablespoon of kosher salt. No table salt, please; we want clean flavor and less cloudiness in the brine.
- One teaspoon of whole black peppercorns.
- One teaspoon of mustard seeds—these add that classic pickle tang.
- Two nice, leafy sprigs of fresh dill.
Pairing these with my dill potato salad is mandatory for summer picnics, by the way!
Ingredient Notes and Substitution Tips for Refrigerator Pickles
Let’s talk specifics so your pickles shine. First off, why pickling cucumbers? They have thinner skin and denser flesh than your giant garden slicing cucumbers, which means they resist getting mushy in the brine much better. If you can only find standard cucumbers, you have to soak them in ice water first, which we will cover later!
Now, for the dill—fresh is so much better, honestly. It gives that bright, almost citrusy herbal note. If you absolutely must use dried dill, swap those two gorgeous sprigs out for just half a teaspoon of dried dill seed. It won’t have the same vibrant flavor, but it still works in a pinch. Remember, these are fresh cucumber pickles, so keeping things as fresh as possible is the key to success!
The Quick Pickling Method: How to Make Refrigerator Pickles
Okay, this is where the magic happens, and I need you to pay close attention because this method is what sets us apart from sad, floppy pickles! The absolute best part about these is that we are skipping the whole hot water bath canning process. We are making no canning pickles, which means speed and ease for us!
Grab your cleanest pint jar—a Mason jar works great—because it’s time to layer up the flavor. Before we dive in, remember you can find tons of tips on my easy preserving for beginners guide if you’re feeling nervous! But honestly, this recipe is fool-proof.
Preparing Cucumbers and Aromatics for Your Refrigerator Pickles
First things first: prep those cucumbers. You want to trim off both the stem end and the blossom end. I know, I know, it feels wasteful, but those ends can sometimes have enzymes that make your pickles go soft faster. Slice those cukes into spears or rounds—I like rounds for snacks!
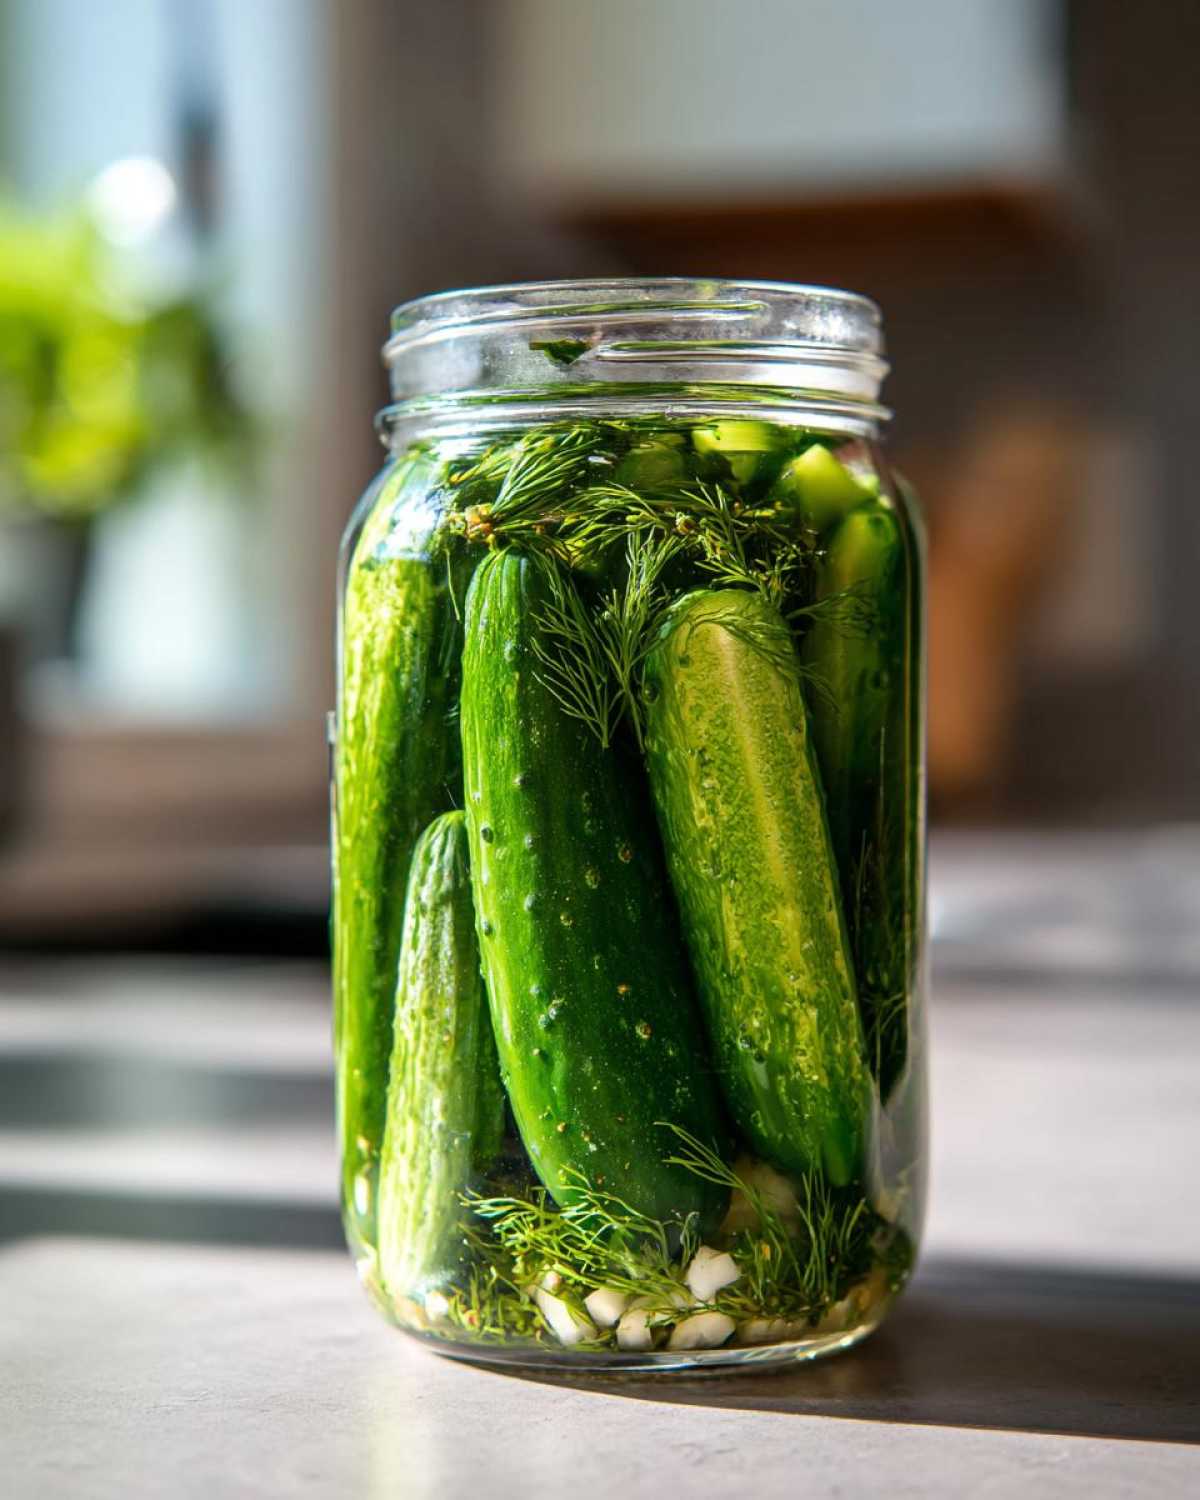
Now, we pack the jar. Get those smashed garlic cloves, the peppercorns, the mustard seeds, and the fresh dill right into the bottom. Then, really stuff those cucumbers on top. You want them packed in there snugly! A tight pack means the brine gets forced into every crevice, guaranteeing maximum flavor infusion in your refrigerator pickles.
Creating the Perfect Refrigerator Pickle Brine
This brine sounds simple, right? Salt, vinegar, water. But the heating process is key. Toss your salt, water, and vinegar into a little saucepan. You need to heat this mixture just enough to dissolve all that salt. I mean it—stir until you see zero graininess at the bottom. Here’s the technical bit: you are NOT trying to boil the vinegar for long. Boiling vinegar too much just reduces its pickling strength, which we don’t want! Heat it gently until the salt dissolves, then pull it straight off the heat immediately.
Cooling and Storing Your 24 Hour Pickles
Once the salt is gone, let that brine hang out for about five minutes to cool slightly—we don’t want to cook our fresh garlic! Then, pour that warm brine right over your packed cucumbers until they are fully covered, leaving just a tiny bit of space at the top.
Seal that jar tightly, but here’s the third secret to crunch: let the jar sit on the counter to cool down to room temperature for about an hour. Putting hot liquid straight into the cold fridge can sometimes shock the cucumbers. After that hour, into the refrigerator they go! That’s it! In 24 hours, you’ve got delicious, tangy, crunchy 24 hour pickles.
Achieving Maximum Crunch in Your Refrigerator Pickles
Okay, let’s talk serious crunch because that’s why everyone makes these refrigerator pickles, right? We want that snap! My grandmother used to say that a soft pickle was just a sad, watery cucumber waiting for the compost bin. We aren’t doing soft around here!
I mentioned trimming the blossom end earlier, and that’s step one for firming them up, but the real heavy hitter is the ice bath. If you are worried for even a second that your cucumbers aren’t up to the task, do this step—you won’t regret it.
Before you even wash them, make a big bowl of ice water. We’re talking ice cubes filling up half the bowl. Slice your cucumbers into spears or chips, and then totally submerge them in that ice bath. You want them chilling out there, getting super cold, for at least 30 minutes, maybe even up to an hour if you have the time. This extreme cold shocks the cucumber cells.
When the cells get that sudden cold bath, they firm right up. It’s like waking them up with a splash of cold water so they tighten up their structure before they ever meet the brine. This simple trick creates a barrier and helps them hold onto their firmness while they soak up all that garlicky dill flavor.
Don’t worry about warming them up before you pack them! Pop those icy-cold cucumbers straight into your jar, add your garlic and spices, and immediately pour that warm brine over the top. The initial hot/cold contrast helps lock everything in place. If you follow this, I promise you will have the best crunchy pickles without canning!
You can read more about other methods for achieving that perfect texture in my deep dive on crunchy pickles without canning, but honestly, the ice soak is pure gold for the refrigerator method.
Flavor Variations for Your Homemade Pickles
Once you master the basic garlic dill brine, you realize just how versatile this refrigerator pickle base really is! I get bored easily, so I constantly tinker. Good news is, since we aren’t sealing these jars for long-term storage, it’s super easy to try out a new batch with just a few tweaks. You can totally personalize these homemade pickles for whatever you’re craving!
If you want something with a little kick, all you have to do is throw in some heat. Half a teaspoon of dried red pepper flakes added right into the jar with your mustard seeds gives a fantastic background warmth. If you’re using fresh chilies—like a few slices of jalapeño—just toss those in too! It’s brilliant for spicy sandwiches.
I also sometimes swap out the dill entirely or play with other aromatics. A couple of tiny sprigs of fresh thyme alongside the dill offers an earthier, more sophisticated taste profile. Or, try substituting the peppercorns for coriander seeds if you want a slightly brighter, lemony spice instead of the deep pepper note. My absolute favorite modification is adding a few thin slices of onion to the jar—they get wonderfully tangy and really soak up the brine!
And while we stick to dill for this main recipe, I highly recommend checking out my guide on making bread and butter refrigerator pickles next time you want something totally different!
Making Sweet Refrigerator Pickles Recipe Variations
If sour and salty just aren’t hitting the spot today, turning this into a sweet refrigerator pickles recipe is almost laughably easy. You just need to convert some of that saltiness into sweetness!
The easiest adjustment is in the brine. For this recipe’s volume, I drop the kosher salt down to just half a teaspoon (we still need a little to activate the process), and then I add about two tablespoons of granulated white sugar into the saucepan when dissolving the salt. You can go up to three tablespoons if you really like that syrupy sweetness!
You should also skip the fresh dill for this version, or at least mute it. Instead, add a few thin slices of fresh onion in with the cucumbers, and maybe a half teaspoon of celery seed to the brine mixture. That classic sweet-and-sour profile comes together beautifully, and they are ready in 24 hours just like the savory ones!
Storage and Shelf Life for Fresh Cucumber Pickles
Now that you’ve made these amazing refrigerator pickles, the trick is keeping them as incredible as they are right now! Since we aren’t canning them, they absolutely must stay tucked away in the fridge. They are incredibly easy to store, but you have to remember that this flavor and texture profile is living, breathing food, not shelf-stable stuff.
You’ll notice the absolute peak of their flavor and crunch comes on days two through four. That initial 24-hour waiting period firms them up, but that first week in the cold? That’s when they really hit their stride. The brine has fully permeated the cucumber, and they are perfectly tangy and snappy. Those amazing texture gains start to slightly fade after about seven days, so try to eat them up while they are at their prime!
So, how long will they last safely? If you keep the jar sealed and submerged in the fridge, you can easily get a good two to three weeks out of them. I once pushed it to four weeks, and they were still perfectly safe to eat, but I noticed they had lost maybe half of that beautiful original crispness. It depends on how fresh your cucumbers were to start, honestly.
Make sure you always use a clean fork when pulling out your pickles! Don’t double-dip, or you risk introducing contaminants that could shorten their lifespan. If you find yourself making a huge batch that you can’t finish in two weeks, you might want to explore making small batch pickles next time, or maybe just eat faster! Ha!
Creative Refrigerator Pickle Uses Beyond the Sandwich
Okay, you’ve got your jar of glorious, snappy garlic dill pickles recipe goodness, and you’ve eaten two just standing over the sink (I know you have). But what about the rest of them? They are so much more versatile than just piling them onto a burger, though they are fantastic there! Seriously, these tangy little crunch bombs can elevate almost any lunch or dinner plate.
The acidic pop and the kick from the garlic make them perfect for cutting through richness. Think about creamy, heavy foods—these pickles are their best friend! They are fantastic chopped up finely and folded into tuna salad or even blended right into creamy dips. My favorite trick is chopping some up and adding them to deviled eggs; it gives them a bright, unexpected zing.
If you are building my famous avocado and chickpea salad sandwich, you absolutely must incorporate some chopped pickle spears! It adds texture and that necessary acidic counterpoint to the rich avocado. They are also amazing just diced up and thrown into mac and cheese right before serving—don’t knock it till you try it; it’s honestly revolutionary for leftovers!
For a really simple side dish, chop them up and serve them over rice, or mix them with some sour cream and chives for an instant, amazing topping for baked potatoes. Trust me, exploring all these refrigerator pickle uses will make your fresh batch disappear even faster than you thought possible!
Frequently Asked Questions About Refrigerator Pickles
I know you might have questions swirling around, especially if you’ve had a sad, mushy pickle experience in the past! That’s why I put together this little FAQ section. It’s all about making sure your quick pickles recipe turns out perfectly crunchy every single time. Don’t worry if you’re new to this; making easy refrigerator pickles is truly simple!
If you want to see the full step-by-step guide again, feel free to check out my main post on how to make refrigerator pickles!
Can I use English cucumbers for this quick pickles recipe?
Oh, you totally *can*, but I have to give you the straight talk: English cucumbers tend to be much softer and have thinner skins than the hard, bumpy Kirby or Persian varieties we used here. If you use English cucumbers, you absolutely MUST follow that ice water soak trick I mentioned earlier! Soak those slices in ice water for at least an hour before packing them into the jar. English cukes also tend to release more water into the brine, which can slightly dilute your flavor profile, so you might find you need to add a touch more vinegar next time to keep that tangy refrigerator pickles flavor we love.
What is the best way to ensure crunchy pickles without canning?
If crunch is your mission, we have three non-negotiable steps for these crunchy pickles without canning! First, trim both ends off your cucumbers—that’s a must-do! Second, always, always make sure you slice or spear your cucumbers right before you pack them; don’t let them sit around sliced on the counter. And third, if you are worried at all, do the 30-minute ice water bath! That shock treatment really firms up the cell structure, and it works wonders for creating that snappy bite in your dill refrigerator pickles.
These tips are the key to avoiding the dreaded soft pickle, no canning required! We covered this in more detail in the section on Achieving Maximum Crunch in Your Refrigerator Pickles, but trust me, the ice bath is the game-changer!
Reader Feedback and Next Steps
Alright, now that you’ve got the best refrigerator pickles recipe in your pocket, I absolutely need to hear how they turned out! Did you go for the spears or the coins? Were the 24 hours agonizing waiting for you? Drop a comment down below!
Tell me what you thought of the garlic level, or if you tried any of the flavor tweaks we talked about. Did you add red pepper flakes? Did the ice bath really make a difference for you? I love reading about how you all customize the recipes—it inspires my next batch!
If you made these and they were a massive hit (which I know they will be!), please consider leaving a star rating right under the recipe card. It helps other folks who are nervous about trying quick pickling for the first time see that this recipe is reliable and delicious!
And hey, if you snapped a picture of your finished jar—maybe sitting next to a great sandwich or chilling on your picnic blanket—I would love to see it! Tag me on social media or get in touch through my contact page. Happy pickling, friends!
PrintUltra-Crispy Garlic Dill Refrigerator Pickles Ready in 24 Hours
Make crunchy, flavorful dill pickles using a simple refrigerator method that requires no canning and are ready to eat in just one day.
- Prep Time: 15 min
- Cook Time: 5 min
- Total Time: 20 min
- Yield: About 1 pint
- Category: Side Dish
- Method: Quick Pickling
- Cuisine: American
- Diet: Vegetarian
Ingredients
- 2 lbs pickling cucumbers (Kirby or Persian), ends trimmed
- 4 cloves garlic, smashed
- 1/2 cup white vinegar (5% acidity)
- 1 1/2 cups water
- 1 tablespoon kosher salt
- 1 teaspoon whole black peppercorns
- 1 teaspoon mustard seeds
- 2 sprigs fresh dill
Instructions
- Wash the cucumbers well. Slice them into spears or rounds, depending on your preference.
- Pack the cucumber slices, smashed garlic cloves, peppercorns, mustard seeds, and dill sprigs tightly into a clean, pint-sized glass jar.
- In a small saucepan, combine the water, vinegar, and kosher salt. Heat over medium heat, stirring until the salt completely dissolves. Do not boil.
- Remove the brine from the heat and let it cool for 5 minutes.
- Carefully pour the warm brine over the cucumbers in the jar, ensuring the cucumbers are fully submerged. Leave about 1/2 inch of headspace at the top.
- Seal the jar tightly with a lid. Let the jar cool to room temperature on the counter for about 1 hour.
- Transfer the jar to the refrigerator. Chill for a minimum of 24 hours before eating for best flavor and crunch.
Notes
- For extra crispness, soak the cucumbers in ice water for 30 minutes before slicing and packing.
- These pickles maintain their best texture within the first week of refrigeration.
- Use these pickles on sandwiches, burgers, or as a simple snack.
Nutrition
- Serving Size: 3 slices
- Calories: 10
- Sugar: 1
- Sodium: 280
- Fat: 0
- Saturated Fat: 0
- Unsaturated Fat: 0
- Trans Fat: 0
- Carbohydrates: 2
- Fiber: 0
- Protein: 0
- Cholesterol: 0