

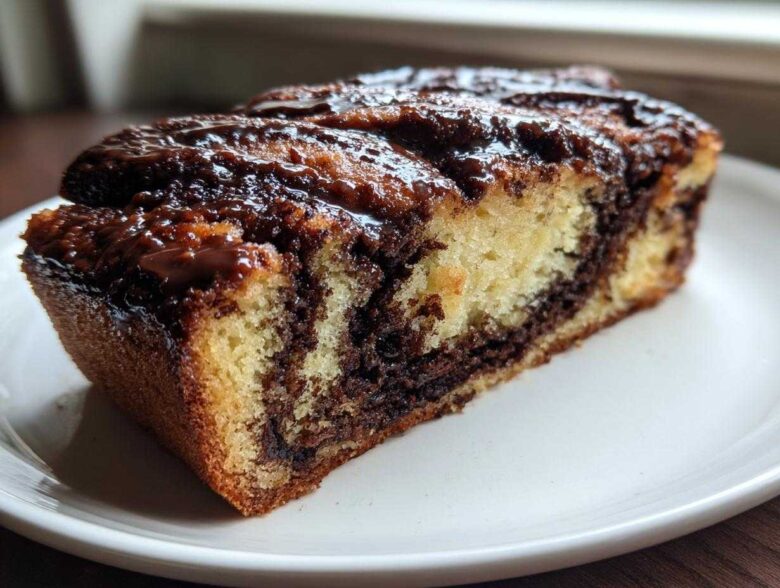
Oh, you know those mornings where you just crave something truly spectacular? Not just toast or cereal, but something rich, yeasty, and totally decadent? That’s where my favorite obsession comes in: the ultimate, show-stopping chocolate babka. I tried making this for years, and honestly, my first attempts were sad, dry messes. The chocolate was a solid block, and the bread was tough! No joy there. But I finally cracked the code, and it all came down to mastering that brioche dough—we want soft and fluffy, not tough!
This recipe is different. Trust me, we are achieving those perfectly defined, deep chocolate swirls and a crumb so moist it practically melts. If you’ve ever wondered how bakeries get that incredible softness in their yeast breads, checking out how we handle the dough in recipes like the one for Japanese Milk Bread is a great starting point! This isn’t just bread; it’s a weekend baking project that pays off big time. If you’ve been intimidated by yeast breads, stick with me, and we’ll conquer the swirl together!
Why This is the Best Homemade Chocolate Babka Recipe
What makes this the best chocolate babka recipe you’ll ever try? It comes down to three things we absolutely nail. First, the dough—it’s a true brioche base, which is the secret to getting that soft and fluffy babka bread texture you see in high-end bakeries. It’s rich but handles beautifully.
Second, the filling is intense. We don’t mess around; we use bittersweet chocolate so the flavor really pops against the sweet dough. And third, that final step: the syrup glaze! Don’t skip it, ever. Brushing it on right out of the oven guarantees the moist chocolate babka result that keeps us coming back for more. It seals in all that goodness, making it better the next day, too. Check out tips on achieving a wonderful tender crumb in other breads which applies here!
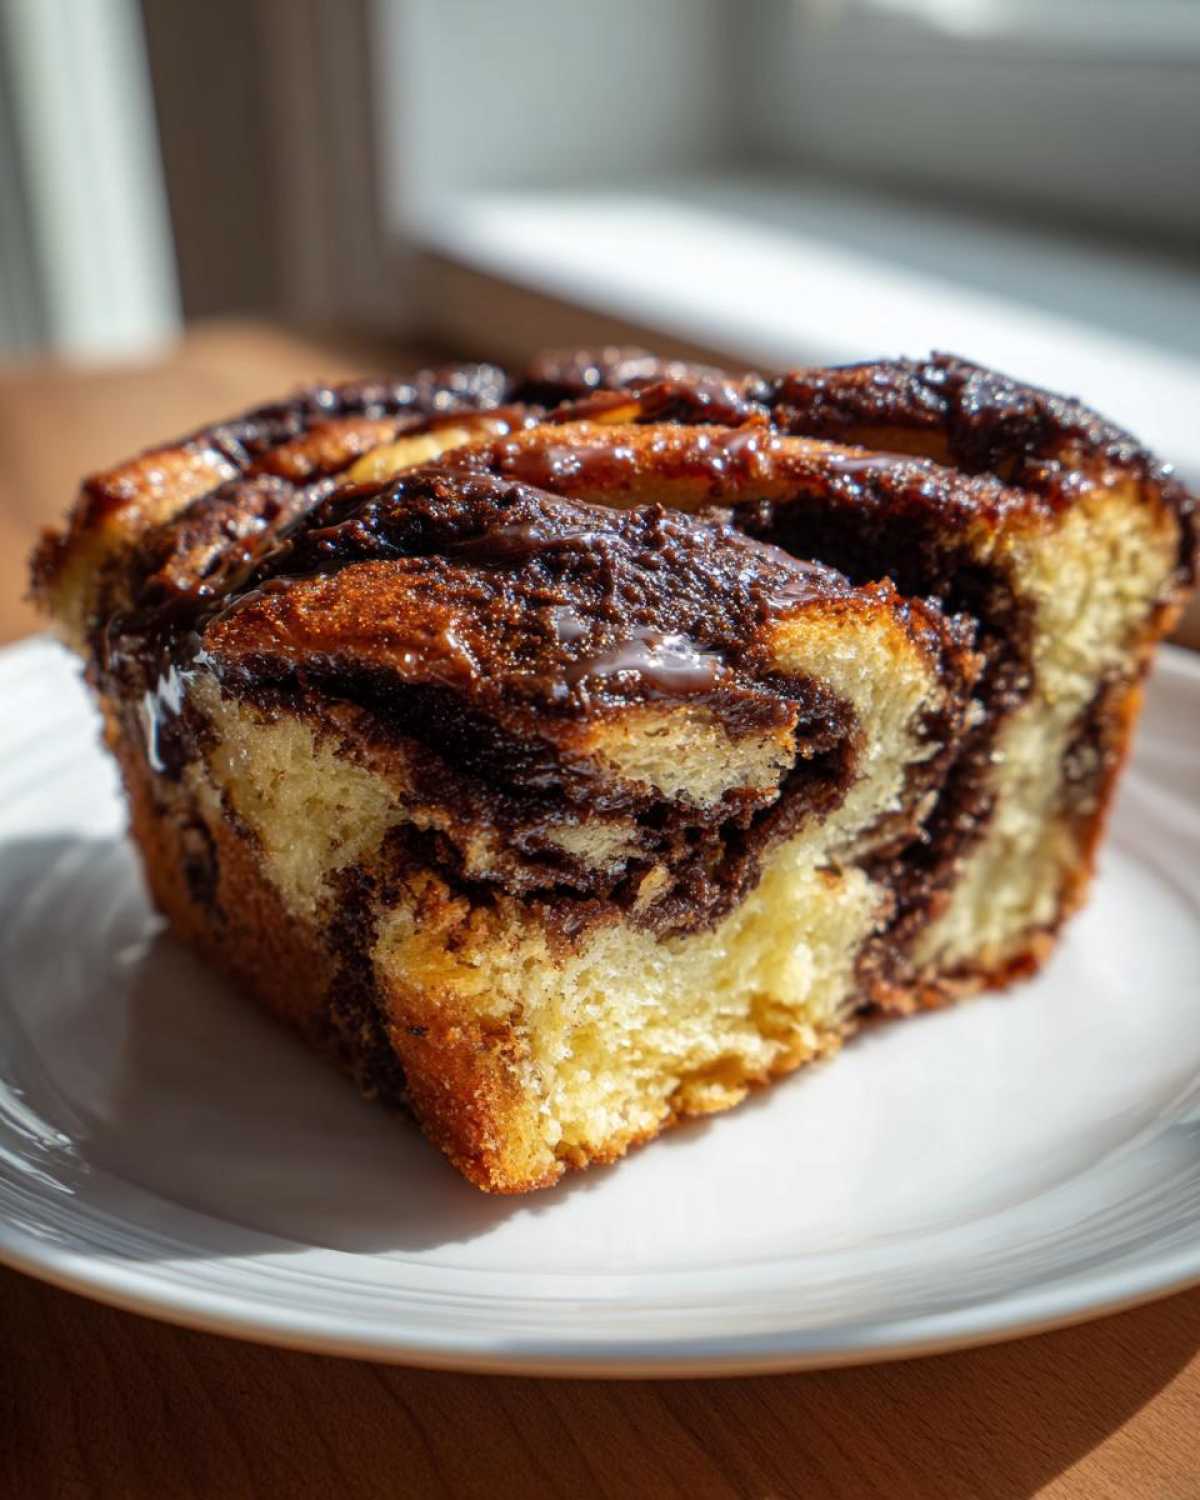
Ingredients for the Ultimate Chocolate Babka
Okay, getting the right ingredients is half the battle won when you’re tackling a homemade chocolate babka recipe like this! Since we’re making a brioche-style dough, the butter and eggs really need to cooperate with us. Always make sure your eggs are room temperature—it seriously helps the dough come together without tearing. If you want to check out a fantastic breakdown of how rich doughs work, take a peek at my notes on the brioche dough process!
For the Rich Brioche Dough
- 1 cup whole milk, warmed to 105-115°F (This is warm like a nice bath, not hot!)
- 2 1/4 teaspoons active dry yeast
- 1/2 cup granulated sugar, plus 1 teaspoon for the yeast
- 4 large eggs, room temperature (super important!)
- 1 teaspoon vanilla extract
- 4 1/2 cups all-purpose flour, plus more for dusting
- 1 teaspoon salt
- 1 cup (2 sticks) unsalted butter, softened and cut into small pieces (The butter can sit out a bit, but it shouldn’t be melty or greasy, just very pliable.)
For the Decadent Chocolate Swirl Filling
This filling is what gives you that rich chocolate swirl pastry effect. We are using bittersweet chocolate here because it gives the best deep flavor contrast against the sweet dough. Don’t use chocolate chips if you can avoid it; bar chocolate melts smoother!
- 1 cup powdered sugar
- 1/2 cup unsweetened cocoa powder
- 1/2 cup (1 stick) unsalted butter, softened
- 4 ounces bittersweet chocolate, melted and cooled slightly (Cool means just warm to the touch, not hot enough to melt the room-temp butter in the mix!)
For the Essential Chocolate Babka Syrup Glaze
You might think a syrup glaze is overkill, but this is key to a moist chocolate babka that stays fresh for days. It soaks right in and keeps everything tender. Don’t skip this step if you want that bakery perfection!
- 1/4 cup water
- 1/2 cup granulated sugar
How to Make Chocolate Babka from Scratch: Step-by-Step Instructions
Now for the real fun! Putting this all together is where the magic happens. Don’t panic when you see the steps; we’re just handling our dough gently. Think of this as a weekend baking project that requires a little patience, but the payoff is heavenly.
Making and Proofing the Brioche Dough
First things first: wake up that yeast! Mix your warm milk, the tiny bit of sugar, and the yeast together and let it sit until it’s foamy. That tells you the yeast is happy and ready to work its magic. Once it’s bubbly, dump in the rest of your dough ingredients—flour, sugar, eggs, salt. Start mixing on low speed, and when it comes together, it’s time for the butter. Add that softened butter piece by piece. You absolutely must let the mixer run on medium-low for a good 8 to 10 minutes after all the butter is in. This heavy kneading is non-negotiable for a proper brioche; it develops the gluten structure needed for that tender crumb bread recipe texture. Once it’s smooth and elastic—like a baby’s cheek, almost—slap a lid on it and let it double in size. This first rise takes about 1.5 to 2 hours, so pour yourself some coffee!
Preparing the Rich Chocolate Filling
While that gorgeous dough is puffing up, whip up the filling. This is so simple—just beat the powdered sugar, cocoa powder, softened butter, and that slightly cooled melted bittersweet chocolate together. Make sure it’s creamy and spreadable. If your melted chocolate is too warm when you add it, it will melt the butter in the filling, giving you soupy chocolate instead of a solid layer. We want a thick paste we can slather on!
Rolling, Filling, and Achieving the Perfect Chocolate Babka Swirl
Once the dough doubles, punch it down gently and roll it out. You’re aiming for a big 12×18 inch rectangle on a lightly floured counter. Spread that chocolate filling evenly all over, but leave about an inch bare on one long side—that’s our ‘seam allowance.’ Now, tightly roll it into a long log, starting from the side *with* the filling all the way to the bare edge. Pinch that seam shut! This is where the artistry comes in for that beautiful rich chocolate swirl pastry look. Take a sharp knife or bench scraper and slice that log right down the middle, cutting through all the layers, exposing the beautiful swirl inside. You should have two long strands covered in chocolate goodness. Now, carefully pick up the two halves and twist them together, making sure the cut sides—where you see all those layers—are facing up! This is the hardest part of the whole babka braiding technique, but keep those swirls facing out! Pinch the ends closed and carefully tuck it into your greased loaf pan.
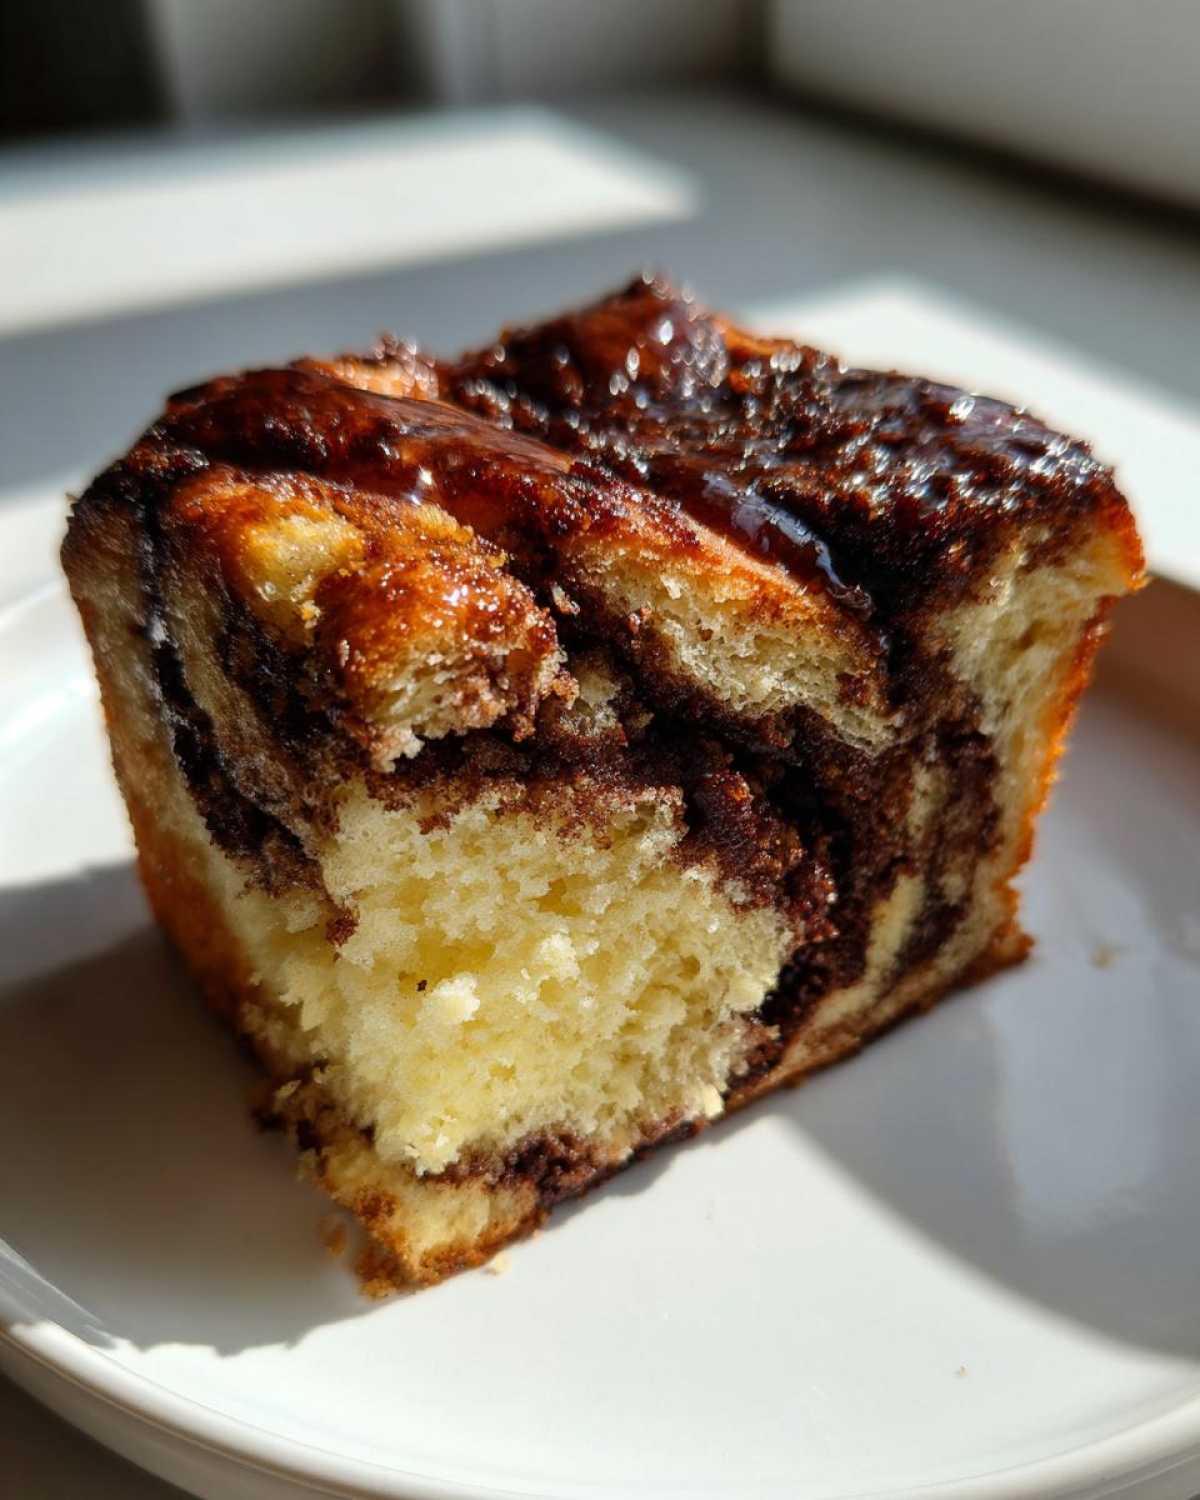
Baking and Applying the Syrup Glaze for a Moist Chocolate Babka
Let that prettily twisted loaf rest for about 30 minutes—it needs a little final puff before baking. Preheat your oven to 350°F (175°C). Bake it for 35 to 45 minutes. You want it deeply golden brown and cooked through. The second it comes out of the oven, grab that simple sugar syrup you made earlier and brush it all over the hot loaf. Don’t be shy; you want it glistening! This syrup soak is exactly what guarantees a truly moist chocolate babka. Let it cool in the pan for 15 minutes before transferring it to a rack. That syrup seals in moisture like nothing else. You’ll find great tips on recreating chocolate bread swirls in other recipes that can help you visualize this step!
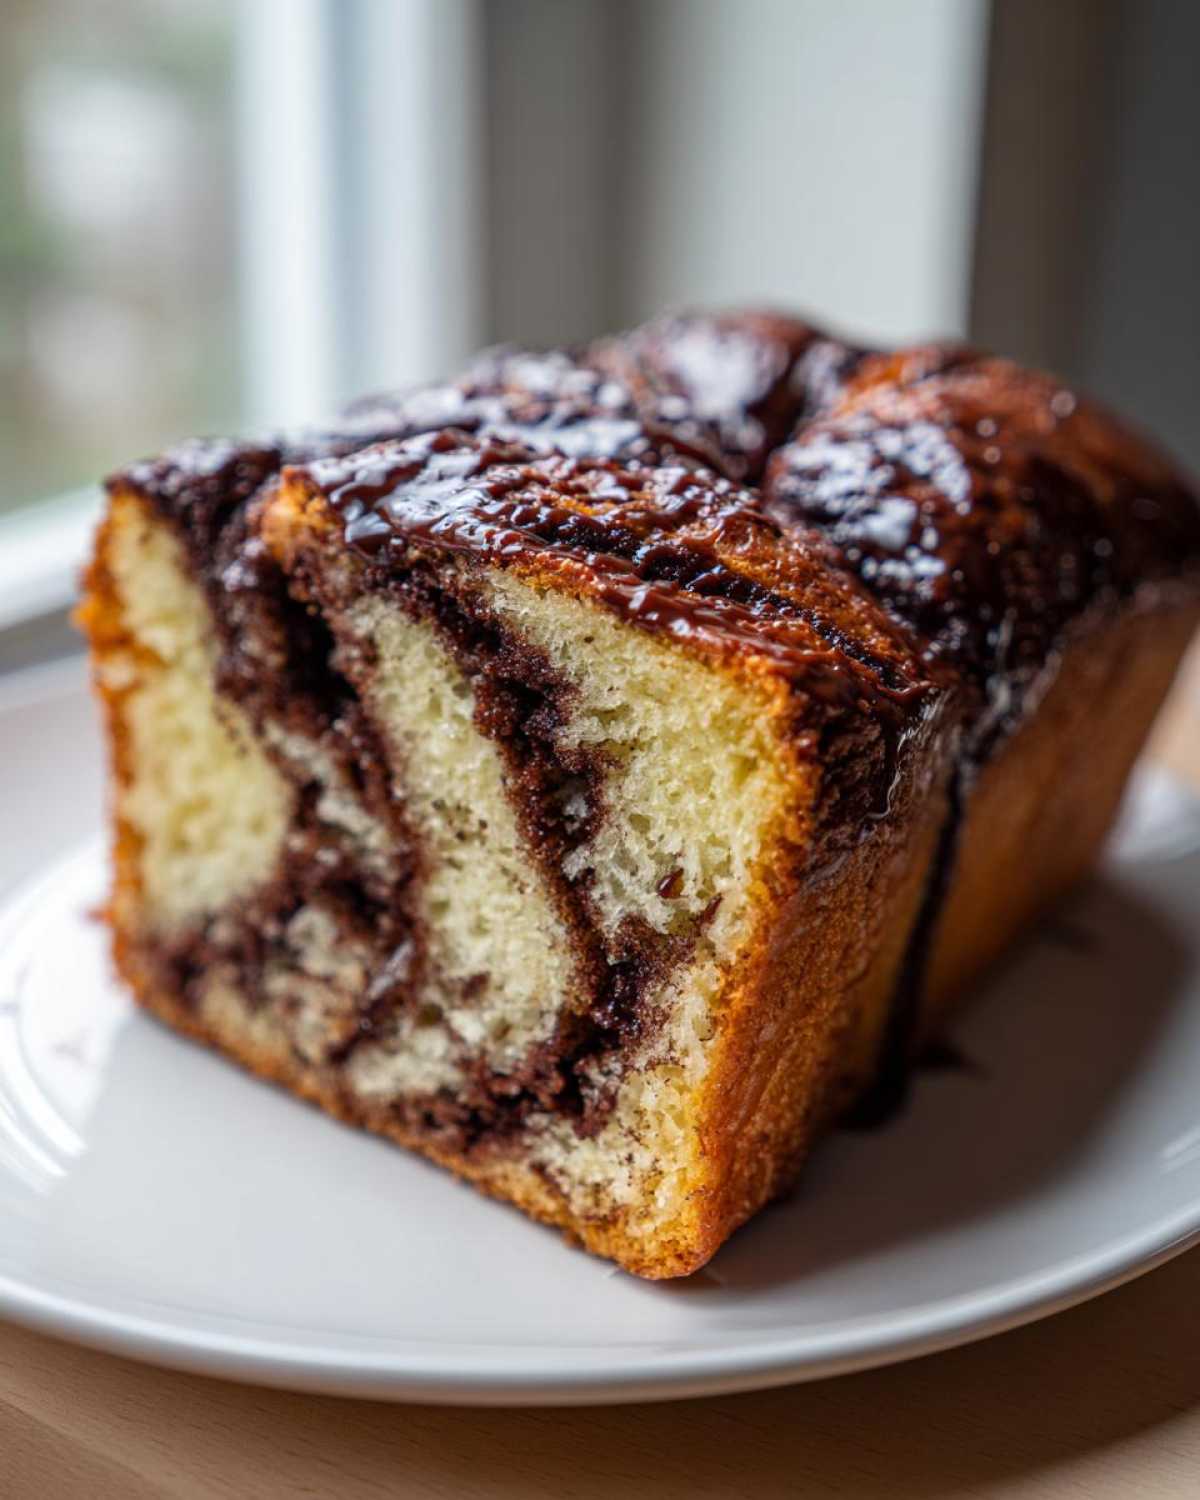
Tips for a No-Fail Chocolate Babka Success
Look, making an easy chocolate babka tutorial means talking about the little things that go wrong! The biggest culprit is usually dough temperature. Remember I mentioned making sure the butter for the dough is soft but not melted? If it’s too warm, your dough will be greasy and won’t develop the strength needed for that beautiful braid. You’ll just end up with a flat mess.
If you’re struggling when you roll out the dough with the filling already on it, stop! Don’t force it. The dough might just be too warm and slack. Pop the whole thing in the fridge for about 15 minutes. Chilling it briefly firms up the butter in the filling, which makes rolling and slicing so much cleaner. You can find more ways to prevent dough mistakes in my guide on having a no-fail chocolate babka!
Also, when slicing the log lengthwise for the twist—be brave but careful! A sharp knife or a piece of dental floss works wonders here. You want a clean cut to show off those layers later!
Ingredient Notes and Substitutions for Chocolate Babka
Okay, let’s get into the nitty-gritty of why we choose these specific ingredients for the absolute best chocolate babka. You might look at the list and think, ‘Can I just use what I have?’ Sometimes yes, but sometimes, those tiny tweaks make the difference between a good loaf and a truly show-stopping, bakery-style pastry!
For instance, yeast! I call for active dry yeast because it needs that proofing step (the foamy milk mixture) which confirms it’s alive and working hard in that rich dough. If you happen to only have instant yeast, fine! You can skip the proofing step and just dump the instant yeast right into the dry ingredients along with the sugar and salt. It’ll wake up in the oven, but you won’t get that foamy confirmation upfront.
When it comes to the chocolate, I’m adamant about bittersweet—at least 60% cacao. If you use milk chocolate, the filling becomes way too sweet, and honestly, it just melts into the dough instead of holding its beautiful swirl shape. We want contrast! For extra depth, sometimes I’ll even stir in a teaspoon of instant espresso powder into the cocoa—it doesn’t make it taste like coffee, it just deepens that chocolate flavor. You can look at how we boost the flavor in blueberry muffins to see a similar concept in my secret fluffy recipe!
And finally, the flour. I use all-purpose flour because it works perfectly with the high amount of fat in this brioche dough. You *could* use bread flour if you wanted a slightly chewier end product, but honestly, I prefer the softness AP gives us. Bread flour has higher protein, and while that’s great for a crusty loaf, for our melt-in-your-mouth sweet breakfast pastry loaf, AP is the winner for that tender crumb!
Storage and Make-Ahead Tips for Your Chocolate Babka
So, you’ve made this incredible, giant loaf of chocolate babka and you’re wondering if you can possibly eat it all before it goes stale. Good news! Because we used that amazing sugar syrup soak, this bread holds onto moisture like a champ. You might not even *need* to freeze it, but if you must, I’ve got you covered!
For day-to-day storage, keep the loaf wrapped tightly in plastic wrap at room temperature on the counter for up to three days. Don’t tell anyone, but I think it actually tastes even better on Day Two once the syrup has fully settled in! If you simply must keep it longer, it freezes beautifully. Wrap it tightly in two layers of plastic wrap, then slip it into a foil layer or a freezer-safe bag. It lasts about three months this way. You can review my general tips on make-ahead and freezer tips for other baked goods if you need more specifics on wrapping techniques!
Now, what if you decide three days later that you want that fresh-baked tenderness back? Don’t just microwave it—that makes it warm and then tough! The best way to refresh a slightly stale loaf is to sprinkle a few drops of warm water onto the cut side (if you’ve already sliced into it), wrap the piece loosely in foil, and pop it into a 300°F oven for about eight minutes. That steam heats everything gently and revives that beautiful soft crumb we worked so hard for.
You can even make the dough ahead of time! After the kneading step, instead of letting it rise on the counter, just pop the dough ball into a greased bowl, cover it tightly, and stick it in the fridge for up to 24 hours. That slow, cold fermentation actually deepens the flavor development (hello, extra richness!). Just let it warm up on the counter for about an hour before you start rolling and filing it for the braid.
Serving Suggestions for This Decadent Chocolate Loaf
So, you’ve pulled this stunning, glistening loaf out of the oven, and now the really hard part begins: deciding when and how to eat it! This decadent chocolate loaf isn’t just great for dessert; it really anchors a special morning or afternoon tea. Seriously, half the joy of making a perfect chocolate babka is figuring out the best pairing!
For me, nothing beats slicing off a thick piece while it’s still slightly warm (but not hot enough to melt the glaze totally off!) and having it with a big, steaming mug of coffee. The slight bitterness of the coffee is just perfect against the sweet, rich chocolate swirl. If you’re looking for the ultimate cozy winter experience, you could even serve a slice with a side of my rich, homemade hot cocoa mix! It doubles down on the chocolate goodness in the best way possible.
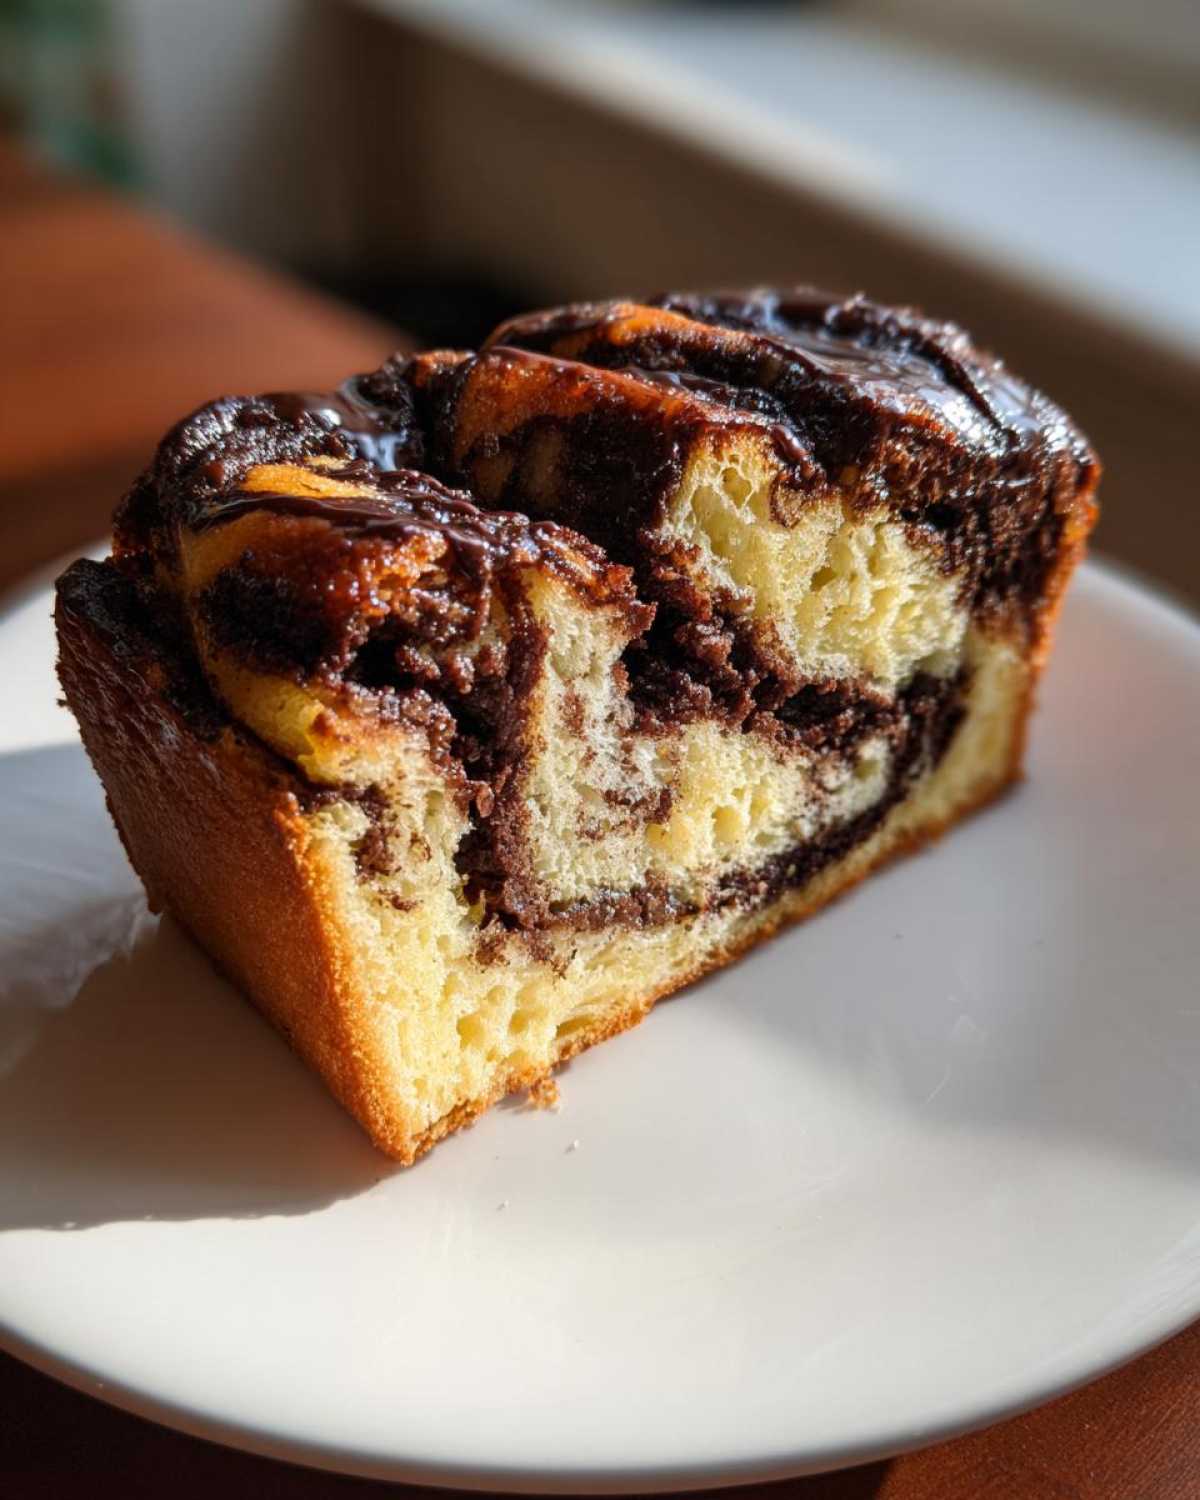
If you’re serving this up as an actual dessert after dinner—which you totally should—try a small scoop of high-quality vanilla bean ice cream right alongside it. The cold creaminess against the pound cake texture? Absolute perfection. It turns a sweet breakfast pastry loaf into an elegant restaurant-style finish.
This is truly my go-to holiday babka dessert. It looks so impressive braided on the table for Christmas morning or Hanukkah brunch, and since it holds up so well, you can even make it the day before serving! People are always asking if it’s store-bought, and that’s when I get to beam and say, ‘Nope, I made this beautiful **chocolate babka** myself!’
Frequently Asked Questions About Making Chocolate Babka
Can I skip the syrup glaze? You know, for general healthiness?
Oh, hon, I get it! We all try to cut back sometimes. But seriously, if you skip that sugar syrup soak, you are missing the whole point of making a true, moist chocolate babka. That soak isn’t just sweetness; it’s the hydration insurance policy! The syrup gets absorbed immediately by the hot loaf right out of the oven. If you leave it off, you risk having a perfectly fine loaf dry out within 24 hours. Trust me, a slice of this bread justifies the extra sugar! If you’re worried, just use half the amount I suggest, but don’t skip it entirely. It transforms the texture!
My babka dough seems totally flat after the first rise. Why isn’t my babka dough rising?
This is almost always a yeast issue, which is super common when you’re making a rich brioche dough recipe for babka like this one, because the high fat content can sometimes slow the yeast down. Did you check your milk temperature? If the milk was too hot (over 120°F), you might have killed the yeast before it even started working. If it was too cold, it took forever and might have barely woken up.
The other reason is often patience! Rich doughs take longer to double than a simple white sandwich loaf. If the room is cool, that 1.5 to 2 hours might stretch to three! The telltale sign of successful rising isn’t the clock; it’s seeing that dough visibly double in size. If it didn’t double, the final bake won’t have the lift it needs for that soft and fluffy babka bread look.
I’m short on time. Can I just use store-bought puff pastry or crescent roll dough for this?
Hold your horses! I know the allure of an easy chocolate babka tutorial using store-bought dough is strong, but please don’t—at least not if you want *this* recipe’s result. Store-bought puff pastry is flaky, not meant to be pillowy and yeast-risen like a brioche. It behaves totally differently when sliced and braided, and you won’t get that classic, slightly chewy, pull-apart texture we love in a chocolate babka.
For a truly authentic, decadent result, you must use the yeast dough. If time is your issue, remember that you can mix the dough the day before and let it do its long, slow rise in the fridge overnight! I talk about that trick in my freezing and storage section. It’s miles better than using a shortcut dough.
How can I ensure I get beautifully crisp layers in my rich chocolate swirl pastry?
That crispness you see—that slight separation between the layers of dough and filling that isn’t totally saturated by the syrup—comes solely from the rolling and twisting. When you roll up that log, you must roll it tightly! If it’s loose, you get air pockets instead of defined layers of dough and filling.
The trick to success is following the slice-and-twist method perfectly (that’s the entire point of the special technique!). When you slice it open lengthwise, using a very sharp, non-serrated knife helps keep the layers clean. Twist gently to expose those ribbons, and the natural thickness of the filling helps keep the dough apart during the final 30-minute rest and the bake itself. It’s about the tension you create when twisting!
Understanding the Nutrition in Your Chocolate Babka
Listen, I’m calling this the “Ultimate Soft & Swirled Chocolate Babka,” not the “Ultimate Low-Calorie Breakfast Bite,” right? This is honestly a treat, a decadent loaf meant for special occasions or that perfect Sunday morning indulgence. But since you asked so nicely, I’ve gone ahead and gotten some estimated nutritional info together for you so you know exactly what you’re getting into!
Remember this: these numbers are purely estimates based on the ingredients list provided. The exact size of your eggs, how heavily you brush that syrup glaze (and trust me, I usually use more!), and even the brand of butter you use can change things slightly. For a full breakdown and disclaimer, you can always check out my general notes on nutrition figures.
Here’s the breakdown for one generous slice, just so you can plan your day accordingly!
- Serving Size: 1 slice
- Calories: Roughly 450 kcal (Worth every single bite, I promise!)
- Sugar: Around 35g (That’s the glorious sweetness from the dough, filling, and that beautiful syrup soak!)
- Fat: About 25g (Hello, brioche enriched with a whole cup of butter!)
- Saturated Fat: Approximately 15g (Mostly from that rich butter and chocolate)
- Carbohydrates: Coming in at 50g
- Protein: Around 8g
It’s definitely rich, but that’s what makes it such a spectacular decadent chocolate loaf. It’s homemade, made with love, and packed with real butter and real chocolate—you can taste the quality difference compared to a store-bought version! Enjoy it guilt-free, knowing you created something truly special!
Share Your Bakery Style Pastry at Home Experience
Now that you have successfully conquered the twisting technique and achieved that stunning, bakery-style result, I absolutely need to hear about it! Seeing your creations makes all those hours kneading brioche dough completely worth it. Seriously, if you managed that swirl without tearing the dough, you deserve a medal!
I always say making a chocolate babka is a journey, and I want to follow yours! Did you manage to keep the filling from oozing out too much? Or maybe you tried a twist where the layers were extra visible? Don’t be shy!
Head down to the comments section below and let me know how it went. Tell me if you rated it five stars (I sure hope you did!) or if you have any little hacks you discovered while making this homemade chocolate babka recipe. Every batch is unique, and your experience helps the next person tackling this yeast bread dessert recipe!
If you snapped a picture of your flawless braid or your gloriously glazed loaf, tag me on social media! I live for seeing that beautiful chocolate bread swirls tutorial come to life in your kitchen. Show off that incredible bakery style pastry at home you just created. I’ll be sharing my favorites in my stories this week!
And hey, if you’re already looking for your next big baking adventure once you’ve finished devouring this loaf, feel free to check out my About Us page to see what other kitchen experiments I’ve been up to lately. Happy baking, my friend!
PrintThe Ultimate Soft & Swirled Chocolate Babka: A Step-by-Step Guide with Syrup Glaze
This recipe guides you through making a rich, tender brioche-style dough and filling it with a deep chocolate spread. You will learn the proper technique for achieving distinct, beautiful chocolate swirls and finishing the loaf with a simple sugar syrup for a moist, bakery-style result.
- Prep Time: 45 min
- Cook Time: 45 min
- Total Time: 3 hr 15 min
- Yield: 1 loaf
- Category: Dessert
- Method: Baking
- Cuisine: Eastern European
- Diet: Vegetarian
Ingredients
- 1 cup whole milk, warmed to 105-115°F
- 2 1/4 teaspoons active dry yeast
- 1/2 cup granulated sugar, plus 1 teaspoon for yeast
- 4 large eggs, room temperature
- 1 teaspoon vanilla extract
- 4 1/2 cups all-purpose flour, plus more for dusting
- 1 teaspoon salt
- 1 cup (2 sticks) unsalted butter, softened and cut into pieces
- 1 cup powdered sugar (for filling)
- 1/2 cup unsweetened cocoa powder (for filling)
- 1/2 cup (1 stick) unsalted butter, softened (for filling)
- 4 ounces bittersweet chocolate, melted and cooled slightly (for filling)
- 1/4 cup water (for syrup)
- 1/2 cup granulated sugar (for syrup)
Instructions
- Activate the yeast: In a large bowl, combine the warm milk, 1 teaspoon sugar, and yeast. Let stand for 5-10 minutes until foamy.
- Mix the dough: Add the remaining sugar, eggs, vanilla, flour, and salt to the yeast mixture. Mix on low speed with a dough hook until combined.
- Incorporate butter: Gradually add the softened butter, one piece at a time, mixing until fully incorporated. Increase speed to medium-low and knead for 8-10 minutes until the dough is smooth and elastic.
- First rise: Place the dough in a lightly oiled bowl, cover, and let it rise in a warm place for 1.5 to 2 hours, or until doubled in size.
- Prepare the filling: While the dough rises, beat together the powdered sugar, cocoa powder, 1/2 cup softened butter, and melted chocolate until smooth. Set aside.
- Prepare the syrup: In a small saucepan, combine the water and 1/2 cup sugar. Heat until the sugar dissolves completely. Remove from heat and set aside.
- Shape the dough: Punch down the risen dough. Turn it out onto a lightly floured surface. Roll the dough into a large rectangle, approximately 12×18 inches.
- Spread the filling: Spread the chocolate filling evenly over the entire surface of the dough, leaving a small border on one long edge.
- Roll and slice: Starting from the long edge opposite the border, tightly roll the dough into a log. Using a sharp knife or bench scraper, slice the log lengthwise down the center, exposing the layers.
- Braid: Turn the two halves cut-side up. Twist the two halves together, keeping the cut sides facing upward to expose the swirl pattern. Pinch the ends together.
- Bake: Carefully transfer the twisted dough to a greased 9×5 inch loaf pan. Cover loosely and let it rest for 30 minutes. Preheat your oven to 350°F (175°C). Bake for 35-45 minutes, or until golden brown and cooked through.
- Glaze: Immediately upon removing the babka from the oven, brush the entire top generously with the prepared sugar syrup. Let the babka cool in the pan for 15 minutes before carefully removing it to a wire rack to cool completely.
Notes
- For the softest crumb, ensure your butter for the dough is truly soft, not melted.
- If the dough is too sticky during rolling, chill it for 15 minutes before proceeding with the filling.
- To achieve a very distinct swirl, chill the filled and rolled log for 10 minutes before slicing it in half for the braid.
Nutrition
- Serving Size: 1 slice
- Calories: 450
- Sugar: 35g
- Sodium: 250mg
- Fat: 25g
- Saturated Fat: 15g
- Unsaturated Fat: 10g
- Trans Fat: 0g
- Carbohydrates: 50g
- Fiber: 3g
- Protein: 8g
- Cholesterol: 75mg