

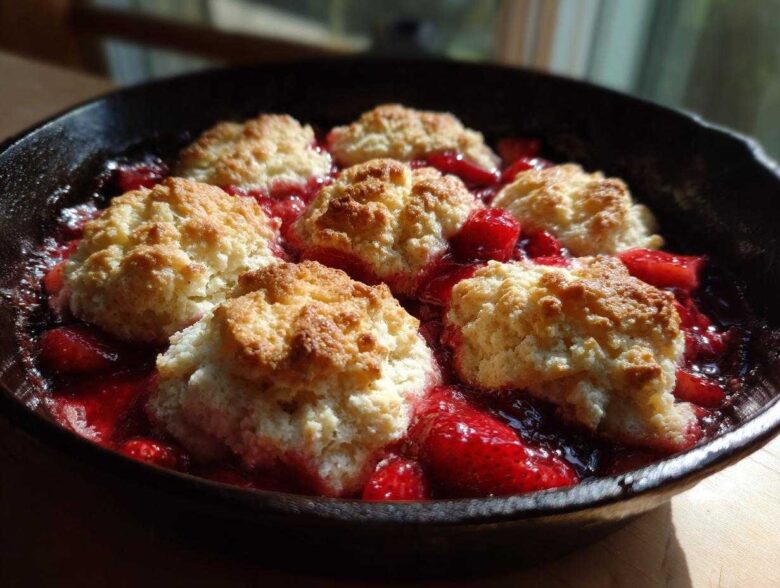
There’s just something about a dessert baked right in cast iron that screams cozy perfection, isn’t there? It’s rustic, it’s warm, and cleaning up is half as bad because everything is in one pan! If you’ve ever tried baking gluten-free biscuits and ended up with something that feels like sad, crumbly sand, I totally get it. I spent way too many afternoons dealing with that exact problem. You can see some of my early, less successful baking adventures over here in my best banana bread post, where I talk about learning patience!
But I nailed it, folks! This Gluten-Free Strawberry Shortcake Skillet recipe is the answer to all our prayers. We get the bright, sweet burst of perfectly macerated strawberries swimming at the bottom, topped by these gorgeous, tender little mounds of skillet cake that are surprisingly light. Trust me, this recipe is super easy but looks like you spent all day on it. It’s the perfect summer strawberry treat!
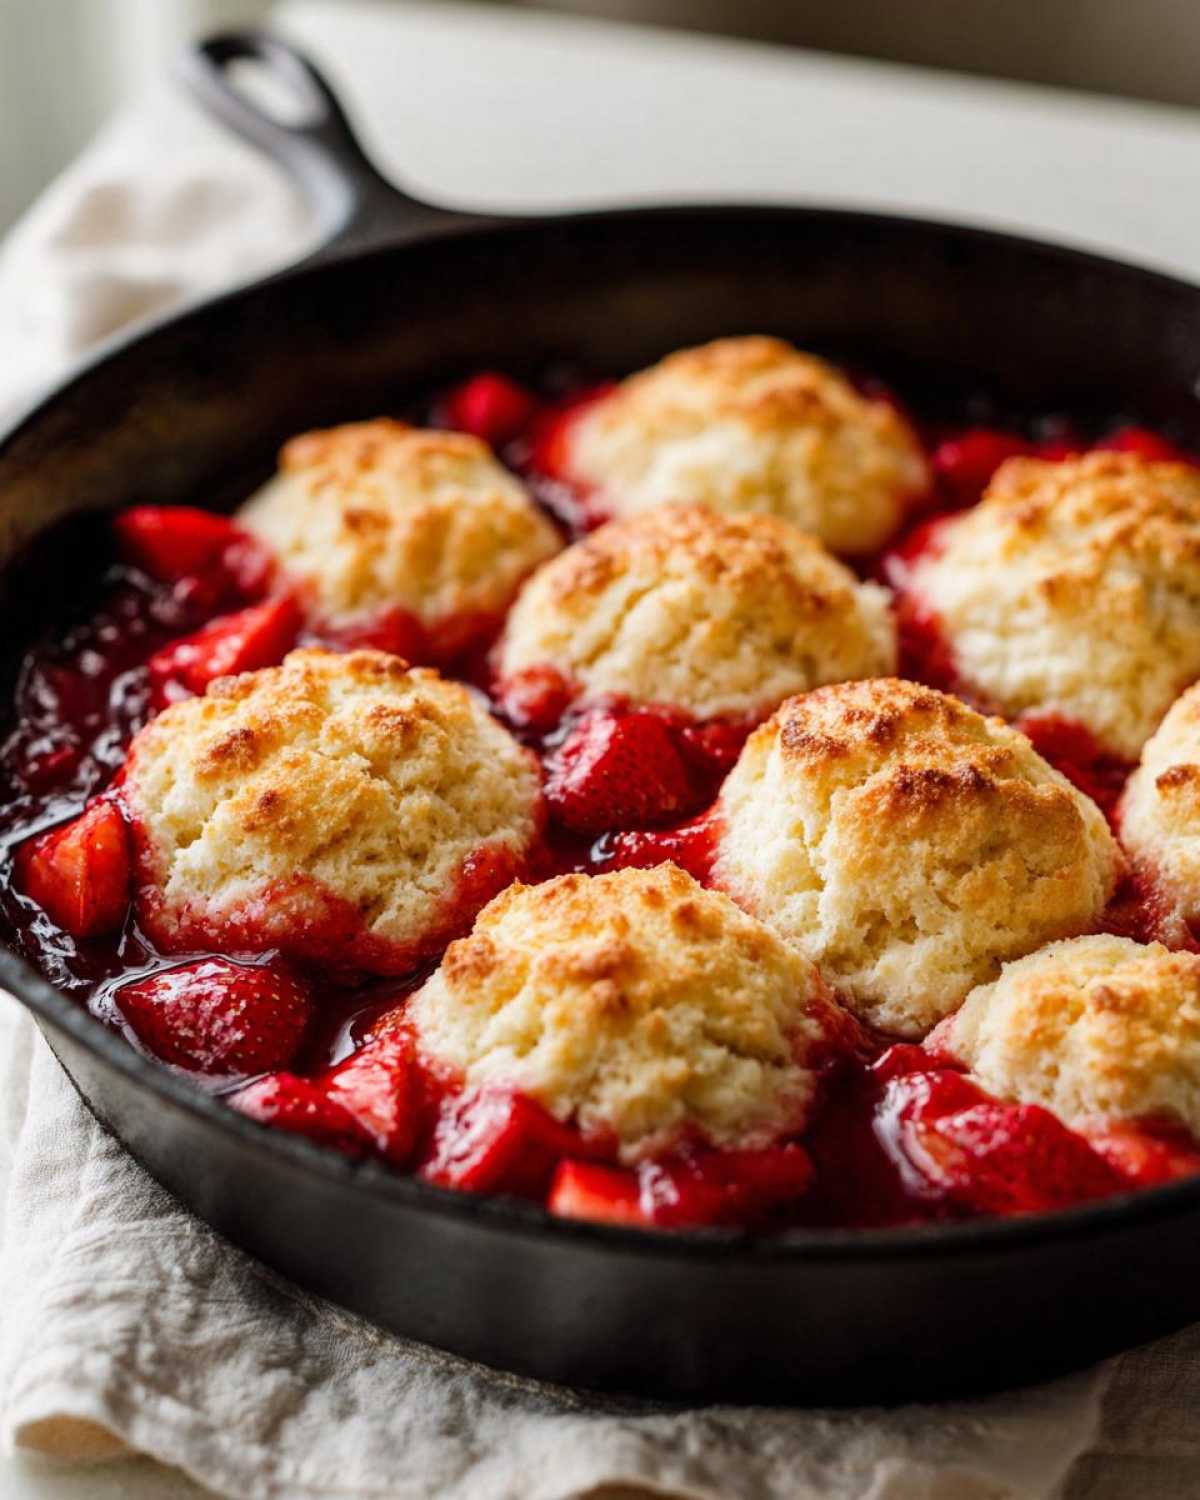
Why This Gluten-Free Strawberry Shortcake Skillet Works So Well
Honestly, the skillet changes everything when you’re working with gluten-free flour. You get this incredible, even heat that bakes the bottom of the biscuit topping perfectly without burning the fruit underneath. It keeps everything wonderfully warm!
- The cast iron creates a fantastic, rustic look that just begs to be served right at the table.
- It’s a truly one-pan strawberry dessert, which means less washing up afterward—hello, easy gluten free baking!
- Our main goal is a tender, light shortcake topping, not a dense brick. The skillet helps us keep that lightness.
Achieving the Best Gluten Free Biscuit Recipe Texture
When dealing with gluten-free dough, you have to be gentle. If you overmix, it gets gummy, and nobody wants that! The trick to a superb Gluten Free Biscuit Recipe here is using butter that’s rock hard and straight from the fridge. Cut that butter in quickly until you have pea-sized crumbles. That cold fat is what creates little pockets of steam when they bake, helping our GF flour behave beautifully!
Gathering Ingredients for Your Gluten-Free Strawberry Shortcake Skillet
Okay, let’s talk ingredients. Since this is an allergy-friendly strawberry shortcake rescue mission, we can’t just throw anything in there, right? Precision matters when you’re working with gluten-free flour blends. I promise, if you stick to these measurements, you’re golden.
First up, you need about a pound of fresh strawberries. Slice those babies up and toss them with a quarter cup of sugar and a tiny splash of lemon juice. This lets them macerate—you know, get all juicy and sweet—while we focus on the topping. If you want to see another fantastic use of fruit in a baking scenario, check out my tips for gluten-free garlic cheddar biscuits; the principles of handling the dough are similar!
Now for the star of the show, the shortcake portion! You absolutely must use a good quality gluten-free all-purpose flour that already contains xanthan gum. Don’t skip that note! We need 1.5 cups of that blend, plus a bit more sugar, baking powder, and salt for lift. Make sure that 6 tablespoons of butter are cut into tiny pieces and are seriously cold. Finally, the liquid is cold heavy cream or whole milk—that fat content is crucial for texture!
Essential Equipment for Skillet Dessert Baking
You can’t make a masterpiece without the right tools, right? Thankfully, for this rustic berry dessert, we mostly just need one main piece of hardware that you hopefully already have sitting around gathering dust!
The absolute star here is the 10-inch cast iron skillet. Seriously, if you have one, this is its moment to shine. The cast iron heats up so evenly, which is amazing for making sure the bottom of our shortcake layer cooks through without turning the fruit into mush. If you’re looking for other ways to use that cast iron magic, I’ve got a great fried potatoes skillet recipe that uses the same principle of even heat.
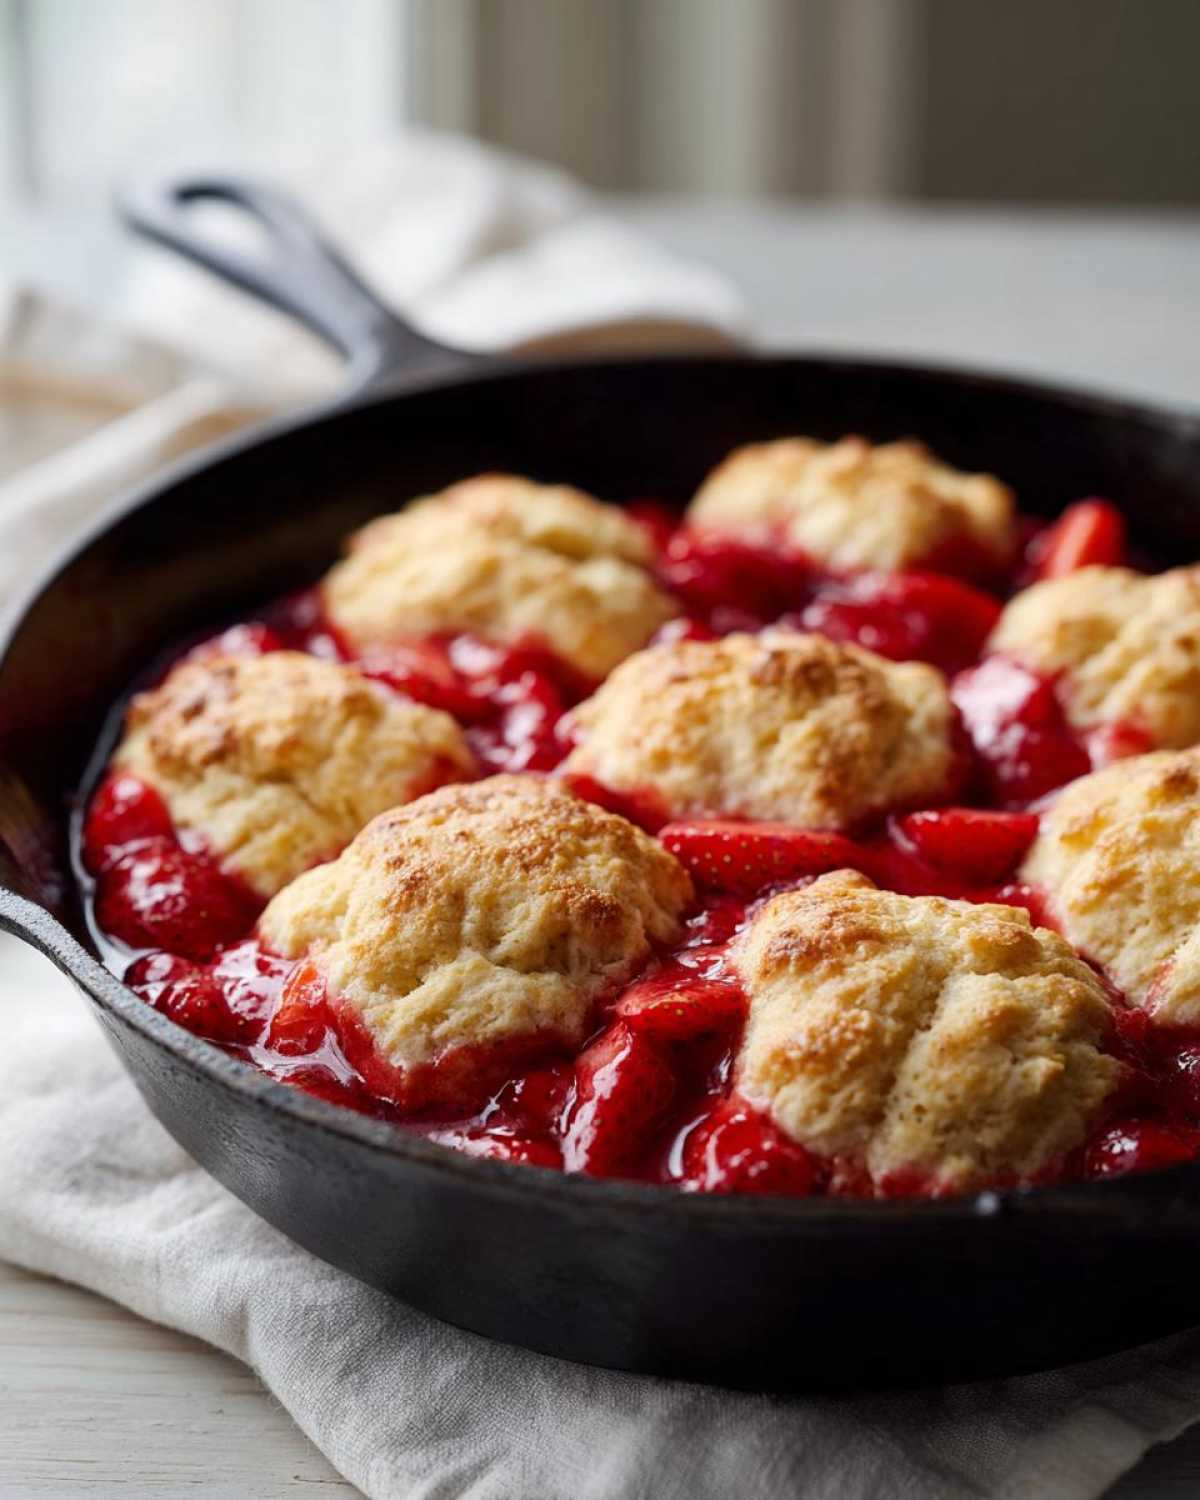
When we’re cutting the butter into the flour for the shortcake dough, you’ve got options. If you’re feeling really traditional and want to mimic the best gluten free biscuit recipe technique, grab a pastry blender. It works those butter pieces right in! If you’re feeling lazy, like I sometimes do, use your fingertips—just keep them cold so you don’t melt the butter too fast. A couple of mixing bowls, a whisk, and a spatula are all you need besides that skillet. That’s it! It’s so simple, which is why this is such a great, quick gluten free berry dessert!
Step-by-Step Instructions for the Gluten-Free Strawberry Shortcake Skillet
This is where the magic happens, and honestly, it moves fast once you get going! Make sure your oven is preheated to 400 degrees Fahrenheit before you even grab your flour. We are grease-and-go people here. Take that skillet—I’m assuming your trusty 10-inch cast iron beauty—and just grease it up lightly. Don’t mess around with parchment paper on the bottom for this one; we want that fruit bubbling right against the iron.
If you want to see what a fully baked version looks like, I think you’ll love the pictures over at my easy skillet cake post—it shows you exactly that golden-brown top we’re aiming for!
Preparing the Homemade Strawberry Topping
Remember those strawberries we sliced and tossed with sugar and lemon juice? Let them hang out for a bit. This maceration step is non-negotiable! It draws out the natural juices, creating a syrupy base that keeps the bottom layer from drying out during baking. That syrup basically becomes your quick sauce. If your berries are looking a little tart today, I actually prefer it—that little bit of tartness cuts through the richness of the biscuit on top perfectly. Just let them swim in that sugar mixture for 15 minutes while you handle the dough.
Mixing the Best Gluten Free Biscuit Recipe Dough
Time to tackle the topping! Whisk your dry ingredients—that GF flour blend, that little bit of sugar, baking powder, and salt—in a separate bowl. Now, bring in the cold butter pieces. You need to cut this butter in until your mixture looks like coarse crumbs, maybe with a few larger, jagged pieces still hanging around. That’s critical for flake! Pour in the cold cream or milk and mix it with a fork, gentle, gentle, gentle! Stop mixing the absolute second the dry bits disappear and it forms a shaggy dough. Seriously, if you see it looking smooth, you’ve mixed too much, and your biscuit texture will suffer. We want that rough look!
Assembling and Baking Your Cast Iron Strawberry Shortcake
Okay, assembly time! Pour those juicy strawberries and all their lovely liquid into your greased skillet and spread them out so they cover the bottom nicely. Now, take your gluten-free biscuit dough and drop spoonfuls randomly over the fruit. Do NOT try to make one solid cake layer; leave gaps! We want those little biscuits to bake up individually above the fruit so the steam can escape and they get those gorgeous crispy edges. Finally, brush the tops of those mounds with the beaten egg and sprinkle them with coarse sugar for that wonderful, rustic berry dessert shimmer. Pop it into the 400-degree oven for about 20 to 25 minutes until that top layer is golden brown and done. IMPORTANT: Let it cool in the skillet for a good 15 minutes before you even think about digging in. That lets the layers settle just right!
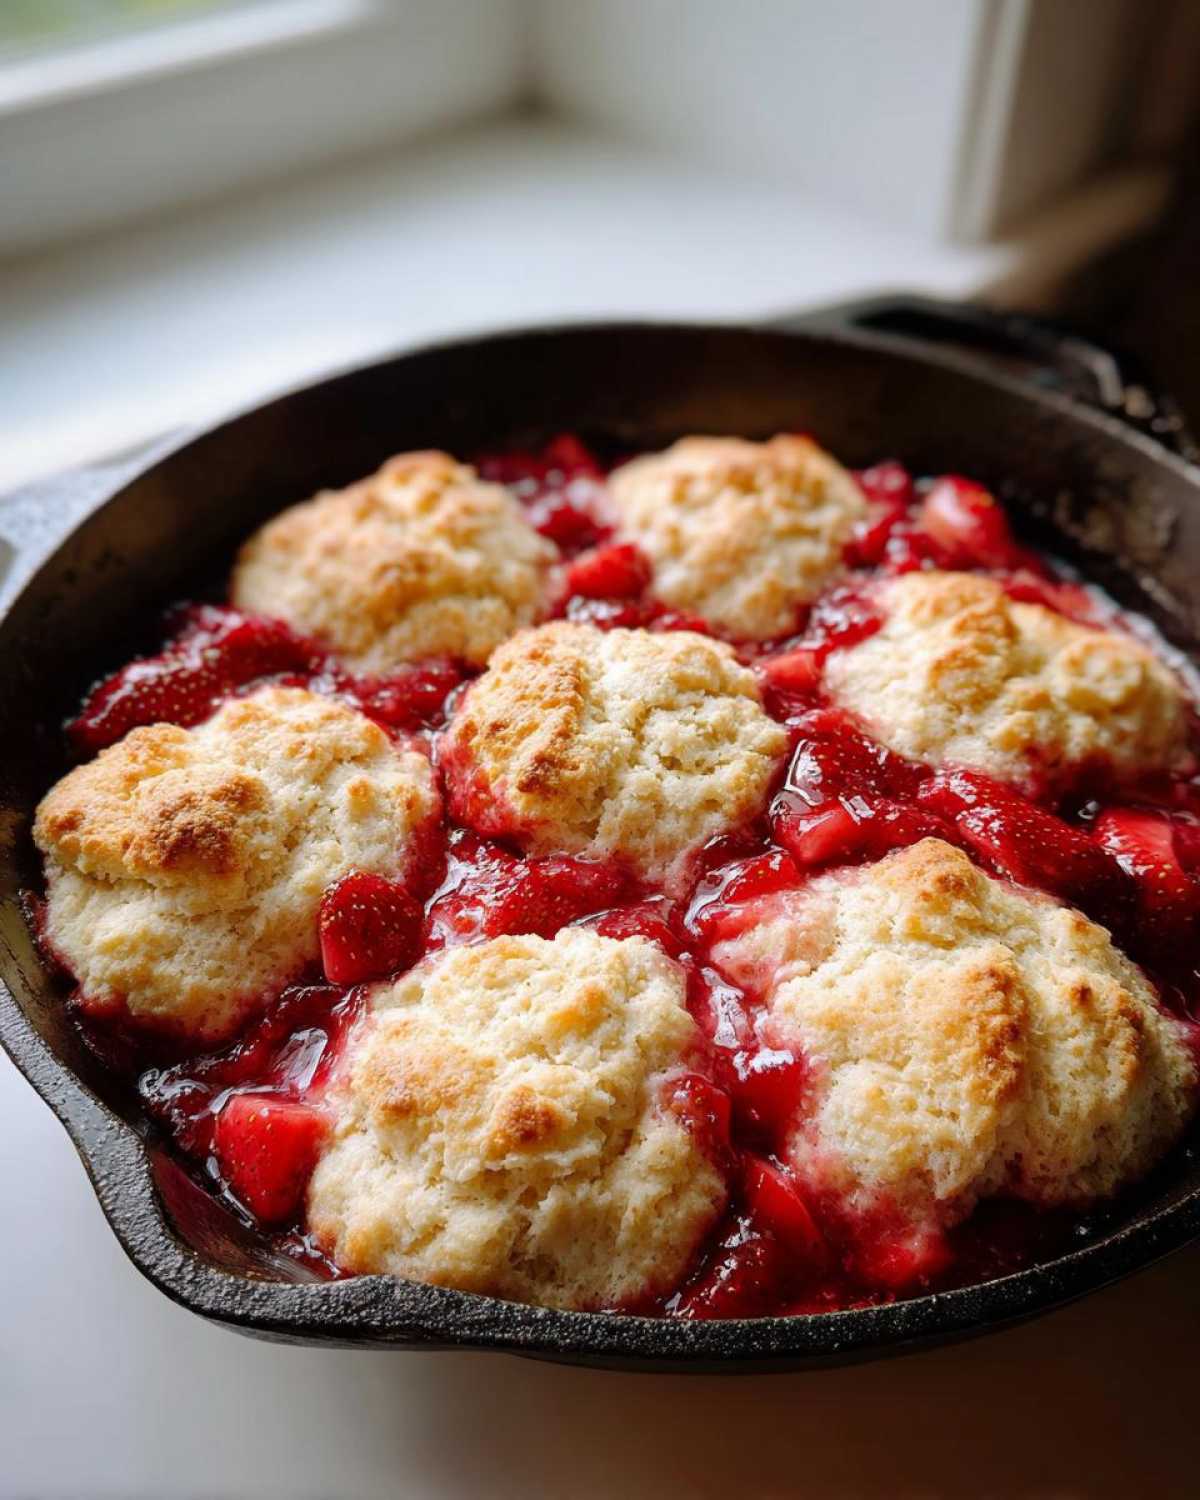
Ingredient Notes and Substitutions for Your Gluten-Free Strawberry Shortcake Skillet
I know that hunting down the right gluten-free flour can feel like cracking a secret code, so listen closely because this is key to avoiding sad, crumbly shortcake! For this particular recipe, you absolutely must use a high-quality gluten-free all-purpose blend that specifically lists xanthan gum in the ingredients list. If your blend doesn’t have it, you need to add about half a teaspoon per cup of flour, otherwise, your biscuits are going to fall apart on you. I’ve had the best luck with certain blends that mimic wheat flour structure, and if you’re curious about another GF triumph, my gluten-free strawberry almond muffins use a similar principle!
Butter is another non-negotiable item for that real, rich flavor. Since the shortcake is so simple, you can’t hide behind cheap substitutes. You need that cold, hard butter for flavor and texture!
Now, let’s talk dairy-free for my friends who need allergy-friendly adjustments. This is surprisingly easy to manage! For the heavy cream or milk, you can swap it out for refrigerated full-fat canned coconut milk. I mean the solid part that rises to the top after chilling overnight—that’s what gives you the necessary fat content. Just scoop out the creamy top layer and use that in place of the heavy cream. And for the final dollop on top, just skip the regular whipped cream and use a good quality dairy-free whipped topping. It’s delicious, looks fantastic, and keeps our biscuit recipe versatile for everyone!
Tips for Success When Making a Gluten-Free Strawberry Shortcake Skillet
You’ve got the ingredients, you followed the steps—now let’s make sure this little skillet dessert turns out perfect every single time. Gluten-free baking can be temperamental, so here are my absolute must-dos to nail that tender texture, especially when baking in cast iron.
First, and I can’t stress this enough: Do Not Overmix the Dough! I know it seems counterintuitive because we are used to mixing wheat flour until it disappears, but with GF flour, overmixing wakes up any starches that want to turn gummy. Mix only until the wet and dry elements just barely come together into that shaggy mess. If you mix until it’s smooth, you’ve ruined the lightness we’re aiming for! It should never look smooth like traditional cookie dough.
Second tip relates to temperature control, which is doubly important for skillet desserts. If you happen to have a spare five minutes while you’re prepping your berries, pop the mixed biscuit dough into the fridge for a quick chill—maybe 10 minutes max. This helps the butter firm back up slightly, which prevents the shortcake mounds from spreading too much and merging into one giant flat disc in the oven. They’ll bake up higher and look more like proper individual biscuits that way!
My third piece of advice is about the fruit itself. If you notice your strawberries are releasing an absolute TON of juice during maceration, don’t pour all that liquid into the skillet! You want the fruit to be covered, but if there’s a swimming pool in there, your shortcake topping will soak up too much liquid too fast and turn soggy instead of baking through. Just use enough juice to coat the berries well enough to keep them glistening. It’s a small thing, but it makes a difference in the final result, sort of like how I deal with keeping my buttermilk scones from drying out!
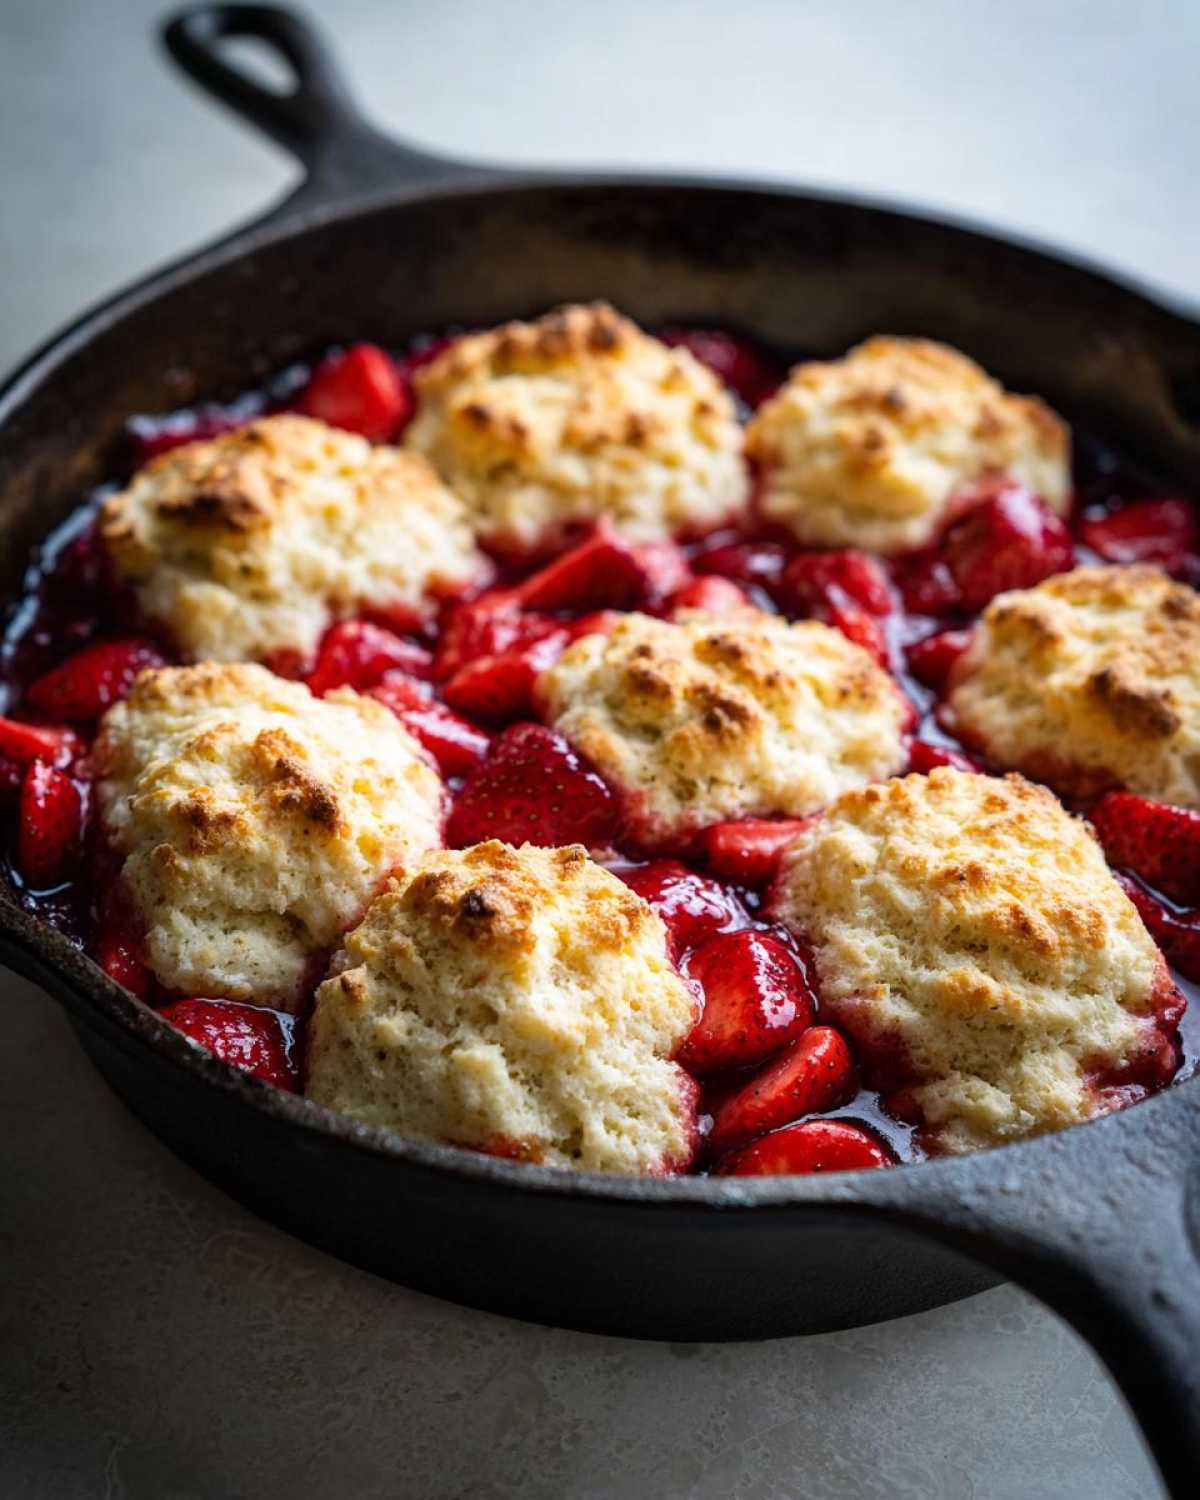
Finally, for that glorious brown top—don’t skip the coarse sugar brush! That little bit of crunch on top is a textural hero, especially against the softness of the gluten-free crumb and the warm fruit. It delivers that satisfying final bite!
Serving Suggestions for This Warm Strawberry Dessert Idea
Alright, the skillet has come out of the oven, it smells incredible, and now comes the best, most important part: the toppings! Since we’ve gone to all this trouble making a beautiful, one-pan dessert, you have to serve it right. Please, for the love of summer berries, serve this skillet warm, right there in the iron pan it cooked in! That’s the whole rustic appeal of this whole setup. Scoop a mound of the warm fruit and biscuit right onto a small dish. Forget fussy plating; this dessert wants to be scooped and enjoyed immediately.
Of course, no shortcake—gluten-free or otherwise—is complete without whipped cream piled high on top. I always default to making my own, honestly. It just whips up so much fluffier and tastes cleaner than most store-bought tubs. If you want that ultimate vanilla flavor that makes everything taste special, you need to check out my recipe for the best vanilla buttercream; even though that’s for frosting, the vanilla extract recommendation I give there applies perfectly to a quick whipped cream!
If you decide to go the store-bought route, that’s fine, I get it, we all have busy days! But make sure you chill it really well first so it holds its shape better when it hits that warm fruit base. A lighter topping alternative, if you’re trying to keep things less heavy, is a drizzle of maple syrup over the top instead of a full cream cloud. But if you ask me? Go big. That contrast between the warm, slightly tart berries, the tender cake, and that cold, sweet cream is non-negotiable for me!
Storage and Reheating Instructions for Leftover Gluten-Free Strawberry Shortcake Skillet
Now, the hard part: having leftovers! Truthfully, this skillet dessert is best on day one when that shortcake topping is at its peak fluffiness. But if you manage to have some left over, don’t panic or throw it out! We can absolutely resurrect this amazing treat. Since it’s a gluten-free comfort food dessert, we have to be careful how we reheat it so it doesn’t turn into a dusty mess.
The fruit situation is easy. If you stored the skillet with a tight lid or wrapped the whole thing up and put it in the fridge, the strawberries will have released more liquid, which is totally fine. They’ll smell amazing when you take them out! Generally, this whole thing lasts about three days in the refrigerator, provided it’s tightly covered. If you’re looking for other old-fashioned recipes that store well, my applesauce cake recipe has some great storage tips, too!
Reheating is where you need to use your judgment. Since the topping is essentially a biscuit baked right on top of the moist fruit, the bottom can get a little soft overnight. If you try to microwave a whole slice, the biscuit part usually gets tough or chewy fast—and we certainly don’t want that gummy texture returning!
Here’s my method for reheating individual servings:
- Oven is Best: If you have multiple servings, pop them into a toaster oven or a regular oven set to about 325°F for about 8 to 10 minutes. This gentle heat warms the fruit up and helps dry the outside of the shortcake biscuit just a touch, bringing back a little bit of that fresh-baked crust.
- Microwave Quick Fix: If you only have one serving and you’re in a huge rush, microwave it for only 15 to 20 seconds. Seriously, don’t let it go longer! It will soften the biscuit, but you need to be ready to eat it immediately before it hardens up as it cools down.
Always, always, always top your leftovers with a fresh dollop of whipped cream (or your preferred topping) right before eating. That cold, fresh cream makes the reheated shortcake taste brand new again!
Frequently Asked Questions About Allergy Friendly Strawberry Shortcake
Because we’re dealing with gluten-free baking and skillet cooking, there are always a few little questions that pop up. I tried to cover everything I ran into when perfecting this recipe. If you’ve got other burning questions, maybe you can find some answers in my post about gluten-free lemon meltaway cookies; sometimes troubleshooting GF flour is a universal problem!
Can I use fresh or frozen strawberries in the Gluten-Free Strawberry Shortcake Skillet?
Oh, absolutely you can use frozen strawberries! But you have to handle them differently than the fresh ones. If you use frozen, don’t thaw them completely first; that releases too much water prematurely. Dump the frozen berries straight into your mixing bowl, and then toss them with the sugar and lemon juice. You’ll need to let them sit—or macerate—for a little longer, maybe 20 minutes instead of 15, to draw out enough juice to create that necessary syrup base. The final baked product might just be a tiny bit runnier at the bottom, but the flavor is still fantastic!
What is the best skillet size for this Easy Gluten Free Baking recipe?
I designed this recipe for a standard 10-inch cast iron skillet. That size gives us the perfect surface area for the fruit layer while ensuring the biscuit topping mounds bake up nicely without being too thin or too thick. If you try to use a smaller skillet, say 8 inches, you’re going to have a much taller, thicker topping, and because it’s gluten-free, that center might take way longer to cook through, potentially leaving you with a gummy, underbaked center. If you must use a larger pan, like a 12-inch one, your topping will spread too thinly, and it will overbake in half the time! Stick to 10 inches for this easy gluten free baking success!
Can I make the shortcake topping ahead of time?
You can definitely make the dough ahead, but I’m going to be honest—it won’t be as fluffy as if you do it right before baking. If you have to get ahead of the game, mix the dough, wrap the whole shaggy ball tightly in plastic wrap, and stick it in the fridge for up to 12 hours. But here’s the catch: when you bring it out, it will be hard! You’ll need to let it sit on the counter for about 30 minutes to soften up just enough to be dropped in spoonfuls over the strawberries. If you try to scoop rock-hard dough, it will break apart and won’t form those nice mounds we want for presentation.
PrintGluten-Free Strawberry Shortcake Skillet

Bake a rustic, delicious gluten-free strawberry shortcake directly in a skillet. This recipe features sweet strawberries topped with a tender gluten-free biscuit crust.
- Prep Time: 15 min
- Cook Time: 25 min
- Total Time: 40 min
- Yield: 6 servings
- Category: Dessert
- Method: Baking
- Cuisine: American
- Diet: Gluten Free
Ingredients
- 1 pound fresh strawberries, hulled and sliced
- 1/4 cup granulated sugar (for strawberries)
- 1 teaspoon lemon juice
- 1 1/2 cups gluten-free all-purpose flour blend (with xanthan gum)
- 2 tablespoons granulated sugar (for shortcake)
- 1 tablespoon baking powder
- 1/4 teaspoon salt
- 6 tablespoons cold unsalted butter, cut into small pieces
- 1/2 cup cold heavy cream or whole milk
- 1 large egg, lightly beaten (for brushing)
- 1 tablespoon coarse sugar (for topping)
- Whipped cream, for serving
Instructions
- Preheat your oven to 400 degrees Fahrenheit. Lightly grease a 10-inch cast iron skillet.
- In a medium bowl, gently toss the sliced strawberries with 1/4 cup sugar and lemon juice. Let them sit while you prepare the shortcake dough.
- In a separate large bowl, whisk together the gluten-free flour blend, 2 tablespoons sugar, baking powder, and salt.
- Cut the cold butter into the dry ingredients using a pastry blender or your fingers until the mixture resembles coarse crumbs.
- Pour in the cold cream or milk. Mix gently with a fork until just combined into a shaggy dough. Do not overmix.
- Pour the macerated strawberries and their juices into the prepared skillet. Spread them evenly across the bottom.
- Drop spoonfuls of the shortcake dough evenly over the top of the strawberries, leaving small gaps between the mounds. Do not spread the dough to cover the fruit completely.
- Brush the tops of the dough mounds lightly with the beaten egg and sprinkle with coarse sugar.
- Bake for 20 to 25 minutes, or until the shortcake topping is golden brown and a toothpick inserted into the center of a biscuit comes out clean.
- Let the skillet cool for at least 15 minutes before serving. Serve warm, topped generously with whipped cream.
Notes
- Use a high-quality gluten-free flour blend that contains xanthan gum for the best biscuit texture.
- If you prefer a dairy-free option, substitute the heavy cream with full-fat canned coconut milk (refrigerated overnight) and use a dairy-free whipped topping.
- For a deeper flavor, you can let the strawberries macerate for up to one hour before baking.
Nutrition
- Serving Size: 1 serving
- Calories: 350
- Sugar: 22
- Sodium: 180
- Fat: 18
- Saturated Fat: 11
- Unsaturated Fat: 7
- Trans Fat: 0
- Carbohydrates: 45
- Fiber: 3
- Protein: 5
- Cholesterol: 55