

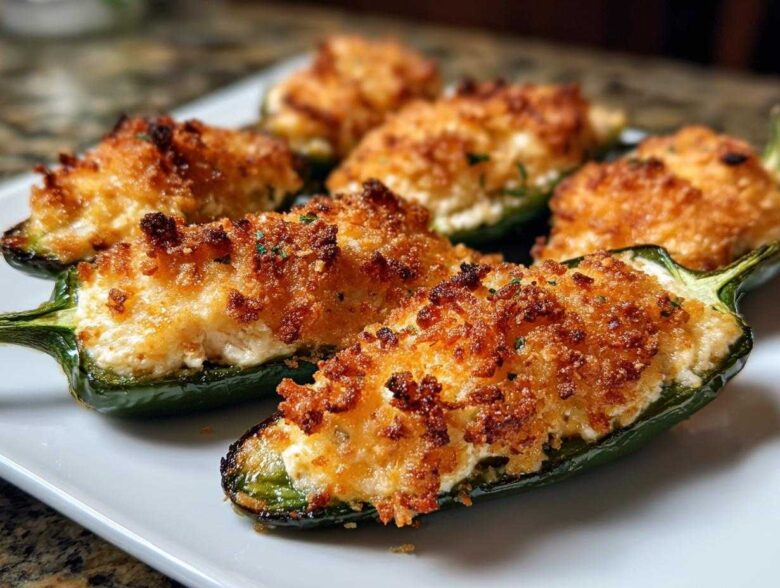
Oh, game night is officially calling, and you know what that means? We need food that’s easy to grab, full of flavor, and packs a little kick! After all those years cooking with the most intense chiles across Africa, I still get such a huge craving for a perfect, familiar American snack. And honestly, nothing beats incredible jalapeño poppers. But deep-frying? Forget it. I want that cheesy, spicy goodness without standing over a pot of hot oil. That’s why Alex and I perfected these **easy baked jalapeño poppers**. They deliver that bubbly, cheesy center you dream about, all from the oven. Trust me, these will disappear before the first quarter is even over.
Why You Will Love These Easy Baked Jalapeño Poppers
Honestly, these are my go-to for any party now—game night, holidays, or just when I need a spicy snack that feels a little sophisticated but is truly effortless. Here’s why I never skip making a double batch when the craving hits for some great baked jalapeño poppers.
- No Fry Fuss: We bake these beauties! You get all the bubbly, melty goodness of amazing cream cheese stuffed jalapeños without that heavy, greasy cleanup. It’s all about maximizing flavor and minimizing mess, which I know we all appreciate after years of cooking in tiny foreign kitchens!
- Perfect Spice Balance: Even though these are spicy appetizer poppers, the cream cheese and cheddar totally tame the heat. They are spicy enough to keep things interesting but mellow enough that everyone at your game night gathering will want seconds.
- Prep Ahead Simplicity: You can stuff these little guys hours before guests arrive. Just cover the baking sheet and pop them in the fridge. Pull them out when the game starts, sprinkle the topping, and slide them in the oven. Easy entertaining is the best entertaining!
- Super Crispy Tops: We use panko breadcrumbs tossed in butter over the filling. This gives you that satisfying crunch you usually only get from frying, sealing in all that amazing flavor.
You simply can’t beat this combination of ease and intense flavor!
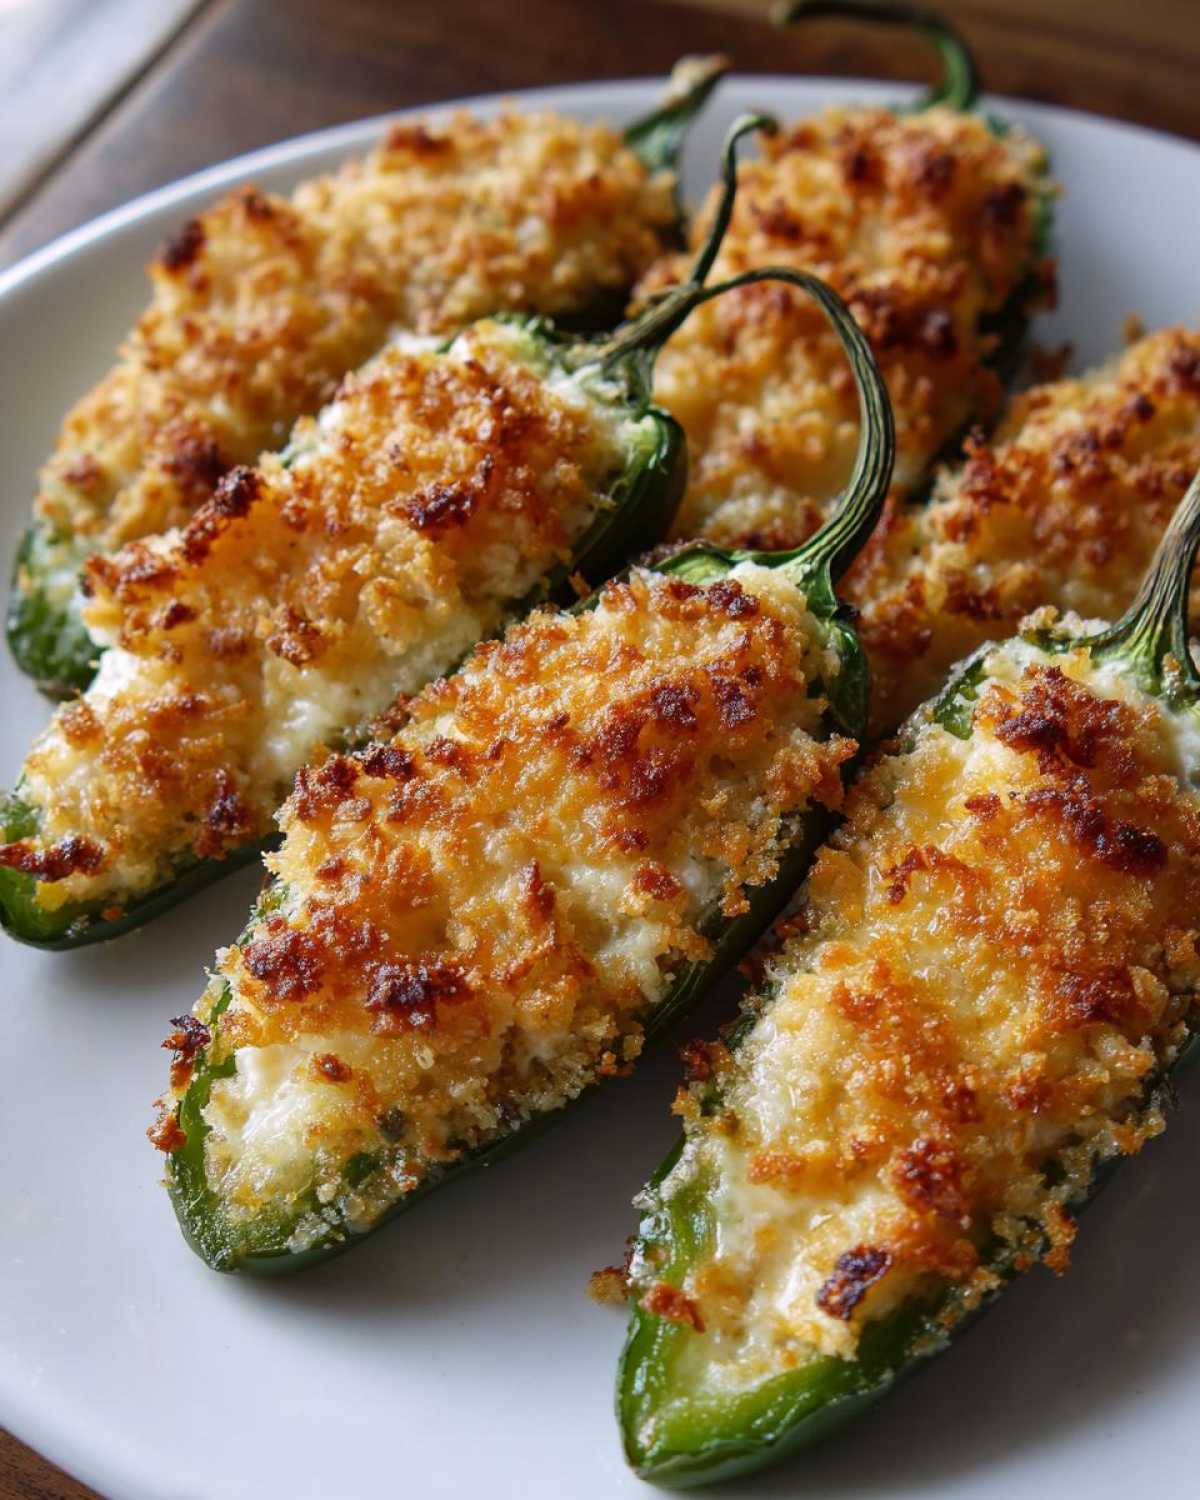
Essential Ingredients for Perfect Jalapeño Poppers
The secret to great bacon wrapped poppers or the plain baked kind is starting with quality basics. Alex is very methodical about ingredients—he actually measures things out first, which I admire! When it comes to these spicy appetizer poppers, precision here means you get that perfect, dreamy texture every time. You’ll need these items on hand:
- 12 fresh jalapeño peppers (make sure they look firm and bright green!)
- 8 ounces cream cheese, makes sure it’s softened on the counter for at least an hour
- 1/2 cup shredded sharp cheddar cheese (I love the extra bite that sharp gives us)
- 1/4 teaspoon garlic powder
- 1/4 teaspoon onion powder
- 1/4 teaspoon salt (just enough to wake up the cheese)
- 1/2 cup panko breadcrumbs (Panko, not regular breadcrumbs—it makes a huge difference for the crunch!)
- 2 tablespoons melted butter (only the real stuff, please!)
- Optional but highly recommended: 12 thin slices of bacon for wrapping
See? Nothing too complicated! But oh boy, when those simple ingredients bake together, it’s pure magic. Seriously, don’t skimp on softening that cream cheese; scrambling to mash cold cheese into the cheddar is a recipe for a lumpy filling, and we want velvety smooth centers for our cream cheese stuffed jalapeños.
Expert Tips for Preparing Your Jalapeño Poppers
Okay, now for the part that makes everyone nervous: handling the spice! When Alex and I first started making these, we learned very quickly that you don’t just chop these peppers with bare hands. We want the heat in the food, not on our skin for the next two days! Approach this stage methodically—that’s Alex’s favorite word, and it really pays off here for consistent results.
Also, remember what I said about the stuffing being smooth? It all starts right here before we even look at the oven preheating.
Controlling the Heat: Deseeding Jalapeño Poppers
Step one, always, is protection. Grab a pair of kitchen gloves; seriously, don’t skip this. Slice each pepper right down the middle lengthwise. Then, take a tiny spoon or the tip of a paring knife and gently scrape out every single seed and, more importantly, that white webbing inside—we call that the membrane or pith. If you leave too much of that white part in there, your poppers are going to be fiery! If you like real, honest-to-goodness heat, you can leave a little bit of that membrane attached, but for party food, I always scrape it all out for a milder bite.
Making the Ultimate Cream Cheese Stuffed Jalapeños Filling
When you’re combining that softened cream cheese with the cheddar, garlic powder, onion powder, and salt, you need it smooth and velvety. If your cream cheese is still chilly, it’s going to clump, and we don’t want any sad, cold clumps inside our hot poppers. Mix this filling until it looks totally uniform and creamy—it should be spreadable like icing. This perfectly blended cheese base is what makes these cream cheese stuffed jalapeños so wonderfully rich. You want a dip this good? Check out the recipe for our creamy homemade cheesy dip for some pairing ideas!
Step-by-Step Instructions for Baked Jalapeño Poppers
You’ve done the careful work of prepping your peppers and mixing up that dreamy cheese filling. Now comes the fun part! Since we’re taking the baked jalapeño poppers route, preheating is our first order of business so everything cooks evenly.
- Get the Oven Ready: You’ll want your oven cranked up to 400 degrees F. While that’s heating, make sure you line a sturdy baking sheet with parchment paper. This parchment is your best friend for easy cleanup later, trust me!
- Stuff Them Carefully: Take that luscious cream cheese mixture you made and spoon it generously into the hollowed-out jalapeño halves. Don’t try to pile it too high, or it’ll just spill over the sides when it melts. A nice, even dome is perfect.
- Wrap the Bacon (If Using): If you decided to go for the glorious bacon addition, now is the time! We wrap one thin slice of bacon snugly around the filled side of the pepper half. If the bacon is being a little defiant and won’t stay put, just thread a toothpick through it to secure it to the pepper.
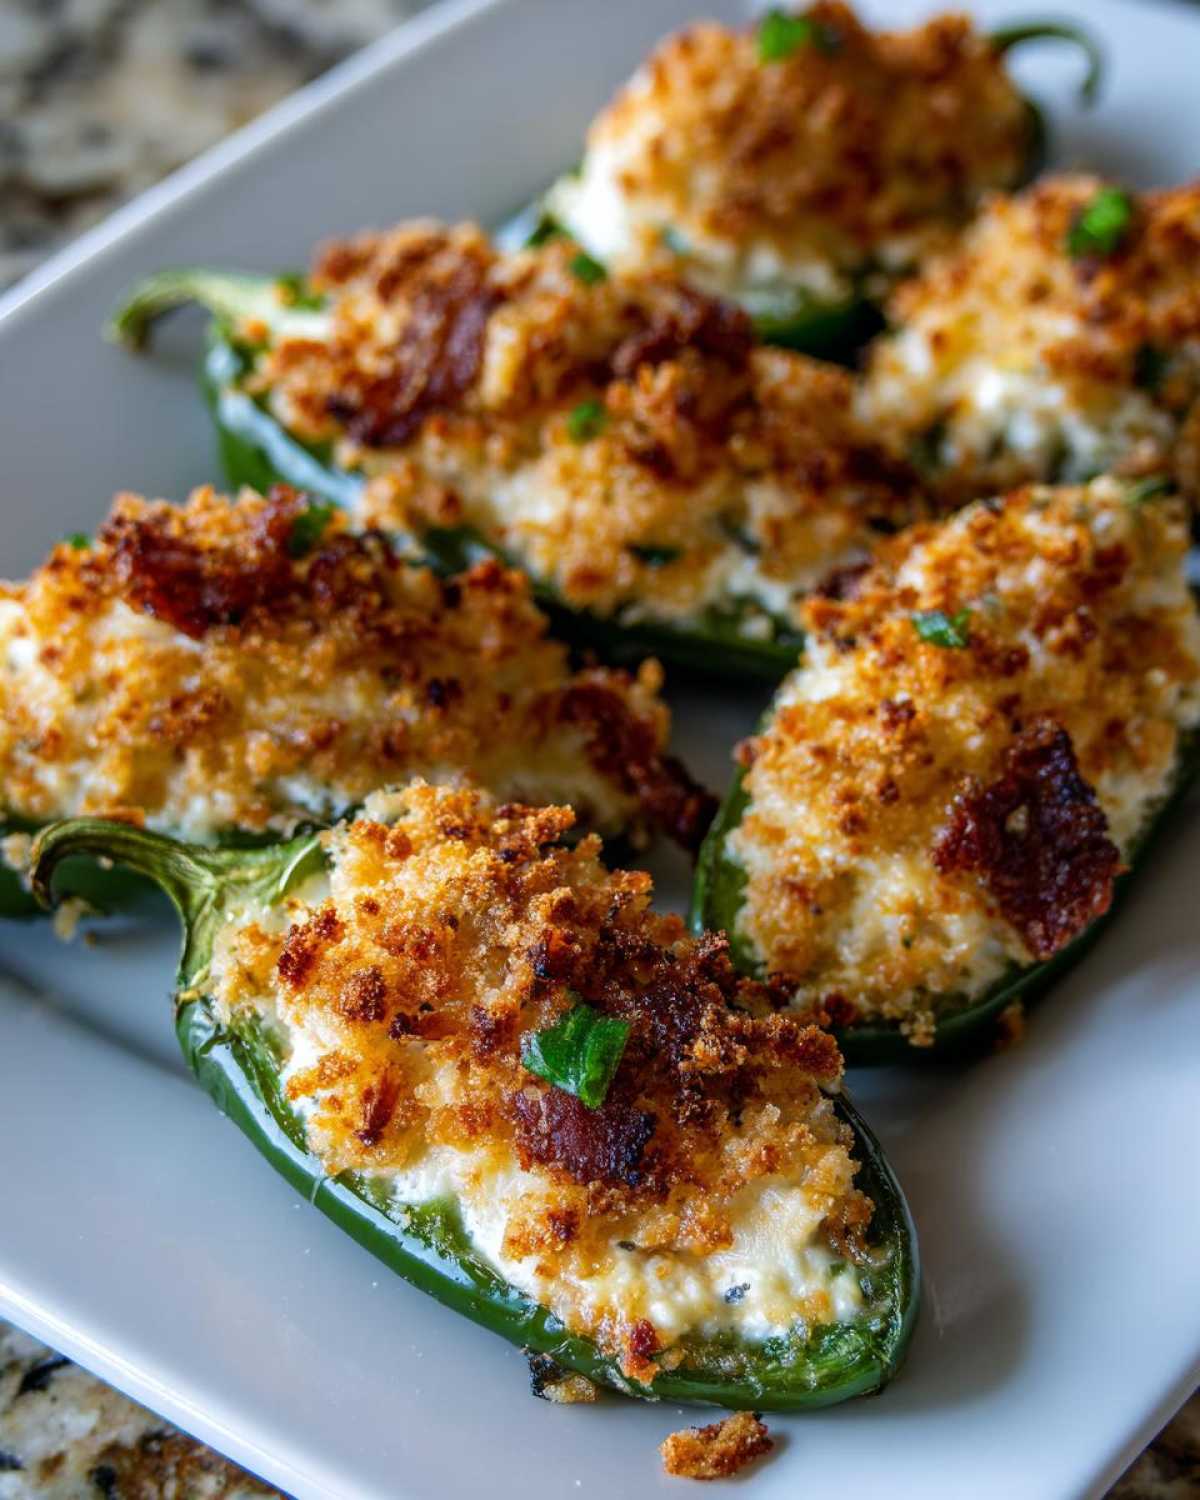
- Add the Crunch Factor: In a small little bowl—I tend to use a ramekin—toss your panko breadcrumbs with that melted butter until they look like wet sand. Sprinkle this buttery panko mixture evenly over the tops of all the filled peppers. This is what gives us that incredible crispiness!
- Time to Bake: Arrange all your prepared poppers neatly on that lined baking sheet. Pop them into the already hot oven. They usually take about 18 to 22 minutes. You’re watching for two things: tender peppers and cheese that is completely bubbly and just starting to turn golden brown on the edges. If you used bacon, make sure it’s cooked until crisp.
- Cool Down Moment: Whoa, look at that glorious color! Take the baking sheet out. You absolutely must let them cool for a few minutes before serving. That molten cheese center is lava hot right out of the oven. A little patience here means you won’t burn your mouth on the best appetizer you’ve ever made!
Variations: Bacon Wrapped Poppers and More
Even though our classic **baked jalapeño poppers** recipe is perfection—especially when we go for the savory **bacon wrapped poppers**—I always love having options ready for guests. Sometimes you need a totally different flavor profile or just realize you ran out of bacon halfway through! Alex always jokes that my creativity spikes when the main ingredient runs low. Here are a couple of ways we switch things up when making a big batch of these cheesy appetizers.
Wrapping the pepper in bacon is definitely a showstopper. When you do this, make sure you use those thin slices we mentioned. If the bacon is too thick, it won’t crisp up properly in the 20 minutes the peppers need to cook. I usually try to get the bacon to slightly overlap on the cheese part before I secure it with a toothpick, just so that filling stays tucked in nice and snug while baking. It comes out tasting just like a barbecue treat!
Swap Out the Cheese for Flair
If you’re skipping the bacon, or just feel like getting extra creative, think about jazzing up that cheese filling a little. We have done this for years, almost like we were using up odds and ends from our spice collection back when we lived abroad! Instead of just cheddar, try using Pepper Jack for a double dose of heat, or even Smoked Gouda for a depth of flavor that is surprisingly good with jalapeño.
Another tiny twist? Mix in a tablespoon of something vibrant. Finely chopped chives or even the very top green parts of the jalapeño (the part you cut off the stem) that you saved earlier can be mixed into the cream cheese. It adds a lovely hint of fresh onion flavor, making them feel a little brighter. For more vibrant vegetable dishes, you should check out how we handle greens in this crack green beans recipe!
The Breadcrumb Bypass (or Boost!)
The panko topping is essential for that crispy exterior we love. However, if you want to change the game entirely, skip the breading altogether! Seriously, just brush the tops of the stuffed peppers lightly with olive oil—or even just melted butter—and bake them as is. The cheese browns beautifully on its own and you get a softer bite around the pepper itself. It’s a different texture entirely, but still yummy.
On the other hand, if you want EXTRA crunch, once they come out of the oven during the last two minutes, you can quickly switch the oven to broil. Watch them like a hawk, though! Broiling works magic on the panko crust, but cheese can burn in seconds, and we certainly don’t want to ruin that beautiful meal.
Serving Suggestions for Your Spicy Appetizer Poppers
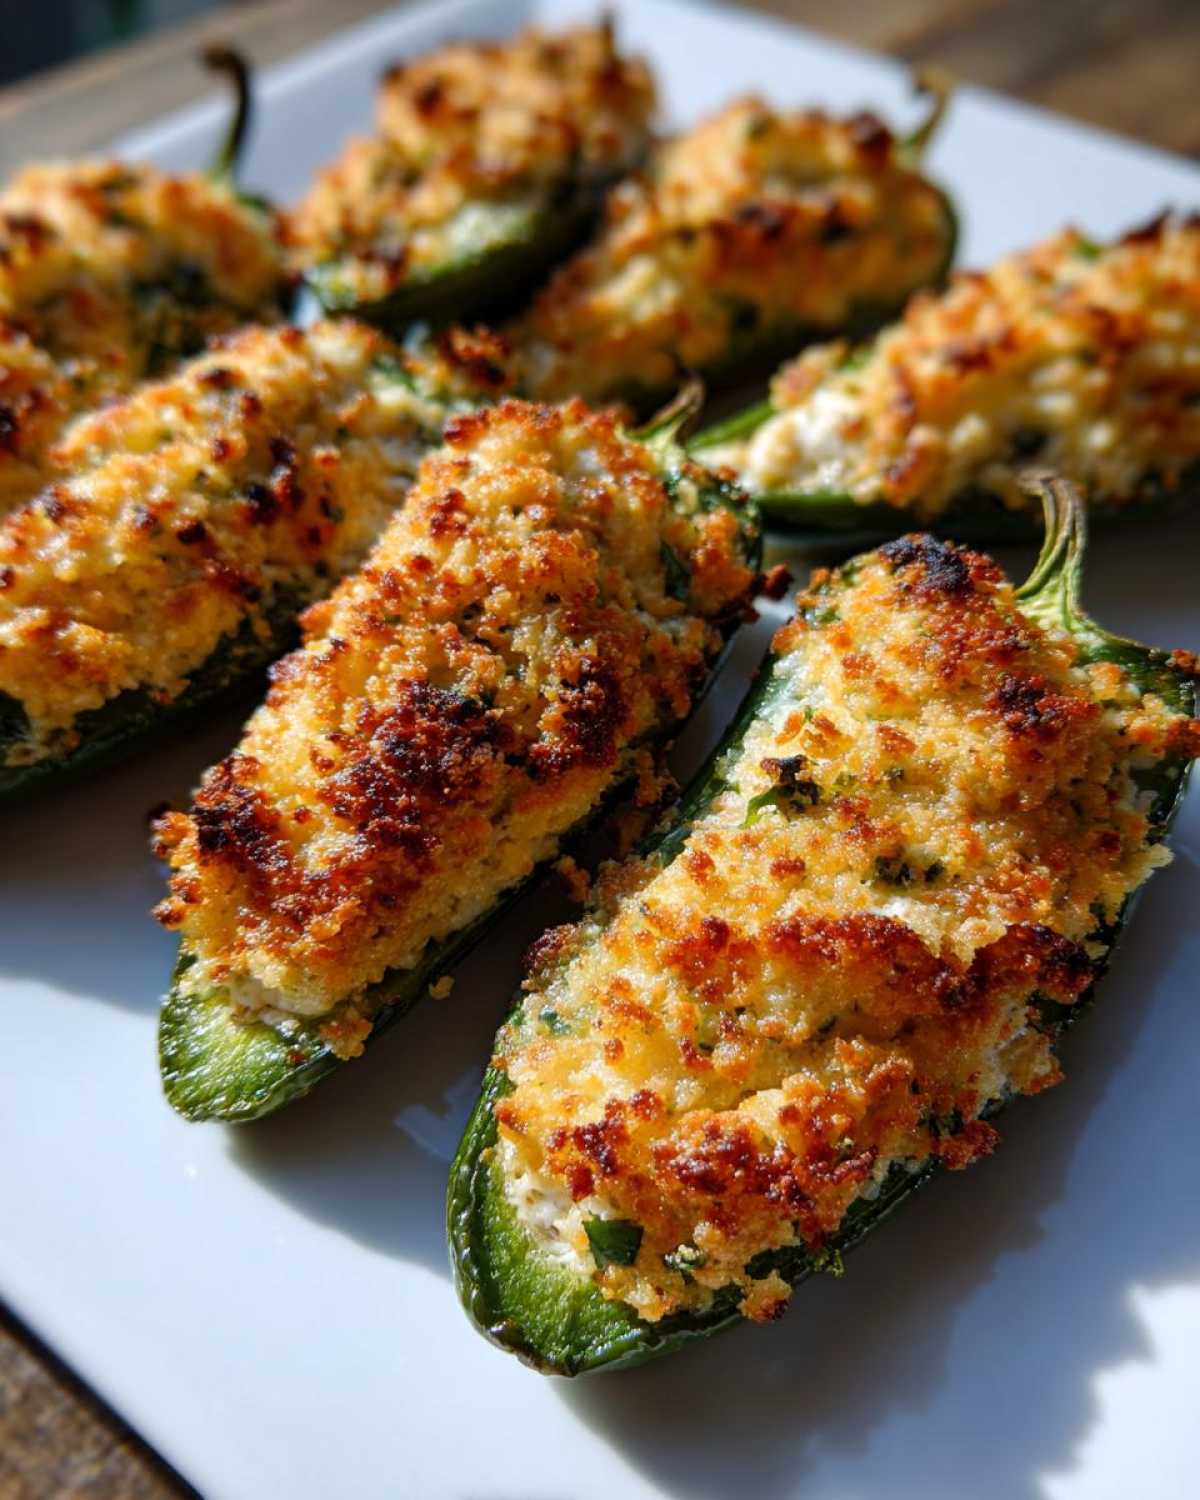
Now that you have these gorgeous, bubbly, **spicy appetizer poppers** ready to go—whether they are wrapped in bacon or just gloriously cheesy—you absolutely need the right sauce game. Food shared during a thrilling game night needs dipping options, right? You can’t just set out plates of perfect **jalapeño poppers** naked! They need partners. Alex leans toward things that balance the heat, while I usually grab whatever is the creamiest on hand.
Here are a couple of dips that pair perfectly with the creamy center and the slight vegetal burn of the baked pepper:
- Cooling Ranch or Blue Cheese: This is the classic, no-fail choice. Cold, tangy ranch dressing is the perfect antidote to any lingering heat from the jalapeño. If you’ve got friends who really love pungent flavors, a good, chunky blue cheese dressing is fantastic with the sharp cheddar in the filling.
- Tangy Sour Cream with Herbs: Sometimes simple is best. Just take a container of full-fat sour cream, stir in a tiny bit of lime juice, some finely snipped cilantro or oregano, and maybe a pinch of salt. This adds a fresh, clean flavor that cuts through the richness of the cheese beautifully.
- A Sweet & Smoky Partner: If you want something totally different—something that plays with the heat instead of just cooling it down—you’ve got to try a slightly sweet sauce. We are massive fans of mixing our favorite Big Mac Sauce style dressing with a teaspoon of smoky chipotle powder. It gives you a sweet, tangy, and smoky coating that makes these **cream cheese stuffed jalapeños** taste gourmet!
When setting these out for guests during a big game, I like to put the dips in small, colorful bowls right next to the platter of poppers. A little color contrast makes the whole spread look ten times better. Enjoy watching everyone dunk!
Storage and Reheating Baked Jalapeño Poppers
It’s rare that we ever have leftovers of these poppers because everyone loves them so much, but if you are hosting a huge crowd or just want to save some for a speedy lunch the next day, knowing how to store them properly is key! We don’t want to ruin that beautiful crunch we worked so hard for with the panko topping. Trust me, there are smarter ways to store these than just leaving them out!
If you have any leftovers, the first thing you need to do is let them cool down completely to room temperature. Putting hot food straight into the fridge creates steam, and steam equals sogginess. We don’t want soggy!
Once they are totally cool, place them in an airtight container. If you can, I like to lay down a piece of paper towel on the bottom of the container first. This helps absorb any moisture that might try to creep in overnight. They hold up beautifully in the refrigerator for about three or four days, tasting almost as good as fresh if you reheat them right.
The Best Way to Reheat for Maximum Crispness
This is the most important tip I can give you about leftovers! Put the microwave down. Seriously, the microwave turns that beautiful, buttery panko crust into sad, chewy mush. We want crunchy!
Your oven or your air fryer are your best friends here:
- Oven Method: Preheat your oven back up to about 350 degrees F. Lay the poppers out in a single layer on a foil-lined baking sheet (foil makes cleanup easy!). Heat them for about 5 to 8 minutes. That gentle, dry heat warms the cheese all the way through while reviving that incredible crunch on top.
- Air Fryer Magic: If you have an air fryer, use it! This is the fastest way to get that close-to-fresh texture back. Set it to 350 degrees F and air fry them for only 3 to 4 minutes. Keep an eye on them, though, because they heat up fast, and you don’t want those crispy edges to burn!
If you happen to have **bacon wrapped poppers**, the air fryer is especially good for recrisping the bacon that might have softened up while resting in the fridge. It works like a charm every single time!
Nutritional Snapshot of These Jalapeño Poppers
You know me, I usually don’t fuss too much with calorie counting when it comes to appetizers—especially when they are this good and meant for sharing at a party! But since Alex is a former engineer, he insists on having a rough estimate of what we’re diving into. So, here’s a general idea of what you’re looking at for serving size when you make these, assuming you stick to the basic **jalapeño poppers** recipe without the optional bacon.
Remember, this is just a guide, not a science degree! These numbers can swing based on exactly how much cheese sneaks out during baking or if you use a lighter or sharper cheddar. This overview focuses on about two pepper halves—enough for a good little snack that won’t derail your whole evening before the main event.
- Serving Size: 2 halves (one whole jalapeño pepper stuffed)
- Calories: Around 110 calories per serving. Not bad for a cheesy, crispy treat!
- Fat: About 9 grams. This comes mainly from the cream cheese and butter in the topping. That’s where the flavor lives!
- Carbohydrates: Roughly 4 grams, mostly from the panko breadcrumbs.
- Protein: A nice little boost of around 4 grams, thanks to that double whammy of cream cheese and cheddar.
If you decide to go all-in and make the **bacon wrapped poppers**, you’ll see those numbers climb up, especially fat and sodium, but honestly, it’s worth every extra bite for game night! We’re prioritizing flavor here, but knowing these baked versions are far lighter than if we were deep-frying them makes me feel much better about eating half the tray myself!
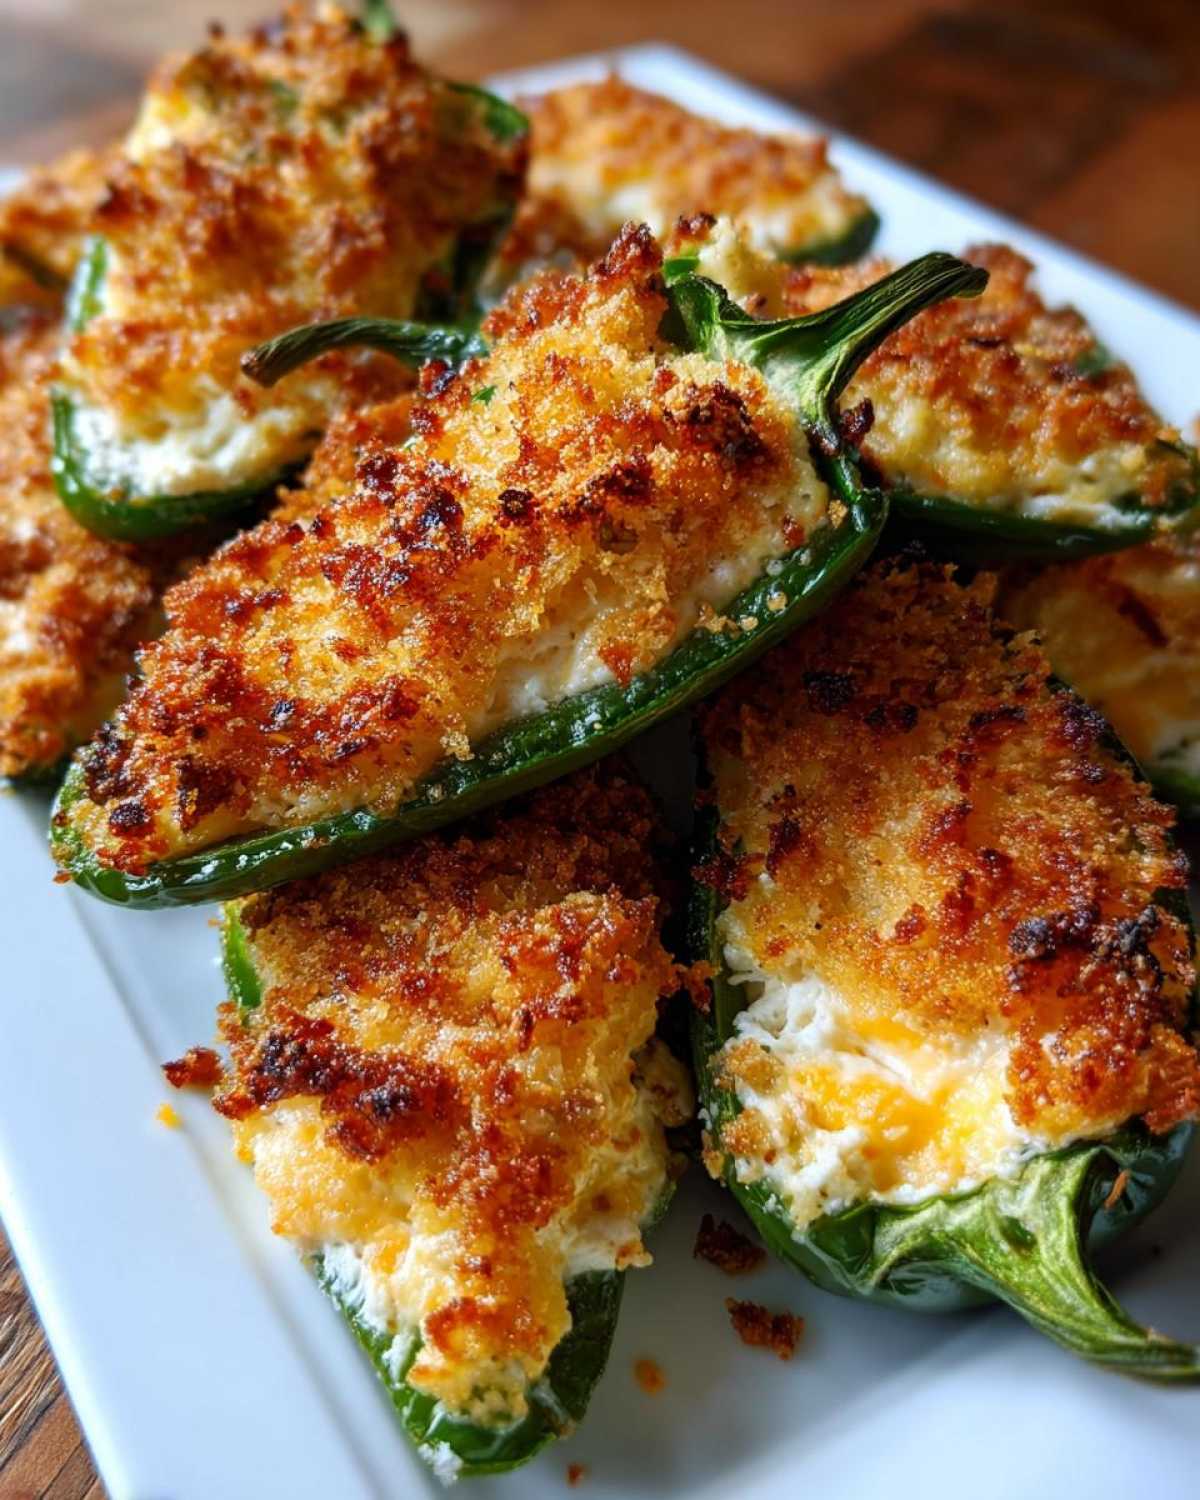
Serving Suggestions for Your Spicy Appetizer Poppers
Now that you have these gorgeous, bubbly, spicy appetizer poppers ready to go—whether they are wrapped in bacon or just gloriously cheesy—you absolutely need the right sauce game. Food shared during a thrilling game night needs dipping options, right? You can’t just set out plates of perfect jalapeño poppers naked! They need partners. Alex leans toward things that balance the heat, while I usually grab whatever is the creamiest on hand.
Here are a couple of dips that pair perfectly with the creamy center and the slight vegetal burn of the baked pepper:
- Cooling Ranch or Blue Cheese: This is the classic, no-fail choice. Cold, tangy ranch dressing is the perfect antidote to any lingering heat from the jalapeño. If you’ve got friends who really love pungent flavors, a good, chunky blue cheese dressing is fantastic with the sharp cheddar in the filling.
- Tangy Sour Cream with Herbs: Sometimes simple is best. Just take a container of full-fat sour cream, stir in a tiny bit of lime juice, some finely snipped cilantro or oregano, and maybe a pinch of salt. This adds a fresh, clean flavor that cuts through the richness of the cheese beautifully.
- A Sweet & Smoky Partner: If you want something totally different—something that plays with the heat instead of just cooling it down—you’ve got to try a slightly sweet sauce. We are massive fans of mixing our favorite Big Mac Sauce style dressing with a teaspoon of smoky chipotle powder. It gives you a sweet, tangy, and smoky coating that makes these **cream cheese stuffed jalapeños** taste gourmet!
When setting these out for guests during a big game, I like to put the dips in small, colorful bowls right next to the platter of poppers. A little color contrast makes the whole spread look ten times better. Enjoy watching everyone dunk!
Storage and Reheating Baked Jalapeño Poppers
It’s rare that we ever have leftovers of these poppers because everyone loves them so much, but if you are hosting a huge crowd or just want to save some for a speedy lunch the next day, knowing how to store them properly is key! We don’t want to ruin that beautiful crunch we worked so hard for with the panko topping. Trust me, there are smarter ways to store these than just leaving them out!
If you have any leftovers, the first thing you need to do is let them cool down completely to room temperature. Putting hot food straight into the fridge creates steam, and steam equals sogginess. We don’t want soggy!
Once they are totally cool, place them in an airtight container. If you can, I like to lay down a piece of paper towel on the bottom of the container first. This helps absorb any moisture that might try to creep in overnight. They hold up beautifully in the refrigerator for about three or four days, tasting almost as good as fresh if you reheat them right.
The Best Way to Reheat for Maximum Crispness
This is the most important tip I can give you about leftovers! Put the microwave down. Seriously, the microwave turns that beautiful, buttery panko crust into sad, chewy mush. We want crunchy!
Your oven or your air fryer are your best friends here:
- Oven Method: Preheat your oven back up to about 350 degrees F. Lay the poppers out in a single layer on a foil-lined baking sheet (foil makes cleanup easy!). Heat them for about 5 to 8 minutes. That gentle, dry heat warms the cheese all the way through while reviving that incredible crunch on top.
- Air Fryer Magic: If you have an air fryer, use it! This is the fastest way to get that close-to-fresh texture back. Set it to 350 degrees F and air fry them for only 3 to 4 minutes. Keep an eye on them, though, because they heat up fast, and you don’t want those crispy edges to burn!
If you happen to have **bacon wrapped poppers**, the air fryer is especially good for recrisping the bacon that might have softened up while resting in the fridge. It works like a charm every single time!
Frequently Asked Questions About Jalapeño Poppers
These are some of the questions I get most often after posting about our favorite **jalapeño poppers** recipe. Dealing with chiles can be intimidating, but honestly, once you know the tricks, these are the easiest things in the world to whip up. Here are the little details that seem to trip people up, but which are honestly simple fixes!
Can I make these jalapeño poppers ahead of time?
Yes, you absolutely can! This is a lifesaver when you’re planning a big party, like for that big game everyone talks about. You can do all the prep work—slice the peppers, mix the **cream cheese stuffed jalapeños** filling, and stuff them—up to a full day in advance. Keep the stuffed peppers covered tightly in the fridge. Just wait to sprinkle on that buttery panko topping until about 15 minutes before you plan to bake them. You want that topping fresh on top so it toasts up perfectly instead of getting damp while sitting in the fridge!
What is the best way to get crispy tops on my baked jalapeño poppers?
We rely heavily on that panko and melted butter mixture we discussed earlier. Panko absorbs the butter beautifully and crisps up in the oven without soaking up oil like regular breadcrumbs would. However, if you pull them out at 18 minutes and the cheese is bubbly but the top isn’t quite brown enough for you, here’s my trick: switch your oven setting to the broiler for just 60 to 90 seconds. Watch them like a hawk—I mean it! If you turn away for one second, you’ll go from golden brown to black charcoal. It gives those **baked jalapeño poppers** that extra layer of browned texture!
Are cream cheese stuffed jalapeños healthier than fried versions?
Absolutely, yes! If health is a concern, skipping the deep fryer is the single biggest win you can get here. When you deep-fry anything, you exponentially increase the fat content. Since our recipe involves baking them with just a little butter coating the panko, you cut down on tons of unnecessary fat while still getting that warm, melty cheese interior. They are still rich because we use real cream cheese, of course, but they are definitely a lighter, smarter choice than their fried counterparts—and just as delicious! If you like savory veggies with less grease, you should also check out the tips in my refrigerator pickles recipe for fresh snaps!
Serving Suggestions for Your Spicy Appetizer Poppers
Now that you have these gorgeous, bubbly, spicy appetizer poppers ready to go—whether they are wrapped in bacon or just gloriously cheesy—you absolutely need the right sauce game. Food shared during a thrilling game night needs dipping options, right? You can’t just set out plates of perfect jalapeño poppers naked! They need partners. Alex leans toward things that balance the heat, while I usually grab whatever is the creamiest on hand.
Here are a couple of dips that pair perfectly with the creamy center and the slight vegetal burn of the baked pepper:
- Cooling Ranch or Blue Cheese: This is the classic, no-fail choice. Cold, tangy ranch dressing is the perfect antidote to any lingering heat from the jalapeño. If you’ve got friends who really love pungent flavors, a good, chunky blue cheese dressing is fantastic with the sharp cheddar in the filling.
- Tangy Sour Cream with Herbs: Sometimes simple is best. Just take a container of full-fat sour cream, stir in a tiny bit of lime juice, some finely snipped cilantro or oregano, and maybe a pinch of salt. This adds a fresh, clean flavor that cuts through the richness of the cheese beautifully.
- A Sweet & Smoky Partner: If you want something totally different—something that plays with the heat instead of just cooling it down—you’ve got to try a slightly sweet sauce. We are massive fans of mixing our favorite Big Mac Sauce style dressing with a teaspoon of smoky chipotle powder. It gives you a sweet, tangy, and smoky coating that makes these **cream cheese stuffed jalapeños** taste gourmet!
When setting these out for guests during a big game, I like to put the dips in small, colorful bowls right next to the platter of poppers. A little color contrast makes the whole spread look ten times better. Enjoy watching everyone dunk!
Storage and Reheating Baked Jalapeño Poppers
It’s rare that we ever have leftovers of these poppers because everyone loves them so much, but if you are hosting a huge crowd or just want to save some for a speedy lunch the next day, knowing how to store them properly is key! We don’t want to ruin that beautiful crunch we worked so hard for with the panko topping. Trust me, there are smarter ways to store these than just leaving them out!
If you have any leftovers, the first thing you need to do is let them cool down completely to room temperature. Putting hot food straight into the fridge creates steam, and steam equals sogginess. We don’t want soggy!
Once they are totally cool, place them in an airtight container. If you can, I like to lay down a piece of paper towel on the bottom of the container first. This helps absorb any moisture that might try to creep in overnight. They hold up beautifully in the refrigerator for about three or four days, tasting almost as good as fresh if you reheat them right.
The Best Way to Reheat for Maximum Crispness
This is the most important tip I can give you about leftovers! Put the microwave down. Seriously, the microwave turns that beautiful, buttery panko crust into sad, chewy mush. We want crunchy!
Your oven or your air fryer are your best friends here:
- Oven Method: Preheat your oven back up to about 350 degrees F. Lay the poppers out in a single layer on a foil-lined baking sheet (foil makes cleanup easy!). Heat them for about 5 to 8 minutes. That gentle, dry heat warms the cheese all the way through while reviving that incredible crunch on top.
- Air Fryer Magic: If you have an air fryer, use it! This is the fastest way to get that close-to-fresh texture back. Set it to 350 degrees F and air fry them for only 3 to 4 minutes. Keep an eye on them, though, because they heat up fast, and you don’t want those crispy edges to burn!
If you happen to have **bacon wrapped poppers**, the air fryer is especially good for recrisping the bacon that might have softened up while resting in the fridge. It works like a charm every single time!
PrintEasy Baked Jalapeño Poppers with Cream Cheese Filling

Make these simple, cheesy jalapeño poppers in the oven for a perfect spicy appetizer without the deep-frying mess. Great for game night!
- Prep Time: 20 min
- Cook Time: 22 min
- Total Time: 42 min
- Yield: 24 halves
- Category: Appetizer
- Method: Baking
- Cuisine: American
- Diet: Vegetarian
Ingredients
- 12 fresh jalapeño peppers
- 8 ounces cream cheese, softened
- 1/2 cup shredded sharp cheddar cheese
- 1/4 teaspoon garlic powder
- 1/4 teaspoon onion powder
- 1/4 teaspoon salt
- 1/2 cup panko breadcrumbs
- 2 tablespoons melted butter
- Optional: 12 thin slices of bacon
Instructions
- Preheat your oven to 400 degrees F. Line a baking sheet with parchment paper.
- Put on gloves to handle the peppers. Slice each jalapeño lengthwise down the middle. Use a small spoon or knife to carefully scoop out the seeds and white membranes. This step controls the heat level.
- In a medium bowl, mix the softened cream cheese, cheddar cheese, garlic powder, onion powder, and salt until well combined. This is your cream cheese stuffed jalapeños filling.
- Spoon or pipe the cheese mixture evenly into the hollowed-out jalapeño halves. Do not overfill.
- If you are making bacon wrapped poppers, wrap one thin slice of bacon around the cheese-filled side of each pepper half and secure it with a toothpick if needed.
- In a small bowl, mix the panko breadcrumbs with the melted butter. Sprinkle the breadcrumb mixture evenly over the tops of the filled peppers.
- Place the prepared poppers on the baking sheet.
- Bake for 18 to 22 minutes, or until the peppers are tender and the cheese is bubbly and lightly browned. If using bacon, cook until the bacon is crisp.
- Remove from the oven and let cool for a few minutes before serving.
Notes
- Wear gloves when cutting the peppers to protect your skin from the capsaicin oil.
- For less heat, remove all the white membrane inside the pepper. For more heat, leave some membrane attached.
- If you skip the bacon, you can lightly spray the tops with cooking spray before adding the breadcrumbs for better browning.
Nutrition
- Serving Size: 2 halves
- Calories: 110
- Sugar: 1
- Sodium: 210
- Fat: 9
- Saturated Fat: 5
- Unsaturated Fat: 4
- Trans Fat: 0
- Carbohydrates: 4
- Fiber: 0
- Protein: 4
- Cholesterol: 25