

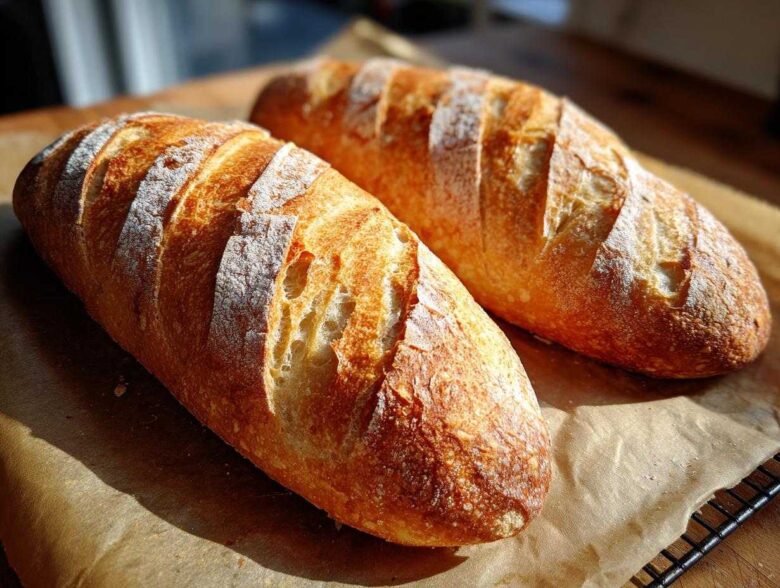
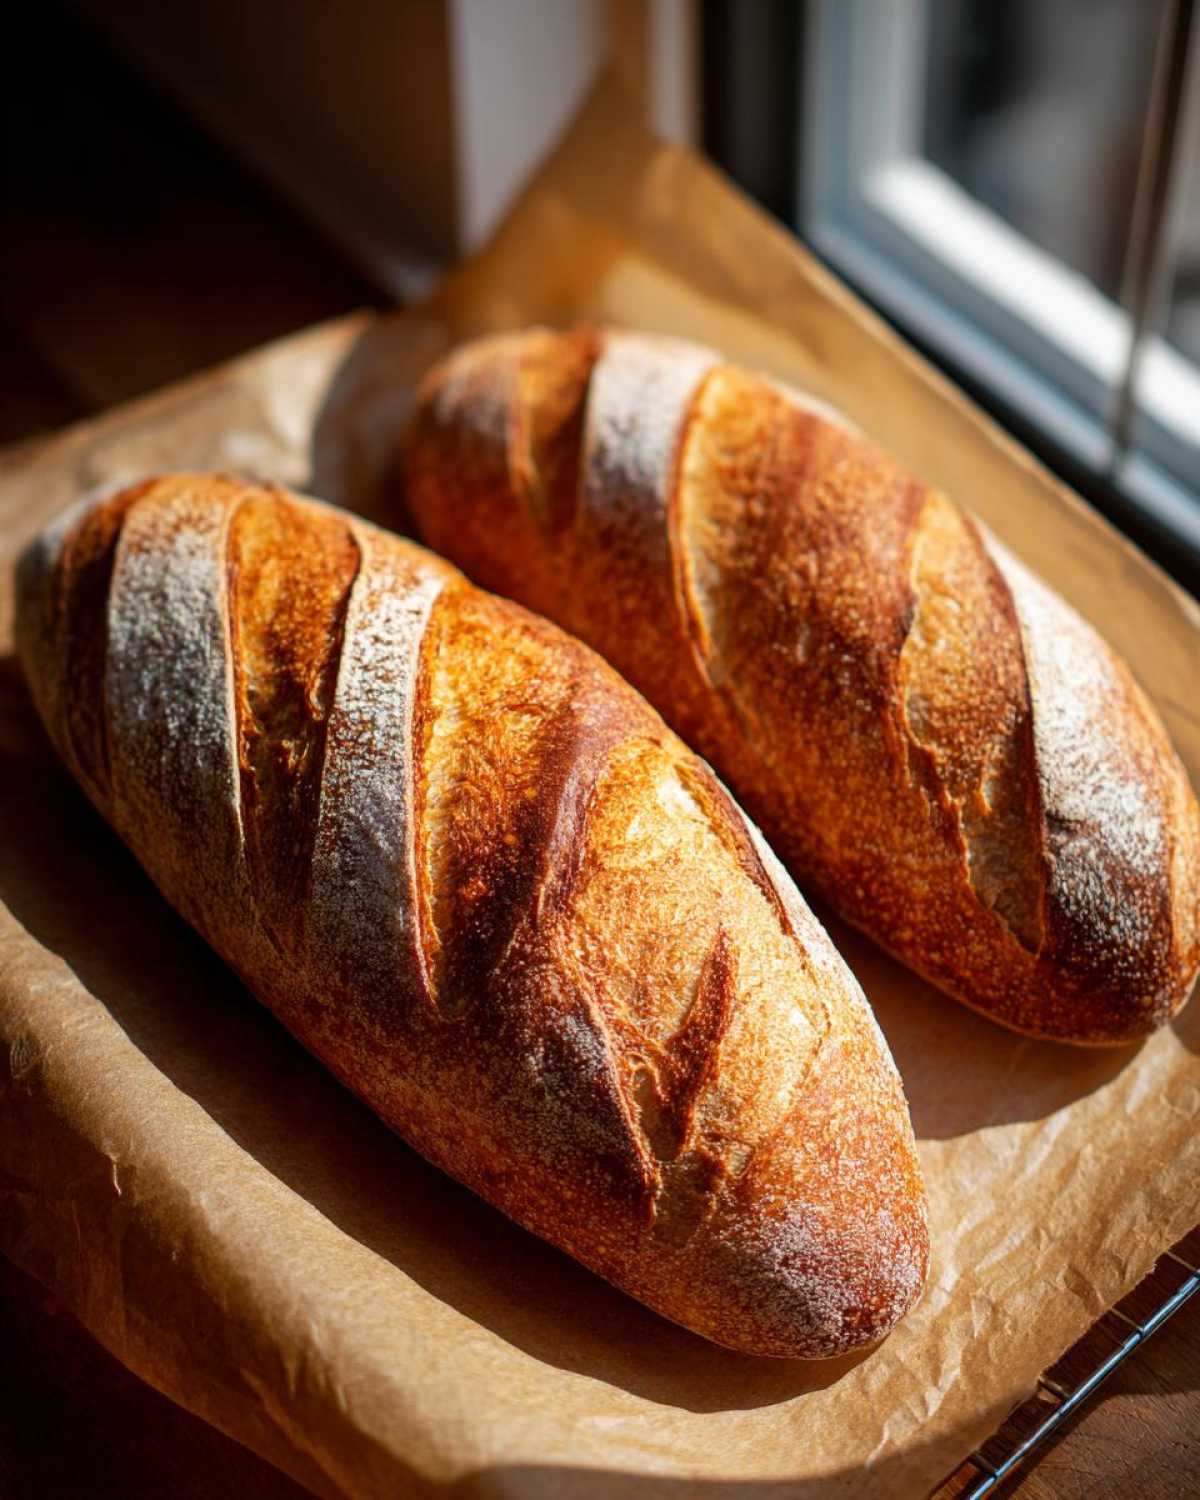
Oh, there is absolutely nothing—and I mean nothing—that beats the smell of fresh French bread baking in your oven. When Alex and I were living overseas, navigating busy markets and learning real, soulful cooking, the simple things, like a perfect loaf of bread, became such treasures. Coming back home, I realized we weren’t getting that kind of quality easily, so I settled on perfecting this recipe. Forget those dry, disappointing store-bought loaves! I’m going to show you how we get the absolute best result: a beautifully crusty exterior that shatters just right, protecting the perfectly soft, fluffy interior. You can make bakery-style French bread right here in your own kitchen, and the best part? It’s genuinely easy and ready in under two hours. Trust me on this one!
Why This Homemade French Bread Recipe Is Your New Favorite
I know you’re busy, so I made sure this recipe delivers top-tier results without fuss. This isn’t one of those tricky recipes that needs a fancy stand mixer or hours of rising time—we’re getting this done fast!
- Soft Fluffy Interiors: Every slice has that light, airy texture we all dream about.
- The Perfect Crunch: We use steam to guarantee that satisfying, bakery-style crackle when you cut into it.
- Speedy Baking: You’re looking at less than two hours total time to have this on your table!
- Beginner Approved: If you’re new to this, this simple yeast bread recipe is the perfect place to start your baking journey.
We’ve packed all the comfort of homemade loaf goodness into one reliable recipe. Check out our main recipe index if you want more simple baking inspiration!
Gathering Ingredients for Your Easy French Bread
Okay, this is the best part of any baking adventure—gathering your supplies! Since this is a Simple Yeast Bread recipe, you probably have most of this stuff waiting in your pantry already. That’s the magic of Easy French Bread, right?
For two beautiful loaves, you’ll need:
- 1 packet active dry yeast (That’s about 2 1/4 teaspoons. Make sure that packet isn’t ancient! Alive yeast is your goal for puffiness.)
- 1 teaspoon granulated sugar (This is just a little snack to wake up the yeast.)
- 1 cup warm water. This temperature is key—it needs to be between 105°F and 115°F. Too cold, and the yeast sleeps; too hot, and you kill it!
- 3 cups all-purpose flour, plus maybe a little extra just for dusting your counter later on.
- 1 1/2 teaspoons salt. We don’t want bland bread, that’s for sure!
- 1 tablespoon olive oil, plus a little extra just to grease your bowl.
- 1 egg white, lightly beaten. This is our secret weapon for that gorgeous, shiny finish on the crust.
Keep the water temperature in mind, especially if you’re baking on a chilly day. Nothing ruins a Homemade French Bread Recipe faster than slow, grumpy yeast!
Step-by-Step Guide to Making Soft French Bread at Home
Okay, deep breath! This is where the magic happens. Baking bread feels intimidating until you realize it’s mostly just waiting! We’re going to handle the dough in distinct stages to ensure we get that beautiful rise and that wonderful, tender crumb everyone looks for in authentic French bread. This recipe relies on the yeast doing its job, so we have to treat it nicely.
Activating Yeast and Mixing the Dough for Your French Bread
First things first: we need happy yeast. Remember that warm water we discussed? Dissolve a tiny bit of sugar in it, then sprinkle the yeast right on top. Go grab a cup of coffee or scroll through your phone for about five to ten minutes. If you come back and it looks like a foamy, bubbly mess, YES! Your yeast is alive and ready to work its air-making wonders. If it looks flat, toss it and start that step over, because flat yeast means flat bread.
Once the foam shows up, go ahead and mix that yeast mixture right into your flour and salt in a big bowl, along with that tablespoon of olive oil. Keep stirring it with a sturdy wooden spoon until it just starts pulling together into what I call a “shaggy mess.” Don’t worry about perfection here; that comes next!
Kneading and the First Rise for Fluffy Loaf Recipe
Now we get to knead! Turn that shaggy dough out onto a lightly floured space. You need to work it for a solid 6 to 8 minutes. I know, I know, your arms might burn a little, but this is what builds the structure for that fluffy loaf recipe texture. You’re looking for it to transform until it feels smooth, soft, and springs back a bit when you poke it. It needs that beautiful elasticity!
Next, put it in an oiled bowl, cover it snugly with plastic wrap, and let it sit for 60 to 90 minutes until it’s doubled in size. My trick—and Alex swears by this—is to switch off the oven, turn on the light inside (if it’s cold where you are!), and place the bowl inside the oven cavity without turning the heat on. It creates the perfect gentle warmth for a rapid rise. If you love soup, this resting time is perfect for whipping up a batch of French Onion Soup!
Shaping, Second Rise, and Scoring Your Homemade French Bread
Once it’s doubled, gently punch the air out—no drama, just deflate it! Divide that beautiful mass of dough in half. Now, gently stretch and roll each half until you have two long loaves, aiming for about 12 to 14 inches long. Don’t handle them too roughly; we want to keep those air pockets we just worked so hard to create.
Place these shaped loaves onto your parchment-lined baking sheet. Cover them again lightly and let them rest for a final 30 minutes. Before they go into the oven, take that beaten egg white—that’s our shine enhancer—and lightly brush it over the tops. Then, the fun part: grab a very sharp knife or razor blade and make three or four deep diagonal slashes, or scores, down the length of each loaf. These scores act like vents, allowing the bread to expand upward instead of bursting oddly everywhere else. If you want to check out another great quick bread idea, look at what the folks at Everyday She Moms suggests!
Achieving the Perfect Bakery Style Bread Crust
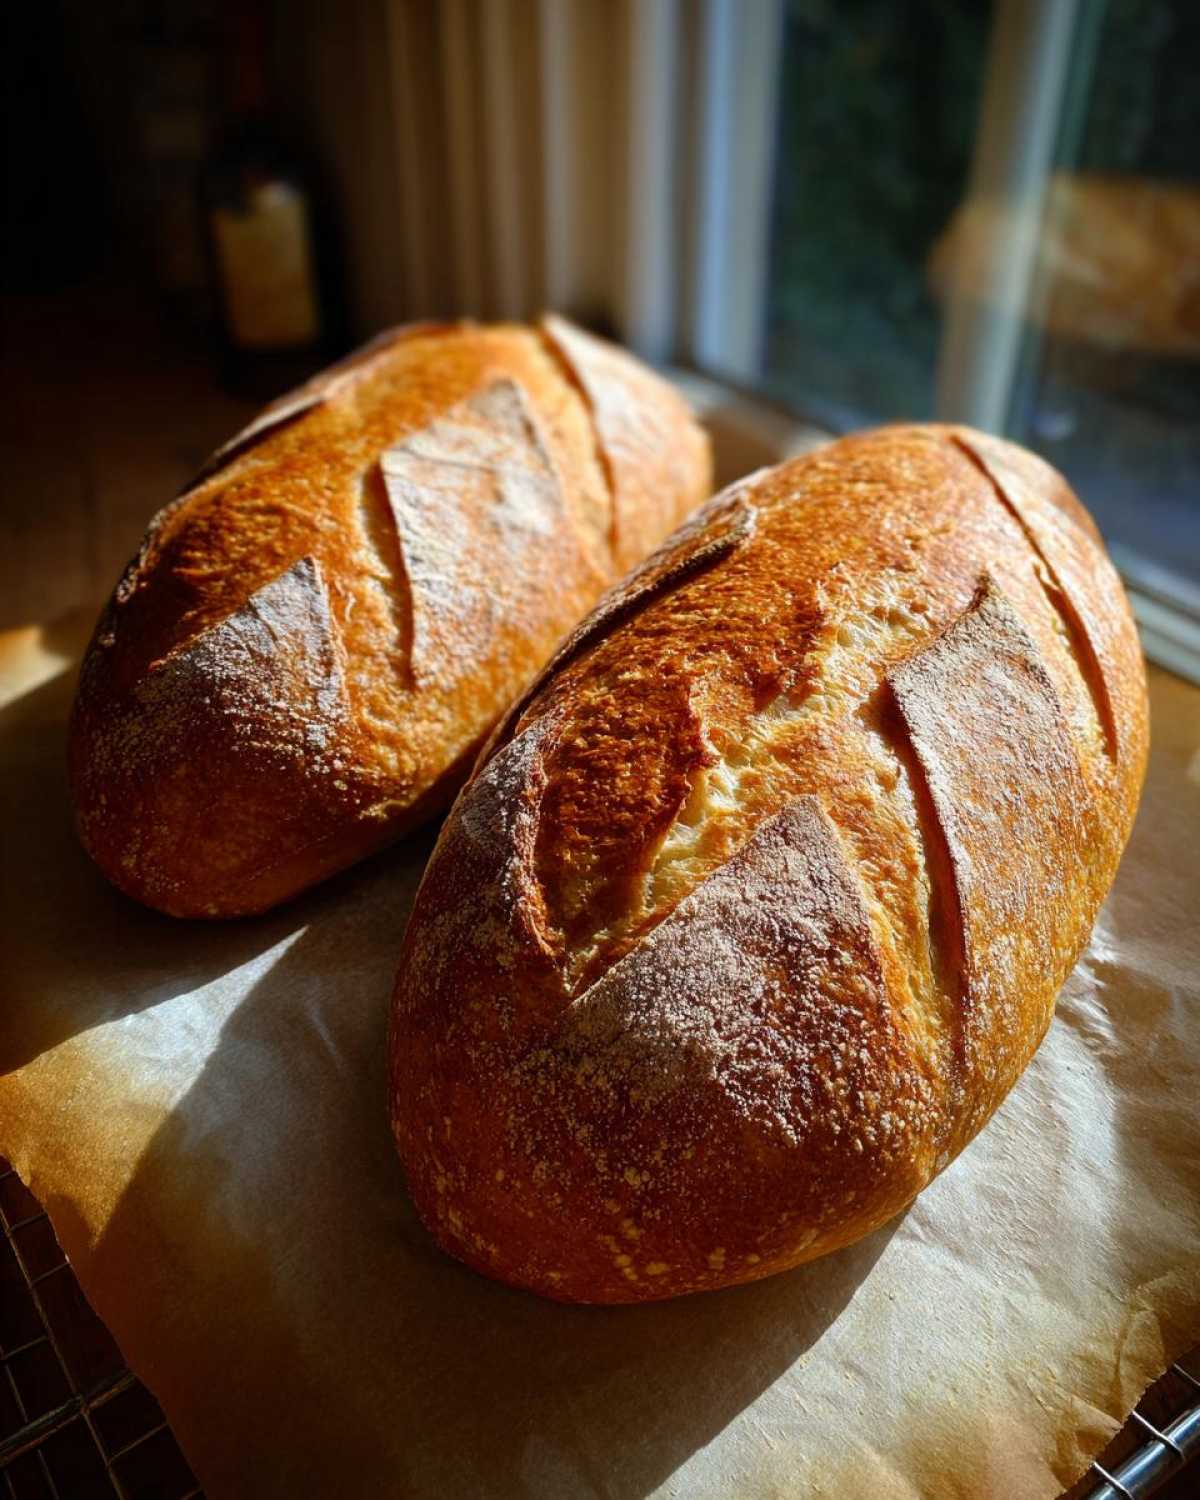
Listen, I could teach you how to make soft insides all day long, but if you don’t get that crust right, it’s not true French bread! This is where we pull out the secret behind that amazing, shatteringly crisp, bakery style bread exterior. It all comes down to steam, believe it or not.
First, you absolutely must preheat your oven properly. About 15 minutes before you plan to bake those beauties, set your oven to 400°F (200°C). Now, here’s the crucial bit: put an empty shallow pan—like an old metal jelly roll pan or cast iron skillet—on the very bottom rack while the oven heats up. We need that pan scorching hot!
Right after you score your loaves and brush them with the egg white, you’re going to carefully slide the baking sheet with your bread onto the middle rack. Then, and this part always gives me a little jolt, you quickly and carefully pour about a cup of very hot water right into that screaming hot pan on the bottom rack. Shut that oven door immediately! That water turns instantly to steam, and steam is what keeps the outside of the dough soft just long enough for the bread to expand fully before the crust sets. That’s how we get height and a great shape.
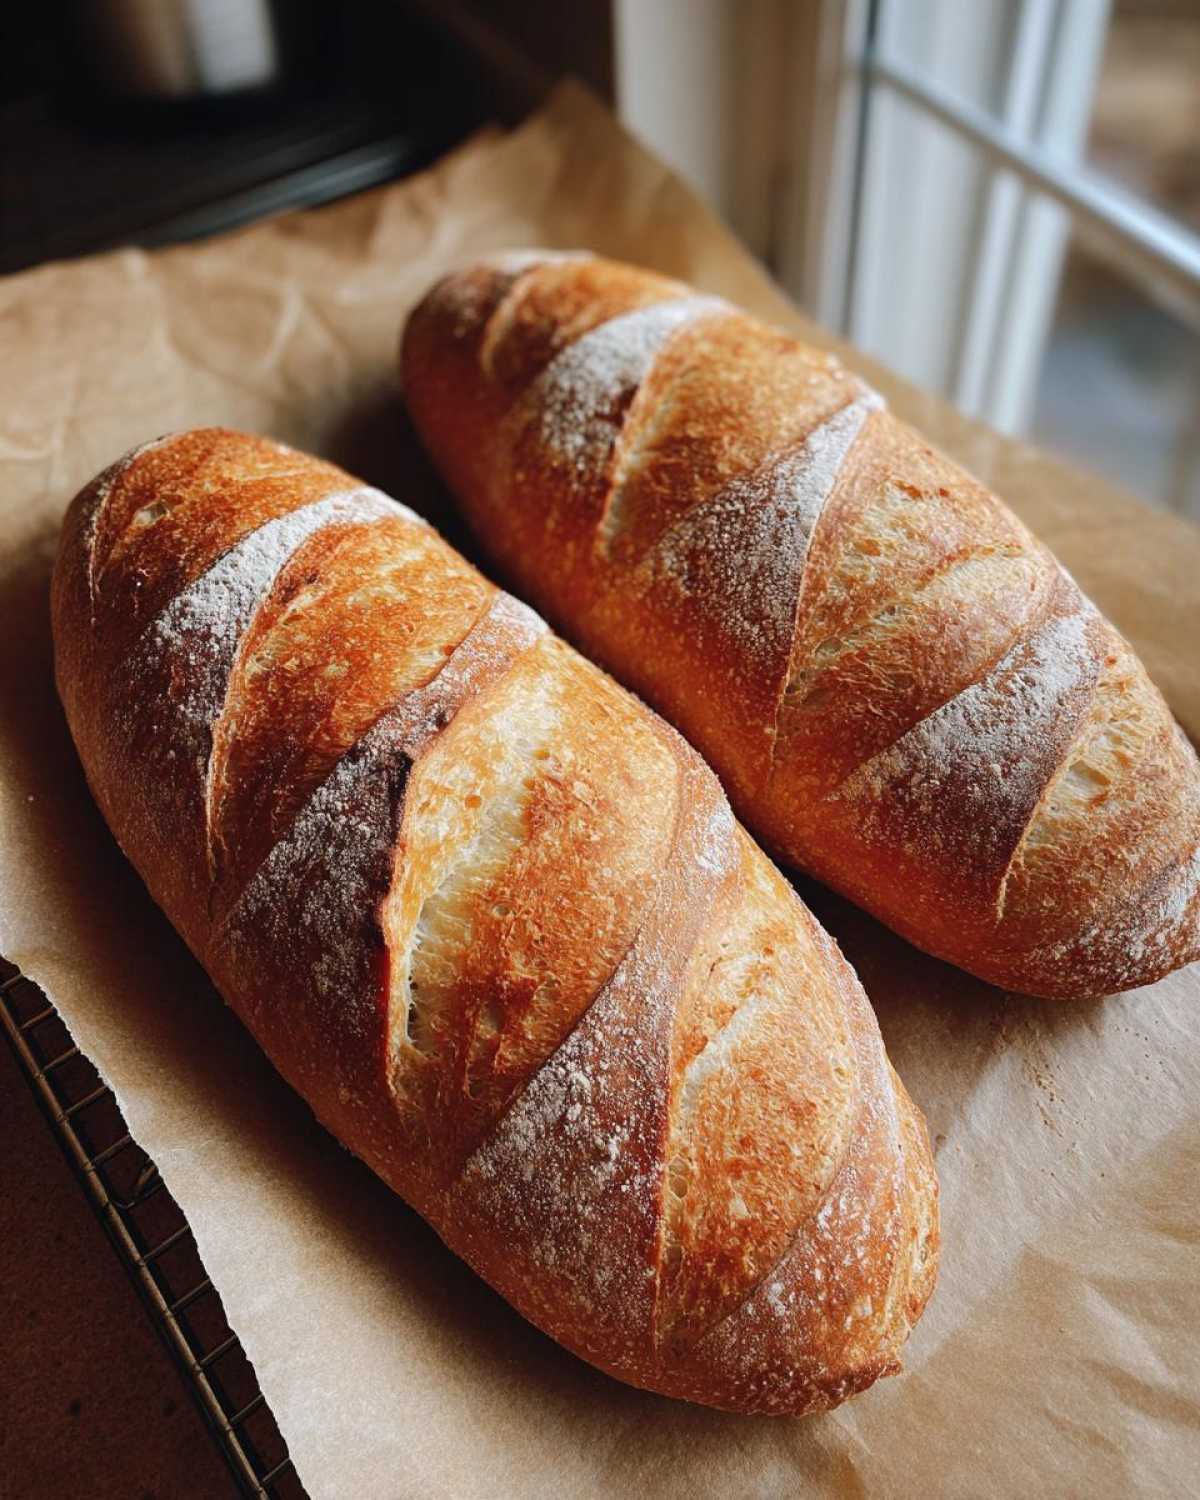
For that ultimate crunch that tastes just like the little bakeries back home, I’ve got one more little trick I picked up. During the first 10 minutes of baking, when that steam is doing its heavy lifting, open the oven door quickly—just a quick flash—and give the interior walls a quick spray with a water bottle. It sounds wild, but that extra burst of moisture seals the deal for a crispier exterior. When you’re done, those golden loaves need to cool on a rack, which lets air circulate and keeps the bottom from getting soggy. This technique is exactly how you get that perfect exterior you’d dip into some rich creamy baked garlic bread dip!
If you really want to dive deep into getting that perfect exterior texture, you should check out the tips over at Taste Within Aya; they go into great detail on the crust science!
Baking Homemade Bread Tips for Beginners
So, you’ve got your loaves shaped, rested, and maybe even scored beautifully. Now comes the final sprint to that golden-brown perfection! Don’t sweat the bake time; even though the recipe says 20 to 25 minutes, you need to use your senses, especially if you’re just starting out with baking homemade bread. Remember, every oven is a little bit different!
Keep that oven at 400°F (200°C). Once your bread goes in and the steam hits (remember that hot water trick?), you’ll bake it for about 20 to 25 minutes. You’re looking for a beautiful, deep golden color. If it looks pale after 25 minutes, give it another three or four minutes.
When you think it’s close, pull the baking sheet out just a smidge—careful, it’s hot!—and tap the bottom of one loaf. If it sounds fully hollow, like drumming on a wooden table, it’s done. That lovely hollow sound means the internal structure is set and cooked all the way through. That’s the best test, honestly, better than any timer!
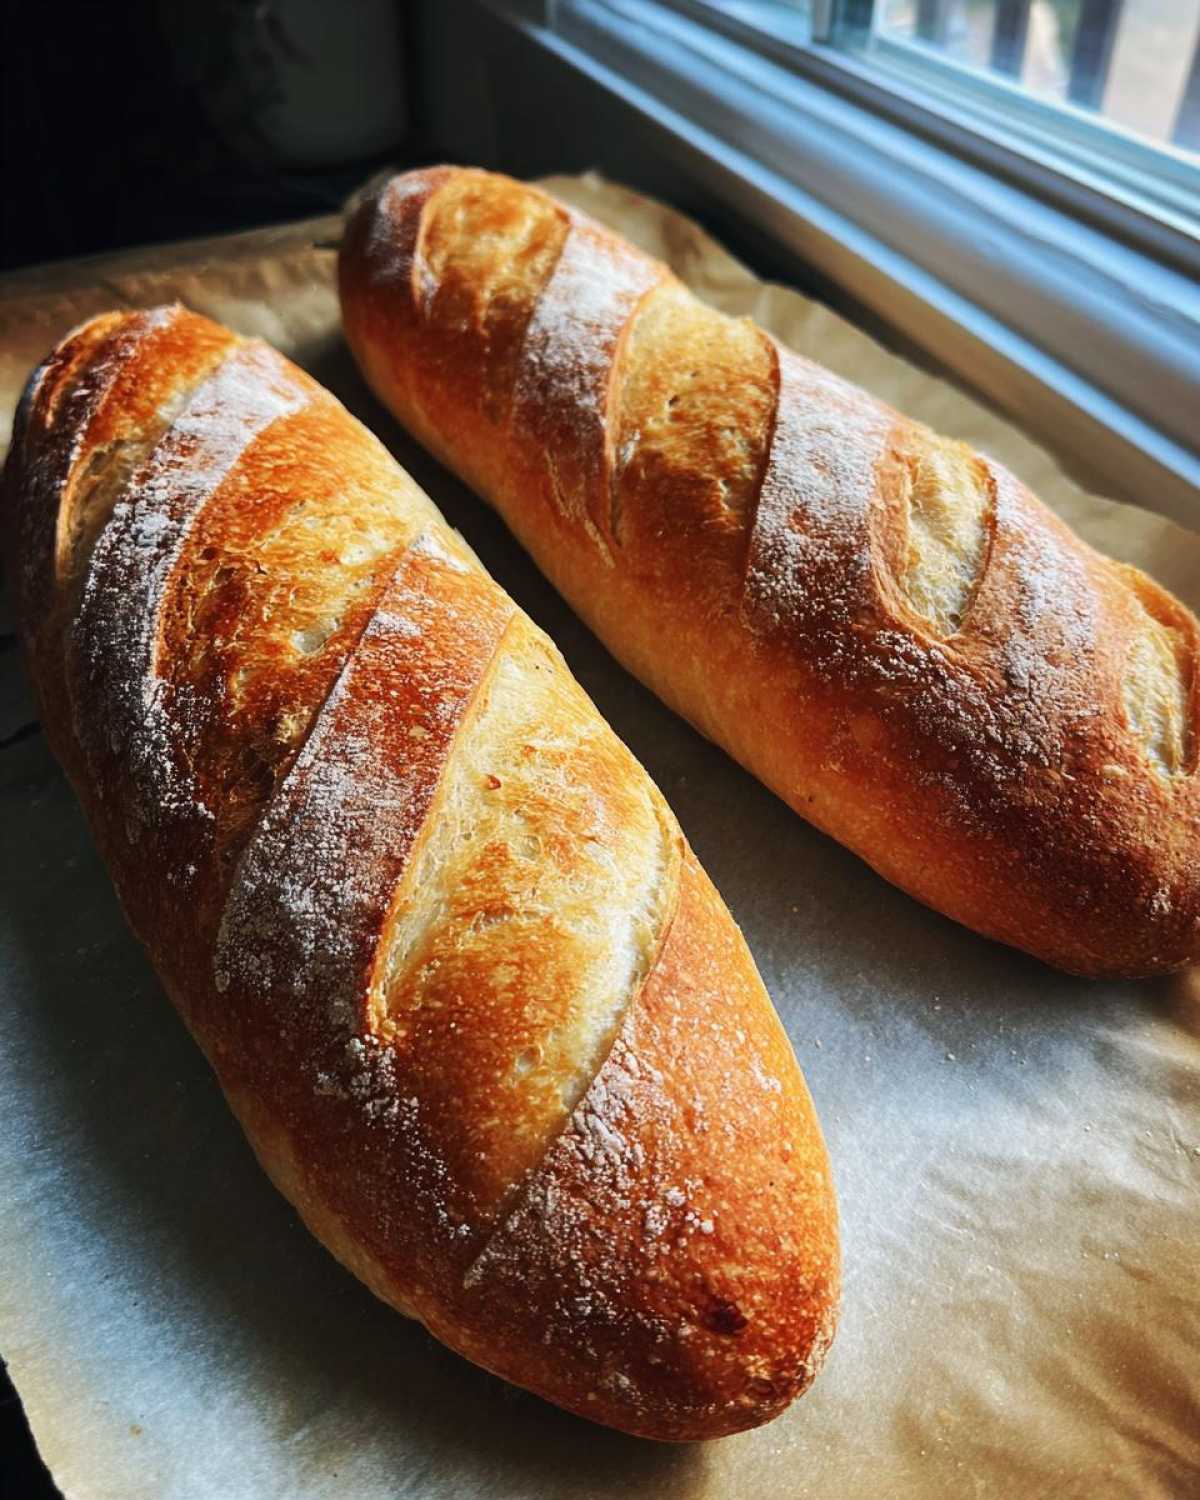
Now, I mentioned that egg white wash gives you that shiny, crisp crust, which is classic! But what if you prefer something a little softer for your Dinner Side Bread? That’s perfectly fine, no judgment here! If you want a slightly softer exterior—maybe you plan on buttering it up right away—just skip the egg white wash entirely. Instead, brush the tops lightly with plain water right before they go into the oven. That simple swap gives you a softer finish while still nailing that tender crumb bread texture inside. See? We can tailor this Homemade French Bread Recipe to whatever you want!
For more in-depth pointers on keeping your yeast game strong and managing oven heat, I put together a little guide over at Baking Homemade Bread Tips. Go check it out!
Ingredient Notes and Substitutions for Your French Bread
When you’re aiming for that Homemade French Bread Recipe success, the ingredients are pretty straightforward, but sometimes life throws us a curveball. Maybe you’re out of regular active dry yeast, or you just can’t find the exact flour you need. Don’t panic! Baking is flexible, and we can make substitutions without ruining the whole batch.
For instance, if you’ve only got instant yeast instead of active dry yeast? You’re in luck! Instant yeast is tough; it doesn’t need that warm water bath to wake up. Just mix the instant yeast right in with your dry flour and salt, and proceed to the kneading step. Skip the whole foamy waiting period. Easy peasy!
Now, flour is usually the main player in any Simple Yeast Bread. I rely on all-purpose flour because it gives us that lovely blend of soft interior and sturdy shape. But if you really want to lean into a chewier texture, maybe you’re planning on using this for really hearty sandwiches, you can swap out about half a cup of the all-purpose flour for bread flour. Bread flour has higher protein, which creates more gluten and gives you that satisfying pull. Don’t go switching all three cups, though, or you might end up with something too dense!
As for the oil, if you don’t have olive oil lying around, vegetable oil or even melted, slightly cooled butter works just fine in a pinch. The oil is really there to keep the dough from being too sticky during that first rise, so almost any neutral fat will do the trick! We’re keeping it simple so anyone can make this French bread.
Serving Suggestions for Dinner Side Bread
You’ve made the most wonderful, crusty loaves of Homemade French Bread—now what? Honestly, I could just eat an entire loaf standing over the counter with a hunk of good salted butter melting on top, but we should probably stretch this out for a meal or two, right?
This bread excels as a classic Dinner Side Bread. It soaks up sauce like a dream! It is absolutely mandatory that you have this on the table when serving any hearty stew or soup. My creamy Cowboy Soup just isn’t the same unless you have a thick piece of this French bread ready for dipping. Don’t use a flimsy slice; use a hearty hunk!
But we can’t stop there! Once these loaves cool, they make the absolute best foundation for almost any sandwich. Forget flimsy sandwich bread; when you use this, the crust gives you that perfect textural stand against gooey cheese or flavorful fillings. Whether you’re making a monstrous deli-style sandwich or just a simple grilled cheese, this bread holds up beautifully, which is why having a recipe for Bread for Sandwiches this good is essential.
If you’re feeling a little more adventurous one night, slice the cooled loaf lengthwise, brush it with garlic butter—maybe even some of that dip you made before the bread cooled—and pop it under the broiler for three minutes. Instant garlic bread that beats anything out of a box store. See? So versatile!
Storage and Reheating Instructions for Leftover French Bread
If you manage to have any of this gorgeous French bread left over—which, honestly, is a feat in my house—you need to store it right. The enemy of that beautiful crust we worked so hard for is moisture trapped inside a plastic bag. If you wrap a lovely crusty loaf tightly in plastic wrap right away, that steam that’s just trying to escape gets trapped, and overnight, your crisp exterior turns into sad, chewy cardboard. Don’t do that to our masterpiece!
For the first day or so, I usually just leave the loaf sitting on the cutting board, cut-side down if it’s been sliced, or just tucked loosely into a paper bag. The paper bag lets the bread breathe while keeping it from drying out completely. We want that moisture to stay inside to keep the crumb soft, but we don’t want the crust to go limp.
If you’re planning on keeping the rest for day three or four, you absolutely have to freeze it. Slice the bread into thick pieces you know you’ll use, and wrap those slices tightly in aluminum foil first. Then, slip the foil-wrapped pieces into a heavy-duty freezer bag. This double layer protects it from freezer burn.
The best part about this is how fast you can bring it back to life! When you want a slice (or half a loaf!), don’t even bother microwaving it—it gets tough instantly. Instead, preheat your oven to 350°F (175°C). Unwrap the bread from the plastic (if it was stored that way) and place the slices or loaf directly onto the oven rack. Let it heat for about 5 to 8 minutes. You’ll hear that crust start to crackle again! It will come out piping hot, smelling like you just pulled it from the oven an hour ago, and the interior will be fluffy again. This simple reheating trick makes day-old Homemade French Bread taste almost as good as fresh!
Frequently Asked Questions About Making French Bread
I’ve gathered a few questions that always pop up when people bake bread for the first time. It’s completely normal to wonder about the process when you’re making something like this beautiful French bread from scratch. Don’t worry; we’ll get you squared away!
Can I make this Quick French Bread Recipe even faster?
That’s the million-dollar question, right? Everyone loves the idea of a true One Hour Bread Recipe! This recipe is certainly on the quick side—under two hours total, which isn’t bad at all for real yeast bread. However, I really, really caution you against rushing the rising times. Yeast needs that specific window to generate the gases that make the bread light and airy. If you drastically cut that 60-to-90-minute first rise or the 30-minute second rise, you’ll end up with dense little bricks instead of that heavenly Soft French Bread at Home. Patience here truly pays off for that fluffy loaf recipe texture!
What is the best way to get a Tender Crumb Bread texture?
The secret to that perfect Tender Crumb Bread texture doesn’t just come from the yeast; it comes from how you handle the dough *after* it rises. The most important thing is proper kneading—that 6 to 8 minutes builds the structure that holds the air. But second to that is shaping! When you gently shape your loaves, you want to be firm enough to create the shape but gentle enough that you aren’t squishing all the air bubbles out that the yeast just worked so hard to create. If you use way too much extra flour during shaping, the dough can actually get stiff and dry out, resulting in a tight crumb. Lightly dust your surface; we’re aiming for soft, not stiff!
If you have any other questions at all about technique, feel free to reach out via my contact page. Happy baking!
PrintEasy Homemade Soft and Crusty French Bread Recipe
Learn how to bake bakery-style French bread at home. This simple recipe delivers soft, fluffy loaves with a perfect crust, ideal for dinner or sandwiches.
- Prep Time: 20 min
- Cook Time: 25 min
- Total Time: 1 hour 55 min
- Yield: 2 loaves
- Category: Baking
- Method: Baking
- Cuisine: French
- Diet: Vegetarian
Ingredients
- 1 packet active dry yeast (about 2 1/4 teaspoons)
- 1 teaspoon granulated sugar
- 1 cup warm water (105°F to 115°F)
- 3 cups all-purpose flour, plus more for dusting
- 1 1/2 teaspoons salt
- 1 tablespoon olive oil, plus more for the bowl
- 1 egg white, lightly beaten (for wash)
Instructions
- Activate the yeast: In a small bowl, dissolve the sugar in the warm water. Sprinkle the yeast over the top and let it sit for 5 to 10 minutes until foamy. This shows the yeast is active.
- Mix the dough: In a large bowl, whisk together the flour and salt. Pour in the yeast mixture and the olive oil. Mix with a wooden spoon until a shaggy dough forms.
- Knead: Turn the dough out onto a lightly floured surface. Knead for 6 to 8 minutes until the dough is smooth and elastic. It should feel soft.
- First Rise: Lightly oil a large bowl. Place the dough in the bowl, turning to coat. Cover the bowl with plastic wrap or a clean kitchen towel. Let the dough rise in a warm place for 60 to 90 minutes, or until it has doubled in size.
- Shape the loaves: Gently punch down the risen dough. Divide it into two equal pieces. On a lightly floured surface, shape each piece into a long, even loaf, about 12 to 14 inches long. For a crusty exterior, you can gently taper the ends.
- Second Rise: Place the shaped loaves on a baking sheet lined with parchment paper, leaving space between them. Cover loosely and let them rise again for 30 minutes.
- Preheat and Prepare: About 15 minutes before baking, preheat your oven to 400°F (200°C). Place a shallow pan on the bottom rack to create steam later.
- Score and Bake: Lightly brush the tops of the loaves with the beaten egg white. Use a sharp knife or razor blade to make three or four diagonal slashes (scores) across the top of each loaf.
- Create Steam: Carefully pour about 1 cup of hot water into the shallow pan on the bottom rack to create steam. Immediately place the baking sheet with the bread into the oven.
- Bake: Bake for 20 to 25 minutes, or until the crust is deep golden brown and the bread sounds hollow when tapped on the bottom.
- Cool: Transfer the finished French bread loaves to a wire rack to cool completely before slicing. Enjoy this homemade French bread warm with butter.
Notes
- For an extra crusty exterior, you can spray the inside walls of the oven with water twice during the first 10 minutes of baking.
- If you want a softer crust, skip the egg white wash and simply brush the tops with water before baking.
- This bread is excellent for making sandwiches or serving alongside dinner.
Nutrition
- Serving Size: 1 slice
- Calories: 150
- Sugar: 1
- Sodium: 250
- Fat: 1.5
- Saturated Fat: 0.3
- Unsaturated Fat: 1.2
- Trans Fat: 0
- Carbohydrates: 30
- Fiber: 1
- Protein: 5
- Cholesterol: 0