

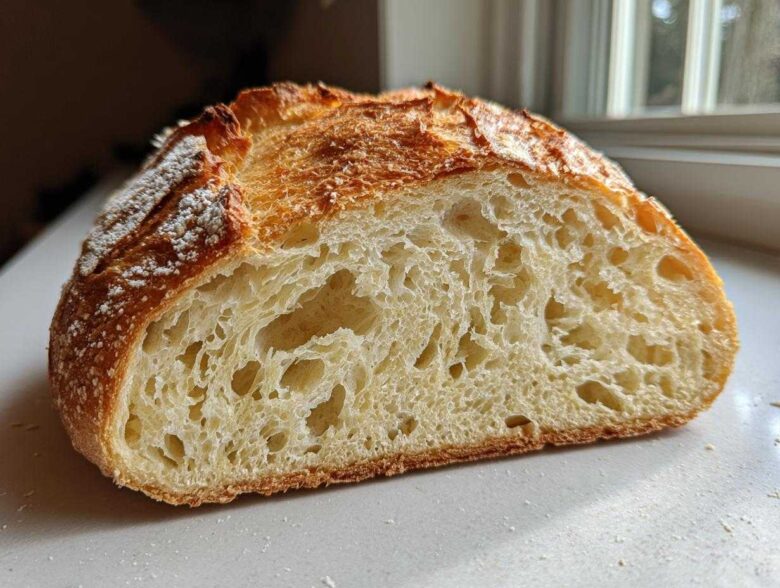
Oh, listen to me, because I spent years fighting with my oven, trying to get that perfect crackle when you pull apart a loaf. You know, that sound that only comes from a real French bakery? Well, after way too many flat, pale failures, I finally nailed it. This isn’t just another recipe; this is the ultimate homemade french bread guide. We are going for that deeply golden, truly crispy exterior that shatters slightly when you touch it, paired with an interior that’s light, airy, and full of those gorgeous, irregular holes. If you’re looking for a side dish for that amazing French toast recipe we made last week, this bread is it! Trust me—once you master this technique for crust and crumb, you’ll never buy that sad supermarket stuff again. Get your oven nice and hot, because we’re about to bake some magic!
Why This Homemade French Bread Recipe Works (The Secret to Artisan Results)
Okay, so what makes this recipe stop your bread from looking like a beige brick? It really boils down to two things we focus on heavily: dough hydration and heat management. This isn’t just about throwing ingredients together; it’s about respecting what the flour and water can do together. When you get these elements right, suddenly, you’re turning out bread that looks like it came straight from a professional baker’s oven. It’s the reason I keep coming back to this specific process every time I make bread making techniques at home. These steps ensure you get that real, authentic french bread experience.
Achieving the Perfect Crispy Crust on Your French Bread
The sound is everything, right? That *crackle*. That’s achieved entirely by steam right when the bread goes into the oven. Steam keeps the dough surface moist for those first crucial baking minutes. If it dries out too fast, you get a thick, dull crust. By injecting a massive burst of steam, the outer layer stays pliable just long enough for the loaf to fully expand (oven spring!), allowing the crust to thin out beautifully and brown deeply. This is the magic required for truly crusty french bread.
Developing an Open and Airy Crumb for Your French Bread
The interior structure happens early on. You need a slightly wetter dough than you might be used to—that’s hydration doing its work for that open crumb. Then, you have to be patient with the kneading. You really need to work that gluten until it’s happy and strong. Those long rest periods give the yeast time to build those big air pockets you see advertised in high-end loaves. That’s how you achieve Artisan French Bread at Home!
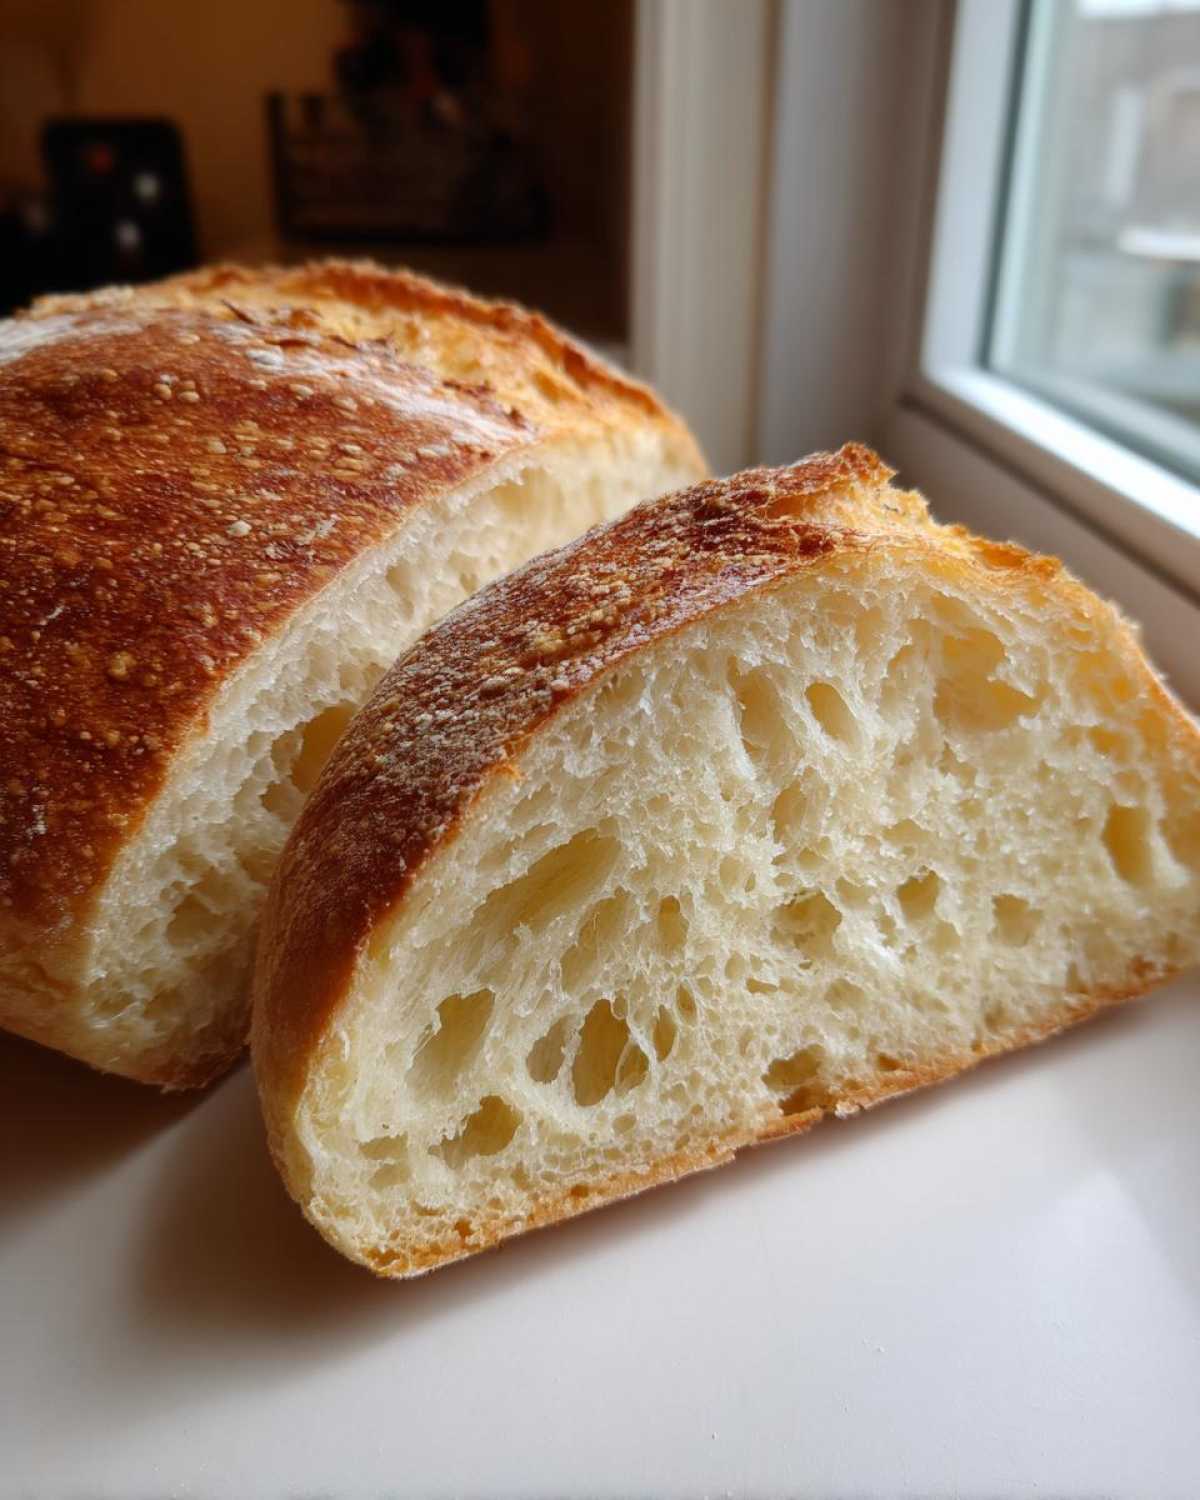
Gathering Ingredients for Authentic French Bread
This is the beautiful part of classic baking: French bread doesn’t need a mile-long shopping list. Honestly, great french bread relies on quality and technique, not tons of specialty items. We only need four core things, actually! Stick to these simple staples, and you’re already halfway to that bakery flavor profile. It’s amazing how much flavor you can get from so little!
Ingredient Measurements and Clarity
You’ll want precisely three cups of simple all-purpose flour, followed by one and a half teaspoons of salt—don’t skimp on the salt, it controls the yeast! The amount of instant dry yeast is small, just one teaspoon. But please, please check your water temperature; it needs to be warm, about 105 to 115 degrees Fahrenheit, to wake up that yeast right. That warm water measurement is key for great french bread every single time.
Step-by-Step Instructions for Your French Bread Recipe
Alright, deep breath! Now that we have our simple ingredients, let’s get this glorious french bread dough made. Don’t rush the mixing or the rising; that’s where the flavor builds up beneath the surface. I’ve tried skipping kneading, and let me tell you, it was a disaster. You need those muscles working! I always remind myself that mastering these bread making techniques is what separates a good loaf from a great one.
Mixing and Initial Rise for Perfect French Bread Dough
First thing, whisk the flour, salt, and yeast together—we want them perfectly distributed. Then, pour in your warm water and just mix it with a wooden spoon until it’s shaggy. It looks horrible! Turn it out onto your counter and knead it for a solid 8 to 10 minutes until it feels smooth as silk. If you’re not sure if it’s ready, try the windowpane test: gently pull a small piece; if you can stretch it thin enough to see light through it without tearing, you’re golden! Lightly oil a bowl, pop the dough in, cover it tight, and let it hang out somewhere warm for about an hour to an hour and a half, until it truly doubles.
Shaping and Final Proofing of the French Bread Loaves
Gently punch that air out—it’s satisfying, I promise. Divide the dough in half. Now for the shaping: wet your hands a little and gently tug and roll each piece until you have two uniform logs, about 12 to 14 inches long. Place them on your prepared, floured sheet or inside a baguette couche if you have one. Cover them loosely so they can rest for another 30 to 45 minutes. This second rise is crucial for the final shape of your french bread.
Baking Techniques: Steam and Scoring for Crusty French Bread
This is showtime for that crispy crust! You must preheat your oven to 450°F for a full 30 minutes *with* an empty metal pan on the very bottom rack—that pan is your steam engine. Just before sliding the loaves in, use a super sharp blade to score the top with three quick, shallow diagonal slashes. Immediately pour a cup of very hot water into that hot pan and quickly close the door. You want that steam surrounding the loaves as they bake for 20 to 25 minutes. We are aiming for a deep golden color and an internal temp of about 200°F!
Tips for No-Fail French Bread Baking Success
Baking artisan bread at home used to feel like a dark art, but it’s truly just a few tricks done right. If you follow these tips for No-Fail French Bread Baking, you’ll stop guessing! The main thing I learned over the years is that the oven floor needs to be screaming hot. Also, don’t panic during the first bake; that initial puff is exactly what we want for our wonderful french bread.
Equipment Matters: Baking Stone vs. Sheet
Listen, you can bake this on a normal baking sheet and it will be good, but to get that *incredible* bottom crust, you absolutely need a baking stone or a baking steel. You preheat that directly in the oven for that full 30 minutes along with the oven itself. When you slide the dough, that direct, intense heat transfer from the stone immediately sets the bottom crust and helps achieve that beautiful lift we talked about. It makes all the difference!
Adjusting Yeast: Instant vs. Active Dry
In the recipe, I called for instant yeast because it mixes right into the flour without fuss. But I know lots of you keep active dry yeast in the cupboard! That’s totally fine. If you’re using active dry, just skip adding it to the flour mixture. Instead, dissolve the yeast in that warm water first and let it sit for five minutes until it gets foamy. If it doesn’t foam, your water was too hot or too cold, or the yeast is old, and you’ll need to start that part over before mixing in the flour for your french bread.
Serving Suggestions for Your Fresh French Bread
Now that you have this glorious, shattering crusty french bread, what are you going to do with it? Forget fancy stuff—this bread shines when paired simply. It’s perfect for soaking up the last bits of soup from a bowl, like that creamy roasted tomato soup. Or, take some slices, slather them with garlic butter, and turn them into incredible croutons for a salad. Even though it’s a long loaf, you can use slices as a substitute for large rolls alongside dinner. Imagine dipping those crusty ends into the cheesy goodness after making butternut squash soup. It tastes far better than any store-bought mini rolls!
Storage and Reheating Instructions for Leftover French Bread
The biggest challenge with truly crusty french bread is keeping that crust from going soft overnight. Don’t wrap it tightly in plastic—that traps moisture, which equals sogginess! Instead, just wrap the cooled loaf loosely in a clean kitchen towel and leave it on the counter. To bring that crispness back to life, preheat your oven to 350°F. Pop the loaf in for about five to seven minutes. It will sound almost brand new again!
Frequently Asked Questions About Making French Bread
I know when you’re trying something new, you always have questions buzzing around in the kitchen! Don’t worry, I’ve been there with every single batch of french bread I’ve ever made. Most of the time, people are just worried about timing or shape, but we can troubleshoot that easily. Feel free to check out my bigger baking blog archives if you have more questions about yeasted loaves.
Can I make this an Easy French Bread Recipe by reducing the rise time?
You technically *can* rush the rise, especially if you’re aiming for a speedier bake, but I wouldn’t recommend it if you want that classic texture. That long first rise develops complex flavor and builds up large gas bubbles inside the dough. Cutting it short for the sake of Quick French Bread Baking often results in a tighter, denser crumb, more like a dinner roll than a beautiful airy French loaf. Patience pays off here!
What is the difference between this and a French Baguette?
That’s a great question about shaping! Technically, this recipe makes a shorter, slightly fatter loaf—more like a traditional batard shape, which is fantastic for table service. A proper baguette is much longer and thinner, which means it bakes slightly faster and loses moisture more quickly, giving it an even crisper crust all the way around. If you want to learn exactly how to make French baguette, you just need to shape your dough logs longer and thinner for the second proof!
My french bread dough isn’t rising. What went wrong?
Ugh, the worst feeling! Usually, when the dough just sits there like a lump, it means one of two things: your water was way too hot and killed the yeast, or it was way too cold and the yeast is just sleeping—remember that 105°F sweet spot. Check the spot where you left the dough; if it’s not warm enough, the yeast won’t wake up enough to do its job. Give it a warmer, draft-free spot for another 30 minutes, but if nothing happens, you might need to retry that step with fresh yeast.
Nutritional Estimate for Homemade French Bread
Now, I always tell people not to obsess over the numbers when you’re baking pure happiness like this amazing fresh french bread. You deserve a slice (or two!) of this incredible loaf! That said, because I believe in being totally upfront about what we’re putting into our bodies, I’ve put together an estimate based on the ingredients list.
Keep in mind that these numbers are just a guide, coming out to about 155 calories per slice—and these slices are generous, mind you! The exact values really depend on the brand of flour you use and whether you added that optional splash of olive oil to the dough. But honestly, the flavor payoff is worth every single calorie when you smell that crust baking!
Here is the quick rundown for one serving (one slice, assuming 1/10 of the loaf):
- Calories: 155
- Total Fat: 0.5g
- Carbohydrates: 32g
- Protein: 4g
I always say that anything homemade from simple ingredients beats the processed stuff, hands down. You control the salt and the preservatives, and that’s a huge win when it comes to something as pure as a perfect loaf of french bread.
Share Your Crusty French Bread Creations
I truly cannot wait to see the amazing loaves you’ve baked! If this recipe gave you the perfect crackle you were dreaming of, please come back and leave me a bright 5-star rating right at the top. Even better, snap a picture of your beautiful, crusty french bread and tag me, or just drop a comment below telling me how it tasted with your dinner. Happy baking, and don’t forget to reach out via my contact page if you need any last-minute tips!
PrintThe Ultimate Homemade French Bread: Achieving a Perfect Crusty Exterior and Soft, Airy Interior
Follow this guide to make classic French bread at home. This recipe focuses on proper hydration and steam injection to give you a deeply golden, crispy crust and a light, open crumb.
- Prep Time: 20 min
- Cook Time: 25 min
- Total Time: 2 hr 5 min
- Yield: 2 loaves
- Category: Baking
- Method: Baking
- Cuisine: French
- Diet: Vegetarian
Ingredients
- 3 cups all-purpose flour
- 1.5 teaspoons salt
- 1 teaspoon instant dry yeast
- 1.5 cups warm water (about 105-115°F)
- 1 tablespoon olive oil (optional, for dough handling)
Instructions
- In a large bowl, whisk together the flour, salt, and yeast.
- Pour in the warm water and mix with a wooden spoon until a shaggy dough forms.
- Turn the dough out onto a lightly floured surface. Knead for 8 to 10 minutes until the dough is smooth and elastic. If the dough is too sticky, add flour one teaspoon at a time.
- Lightly oil a clean bowl. Place the dough in the bowl, turning to coat. Cover the bowl tightly with plastic wrap.
- Let the dough rise in a warm place for 1 to 1.5 hours, or until doubled in size.
- Gently punch down the dough. Divide it into two equal pieces.
- Shape each piece into a long, even loaf shape (about 12-14 inches long). Place the loaves on a baking sheet lined with parchment paper or on a lightly floured couche.
- Cover the loaves loosely with plastic wrap or a clean kitchen towel. Let them rest for a second rise for 30 to 45 minutes.
- Preheat your oven to 450°F (232°C) 30 minutes before baking. Place a shallow metal pan on the bottom rack during preheating to generate steam.
- Just before baking, use a sharp knife or razor blade to make three diagonal slashes across the top of each loaf.
- Carefully pour 1 cup of hot water into the preheated metal pan on the bottom rack to create steam. Immediately place the loaves in the oven.
- Bake for 20 to 25 minutes, rotating the pans halfway through, until the crust is deep golden brown and the internal temperature reaches 200°F (93°C).
- Remove the bread from the oven and cool completely on a wire rack before slicing.
Notes
- For the best crust, use a baking stone or steel instead of a baking sheet. Preheat the stone with the oven.
- If you do not have instant yeast, use active dry yeast and proof it in the warm water for 5 minutes before adding the flour.
- To keep the crust crisp after baking, cool the bread on a wire rack away from drafts.
Nutrition
- Serving Size: 1 slice (1/10 loaf)
- Calories: 155
- Sugar: 0.5
- Sodium: 350
- Fat: 0.5
- Saturated Fat: 0.1
- Unsaturated Fat: 0.4
- Trans Fat: 0
- Carbohydrates: 32
- Fiber: 1
- Protein: 4
- Cholesterol: 0