

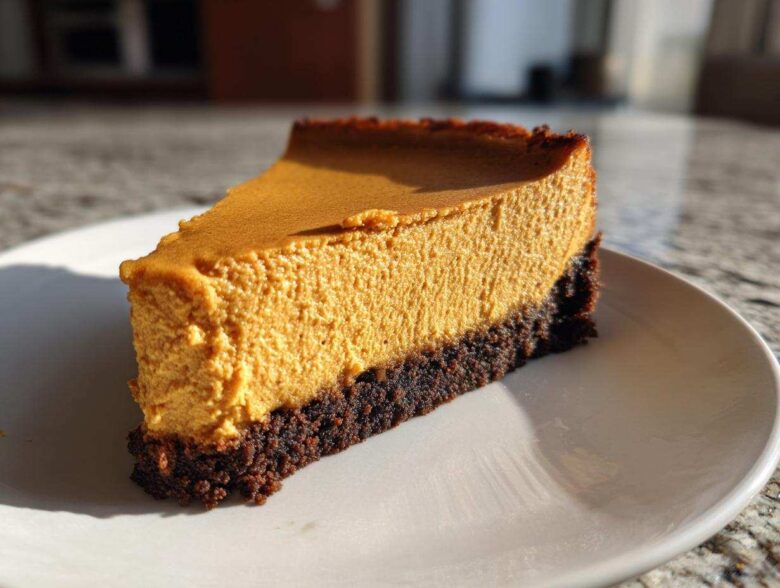
Okay, you know fall is here when I start dreaming about spices, warm ovens, and absolutely decadent desserts! Forget pies for one second, because this is the recipe I pull out when I really need to impress someone, or maybe just myself after a long week. I’m talking about the creamiest baked pumpkin cheesecake with a gingersnap crust you have ever imagined. Seriously, this homemade pumpkin cheesecake recipe is my absolute go-to for Thanksgiving. It’s rich, perfectly spiced, and that crust? Pure perfection.
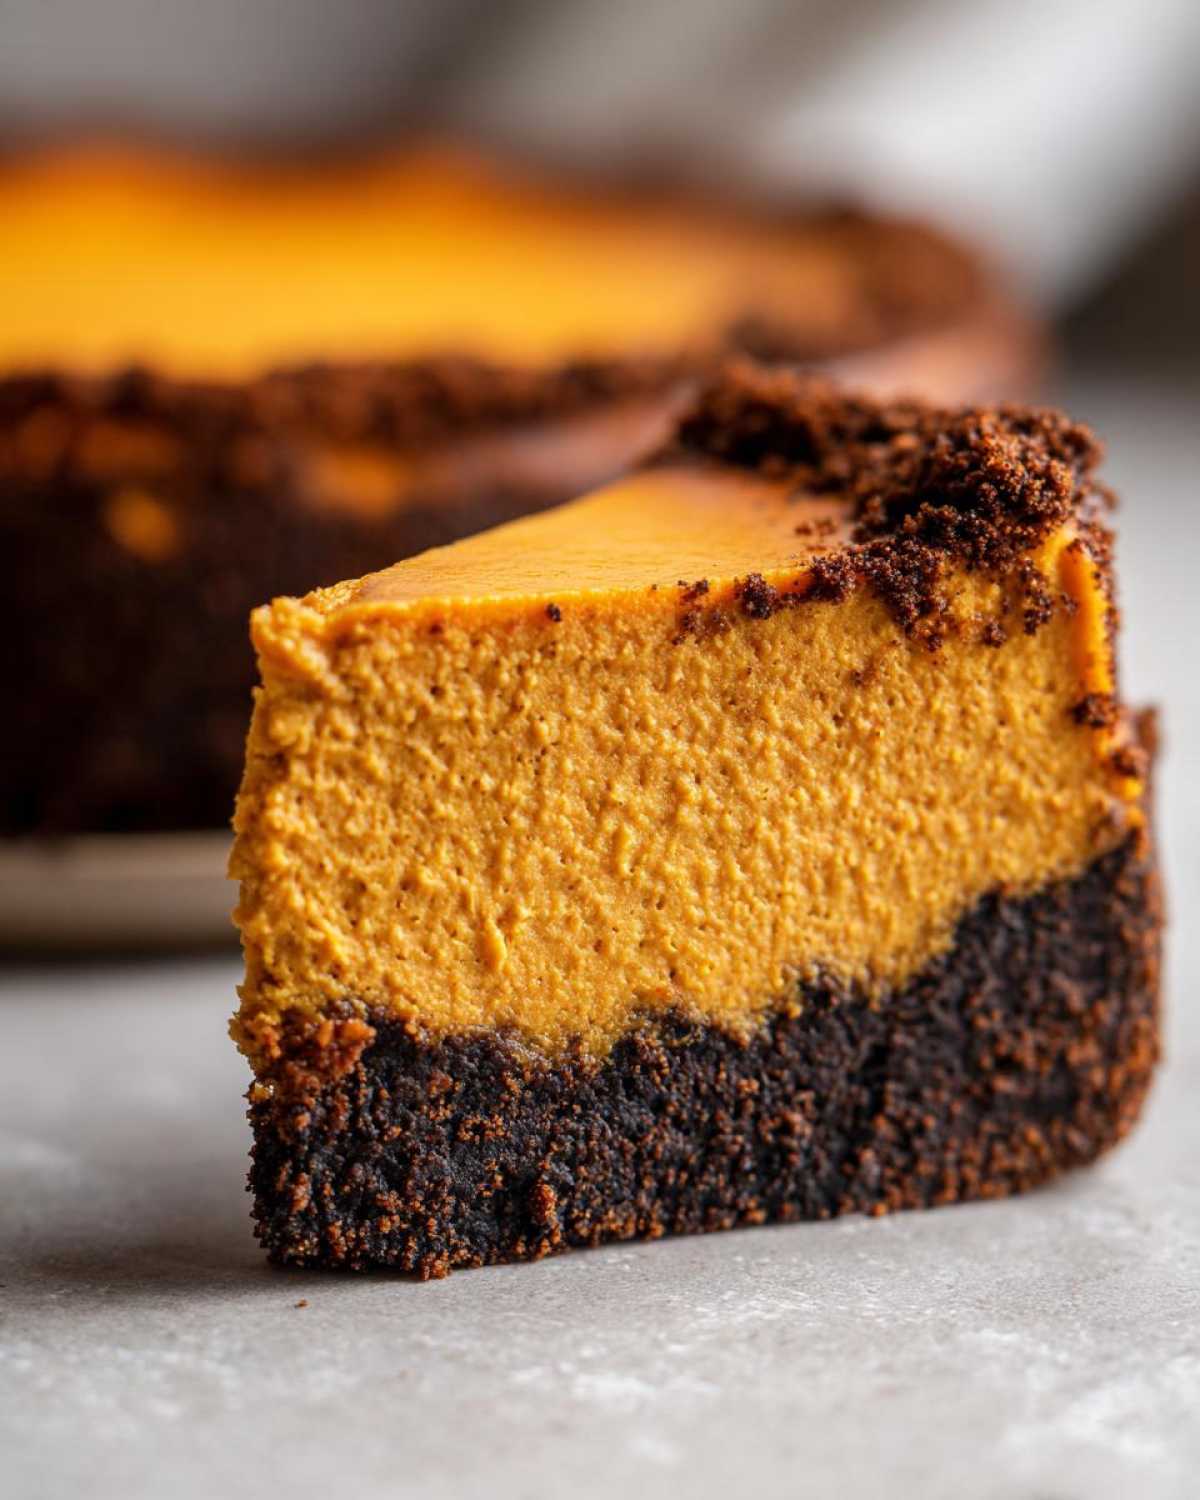
Why This Creamy Baked pumpkin cheesecake Recipe Stands Out
There are a million pumpkin desserts out there, but trust me when I say this pumpkin cheesecake is different. It’s my secret weapon for holiday parties! It’s not just the flavor; it’s the texture. We achieve that unbelievable creamy, dense mouthfeel that you usually only find in fancy bakeries, and it all comes down to a few critical steps that Grandma taught me ages ago.
- The spice blend is spot on—we use a mix of cinnamon, ginger, and fresh nutmeg that really sings against the sweetness of the pumpkin.
- That gingersnap crust offers such a nice little spicy kick to cut through the richness. So much better than plain graham crackers!
- The water bath technique is non-negotiable. It’s the key to why ours is so smooth and never cracks. Learn this trick, and you’ll master cheesecake forever.
If you want to see how to get those perfect results every time, check out my guide on baking techniques, but let’s talk texture first!
Achieving the Perfect Texture in Your pumpkin cheesecake
The number one reason people quit making cheesecake is the dreaded crack right down the middle. It happens when the temperature changes too fast! That’s why we use the water bath, or the *bain-marie*. You wrap your pan tightly in foil and set it into a larger pan filled with hot water before it goes into the oven.
This creates a steamy, gentle environment for baking, ensuring the cheesecake cooks evenly from the edges to the middle. Also, never skip softening your cream cheese! If it’s lumpy when you start beating it, your filling will be lumpy, no matter how much you mix later. Room temperature ingredients are your best friend here for that unbelievably smooth finish.
Gathering Ingredients for the Best pumpkin cheesecake
Alright, let’s talk about getting what you need for this amazing dessert. I always lay out all my ingredients before I even turn the mixer on. Organization is half the battle when you’re making something this rich! The quality of your pumpkin really makes a huge difference here. Don’t grab that can labeled ‘Pumpkin Pie Filling’—that stuff is already sweetened and spiced for you, and we need pure, unadulterated pumpkin for this creamy texture.
If you’re prepping for a big baking session, maybe grab some extra cream cheese, since you know how much we love sweets! For more inspiration on delicious fall baking staples, you might want to check out my recipe for healthy pumpkin spice granola bars while the oven preheats.
Gingersnap Crust Ingredients
This crust takes about five minutes to mix up, and it smells incredible while it’s baking solo! Make sure your butter is melted but not scalding hot before mixing it in with those crunchy gingersnaps.
- 1 1/2 cups gingersnap cookie crumbs
- 1/4 cup granulated sugar (for crust)
- 6 tablespoons unsalted butter, melted
Creamy pumpkin cheesecake Filling Ingredients
The secret to the creamy factor starts right here with using three full packages of cream cheese, and they absolutely *must* be soft when you start whipping them. I mean soft like room temperature butter!
- 3 (8 ounce) packages cream cheese, softened
- 1 1/2 cups granulated sugar (for filling)
- 1 teaspoon vanilla extract
- 1 teaspoon ground cinnamon
- 1/2 teaspoon ground ginger
- 1/4 teaspoon ground nutmeg
- 1/4 teaspoon salt
- 2 large eggs
- 1 (15 ounce) can pumpkin puree (not pumpkin pie filling)
- 1/2 cup sour cream
Step-by-Step Instructions for Your homemade pumpkin cheesecake
This is where the magic happens! Don’t rush these steps, especially when we are dealing with eggs and cheese—that’s the secret handshake for a perfect pumpkin cheesecake. I like to have my cooling rack ready and a kettle of water boiling before I even start mixing the filling. It keeps everything moving smoothly, which is important when we need to maintain that ideal temperature.
If you want to see some other great creamy bakes, check out how I make my maple walnut blondies—the mixing process shares a little bit of that same gentle touch!
Prepping the Pan and Baking the Gingersnap Crust
First things first: get your oven warmed up to 350 degrees! We need to protect that springform pan, so grab some heavy-duty foil and wrap the entire bottom and sides tightly. This is the armor it needs for the water bath later on. Mix those gingersnap crumbs, the little bit of sugar, and the melted butter until it looks like damp sand. Press it down firmly into the bottom of your prepared pan. Pop that into the hot oven for just 10 minutes.
When you pull it out—wow, does that smell good! Let it cool down for a moment while you do the next important thing: drop your oven temperature down to 325 degrees. We’re switching gears from crisp crust to slow, gentle bake.
Mixing the rich pumpkin dessert Filling
Grab your biggest bowl, because we start with the cream cheese. Beat that until it’s silky smooth—no lumps allowed! Then, slowly stream in the main sugar, vanilla, and all those beautiful spices (cinnamon, ginger, nutmeg). Once that’s totally combined, you add the eggs, and this part is crucial: add them one at a time, mixing just enough after each one until it disappears.
If you overmix the eggs, you incorporate too much air, which causes cracking later. Trust me on this one! Finally, gently fold in your pumpkin puree and the sour cream until everything is just a uniform, gorgeous orange color. That’s it for the batter!
Baking the pumpkin cheesecake Using a Water Bath
Pour your filling carefully over that slightly cooled gingersnap crust. Now, take the tight foil-wrapped pan and place it inside a larger roasting pan. Carefully pour hot water into the roasting pan until it comes about halfway up the sides of your cheesecake pan. This insulation is what keeps the process even.
Bake it at 325 degrees for about 60 to 75 minutes. You know it’s done when the edges look set, but if you give the side of the pan a very gentle nudge, the very center still has a tiny little wobble, like soft gelatin. That jiggle means it’s perfect!
Cooling and Chilling the pumpkin cheesecake
Do not pull it straight out! That rapid temperature change is what causes cracks, and we worked too hard for that. Turn the oven off completely. Prop the oven door open just a crack—maybe shove a wooden spoon in there—and let that pumpkin cheesecake hang out inside for a full hour. It gradually cools down safely.
After an hour, take it out of the roasting pan and let it finish cooling on a wire rack completely. Once it’s just room temperature, cover it up tightly (plastic wrap works great, but don’t let it touch the top!) and stick it in the fridge. Seriously, you have to chill this for at least six hours, but preferably overnight. That chilling time lets all those beautiful flavors deepen and firms up the texture for that signature slice.
Tips for the Best pumpkin cheesecake Success
I’ve made this recipe so many times that I’ve learned a few tricks that really elevate it from good to absolutely unforgettable. When it comes to making the best pumpkin cheesecake, it’s all about respecting time and temperature! You really need to focus on what’s going into the bowl before you even turn the mixer on. You want that dessert to sing when you serve it, especially if it’s for a big gathering.
If you want a great flavor boost for other baking projects, you should definitely check out my spiced orange biscotti recipe—perfect for dipping!
Ingredient Preparation and Spice Balance
I mentioned it before, but it bears repeating: take your cream cheese out first thing in the morning! If it’s even slightly cold, it won’t cream properly, and you’ll end up fighting lumps the whole time. Room temperature isn’t soft and mushy; it should yield just a little bit to gentle pressure. That smoothness is the foundation for a rich pumpkin cheesecake.
And the spices! Don’t just dump them in from a jar that’s been sitting in your cupboard since last Easter. If your cinnamon or ginger doesn’t smell intensely fragrant when you open the jar, they probably won’t add much flavor to the final bake. Fresh, potent spices make a huge difference against the earthy pumpkin. Oh, and if you happen to be out of gingersnaps, don’t panic! You can absolutely substitute graham crackers for the crust; it just gives you a slightly milder, more traditional base.
Storage and Reheating Instructions for pumpkin cheesecake
This decadent pumpkin cheesecake tastes even better the next day, which is why leftovers are the best part! Make sure it’s fully chilled before you cover it. Once it’s set, cover the pan tightly with plastic wrap—try not to let the wrap touch the top of the filling—and keep it in the fridge for up to five days. It freezes beautifully too!
If you do freeze it, wrap it twice in plastic, then once in foil. Thaw it overnight in the fridge before serving. And if you need a cozy drink to go with that second slice, you absolutely have to try my recipe for warm coconut hot chocolate!
Serving Suggestions for Your Spiced Autumn Dessert
The hardest part is over! Your glorious, creamy pumpkin cheesecake is finally ready to eat. But wait, we can still make the presentation next level, right? You don’t even need complicated toppings; sometimes the best compliments are the simplest ones that connect back to those fall vibes we love so much.
My absolute favorite way to serve it is with a big dollop of freshly whipped heavy cream—I mean *freshly* whipped, none of that aerosol stuff that tastes like chemicals! If you want a little extra texture, a quick sprinkle of toasted, roughly chopped pecans on top of the whipped cream adds a wonderful crunch against the smooth filling.
If you’re really leaning into the holiday spread, a light drizzle of caramel sauce right before serving is divine. It just meshes so beautifully with the gingersnap crust. And what do you serve with the best dessert of the season? Perfectly spiced drinks, of course! I highly recommend making a batch of my hot cinnamon apple cider donuts (yes, the drink!) to go alongside each slice. It feels just right, balancing the richness of the cheesecake perfectly.
Frequently Asked Questions About pumpkin cheesecake
I know you probably have a few lingering questions because baking cheesecake always feels like navigating a tricky landscape! Don’t worry, I’ve answered the questions I get asked most often about this specific pumpkin cheesecake.
How do I guarantee my pumpkin cheesecake won’t crack?
Well, you can never 100% guarantee it, but you stack the odds heavily in your favor! The two biggest things are: one, making sure your ingredients are completely room temperature for a smooth mix, and two, using that water bath we talked about while baking. Also, don’t forget the slow cool down inside the turned-off oven—that one slow step prevents like 90% of cracking issues for this creamy pumpkin cheesecake!
What exactly is the difference between pumpkin puree and pie filling?
This is so important for any fall dessert recipe! Pumpkin puree is just cooked, pureed pumpkin—that’s it! Pumpkin pie filling comes pre-sweetened and pre-spiced, ready to dump into a pie crust. If you use the filling in this recipe, your cheesecake will be way too sweet and the texture will be off. Always go for the pure stuff for your Thanksgiving cheesecake.
Can I skip the water bath and just bake this recipe?
Honestly? If you want that truly creamy pumpkin cheesecake texture, I strongly advise against it. You will likely end up with dry edges and a massive crack. The water bath keeps the heat around the edges from getting too aggressive. If you absolutely must skip it (maybe you don’t have a roasting pan?), you need to reduce your oven temp by 50 degrees and add an extra 30 minutes of cooling time inside the oven. But I hope you try the water bath first!
For more spiced autumn inspiration that’s a little less fussy, take a look at my super popular pumpkin spice muffins recipe!
Estimated Nutritional Data for pumpkin cheesecake
I always feel a little guilty after a massive slice of this dessert, but hey, we bake for joy, right? I used our standard recipe breakdown—which yields 12 generous slices—for these numbers. Keep in mind, since we used real butter and real cream cheese in this rich pumpkin dessert, it definitely tips the scale toward decadent!
I’m not a nutritionist, so please take this as a general guide, especially if you start adding extra swirls of caramel sauce on top! But for one slice coming right off the wire rack after chilling overnight, here’s what you’re looking at:
- Serving Size: 1 slice
- Calories: 420
- Total Fat: 28 grams (with 17g of that being saturated, oops!)
- Carbohydrates: 38 grams
- Sugar: 35 grams
- Protein: 7 grams
- Sodium: 310 milligrams
- Cholesterol: 110 milligrams
Don’t worry too much about the details, though. This Thanksgiving cheesecake is meant to be enjoyed in big slices on special occasions. Everything in moderation, right? Just make sure you save room for that second piece!
Share Your pumpkin cheesecake Experience
Now that you’ve baked this dreamy pumpkin cheesecake, I just *have* to know what you think! Did you go with the gingersnap crust or try something else? Did you try adding a little bourbon to your sour cream? Drop a rating below and tell me how it went. I love seeing your kitchen successes, so snap a picture and share it! Happy baking, friend!
For more fun recipes and baking adventures, always feel free to check out the rest of the blog here: my recipe archives.
PrintCreamy Baked Pumpkin Cheesecake with Gingersnap Crust
A recipe for a rich, creamy baked pumpkin cheesecake featuring a spiced gingersnap cookie crust. This dessert is suitable for fall gatherings and holidays.
- Prep Time: 25 min
- Cook Time: 75 min
- Total Time: 100 min
- Yield: 12 servings
- Category: Dessert
- Method: Baking
- Cuisine: American
- Diet: Vegetarian
Ingredients
- 1 1/2 cups gingersnap cookie crumbs
- 1/4 cup granulated sugar (for crust)
- 6 tablespoons unsalted butter, melted
- 3 (8 ounce) packages cream cheese, softened
- 1 1/2 cups granulated sugar (for filling)
- 1 teaspoon vanilla extract
- 1 teaspoon ground cinnamon
- 1/2 teaspoon ground ginger
- 1/4 teaspoon ground nutmeg
- 1/4 teaspoon salt
- 2 large eggs
- 1 (15 ounce) can pumpkin puree (not pumpkin pie filling)
- 1/2 cup sour cream
Instructions
- Preheat your oven to 350 degrees Fahrenheit. Wrap the outside bottom of a 9-inch springform pan tightly with heavy-duty aluminum foil.
- Prepare the crust: Mix the gingersnap crumbs, 1/4 cup sugar, and melted butter until combined. Press the mixture firmly into the bottom of the prepared springform pan. Bake for 10 minutes. Remove from oven and let cool slightly. Reduce oven temperature to 325 degrees Fahrenheit.
- Prepare the filling: In a large bowl, beat the softened cream cheese with an electric mixer until smooth. Gradually beat in the 1 1/2 cups sugar, vanilla extract, cinnamon, ginger, nutmeg, and salt until fully blended.
- Beat in the eggs one at a time, mixing just until combined after each addition. Do not overmix.
- Beat in the pumpkin puree and sour cream until the filling is smooth and uniform in color.
- Pour the filling over the cooled crust in the springform pan.
- Place the foil-wrapped springform pan into a larger roasting pan. Carefully pour hot water into the roasting pan until the water reaches about halfway up the sides of the springform pan (this creates a water bath).
- Bake at 325 degrees Fahrenheit for 60 to 75 minutes, or until the edges are set but the center still jiggles slightly when gently nudged.
- Turn off the oven, crack the oven door open slightly, and allow the cheesecake to cool inside the oven for 1 hour.
- Remove the cheesecake from the water bath and foil. Cool completely on a wire rack. Once cool, cover and refrigerate for at least 6 hours, preferably overnight, before serving.
Notes
- For the smoothest texture, let your cream cheese soften completely at room temperature before starting.
- Use pure pumpkin puree, not pumpkin pie filling, for accurate flavor and texture.
- If you do not have gingersnaps, you can substitute graham crackers for the crust.
Nutrition
- Serving Size: 1 slice
- Calories: 420
- Sugar: 35
- Sodium: 310
- Fat: 28
- Saturated Fat: 17
- Unsaturated Fat: 11
- Trans Fat: 0.5
- Carbohydrates: 38
- Fiber: 1
- Protein: 7
- Cholesterol: 110