

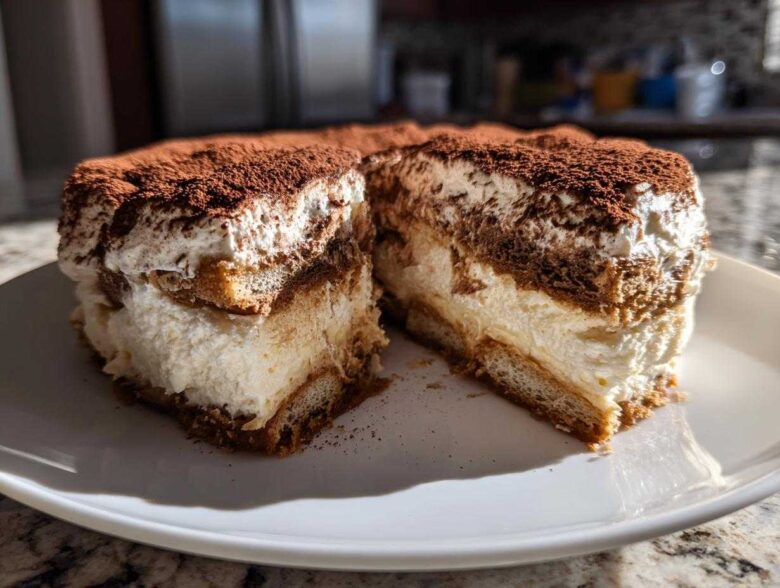
Listen, I live for those desserts where two amazing classics decide to hold hands and create something truly spectacular. When you combine the creamy, dreamy indulgence of cheesecake with the sophisticated coffee punch of real Italian tiramisu? Well, that’s just culinary magic, isn’t it? We’re talking about the ultimate fusion dessert here: the tiramisu cheesecake. Because I’ve spent years tinkering with layered desserts—trying to get that perfect structure without the sinkhole in the middle—I can tell you this: the no-bake route is the winner for this combo.
Forget the oven fuss! This recipe delivers that signature mascarpone richness and deep espresso flavor without ever turning on the stove. It sets up beautifully, tastes intensely authentic, and honestly, it’s easier to impress people with this than almost anything else I make.
Why This No Bake tiramisu cheesecake Recipe Works So Well
Honestly, this tiramisu cheesecake isn’t just a good dessert; it’s a genius shortcut that tastes incredibly sophisticated. The beauty is that you get all those deep coffee notes and the luxurious mascarpone flavor without the risk of your cake cracking when it comes out of the oven. Trust me, nobody wants that heartache!
We’re aiming for pure ease and peak flavor, which is why this fits perfectly into the category of Easy Make Ahead Desserts. You put in the work upfront, and it’s ready to rock when the dinner party starts. It’s the definition of a Creamy Cheesecake Fusion that just simplifies life.
- It requires zero oven time, which is huge in the summer!
- The flavor actually gets better overnight as the espresso soaks into those ladyfingers.
- It sets up firm and rich, perfect for slicing cleanly.
The Perfect Creamy Texture for Your tiramisu cheesecake
The secret sauce here is the double dairy punch: we use both cream cheese *and* glorious mascarpone. The mascarpone gives it that authentic, velvety Italian mouthfeel. I always chill this beauty for a solid minimum of 8 hours, but honestly, overnight lets the coffee layers truly meld with the filling. That long chill is non-negotiable for structure!
Ingredients Needed for the Ultimate tiramisu cheesecake
Okay, time to gather our building blocks! When you’re making a fusion dessert this special, you can’t skimp on quality. The ingredients list looks a little long, but trust me, it’s just three distinct groups: the base, the filling, and the coffee magic that makes it taste like real tiramisu. Make sure your cream cheese is actually softened—like, really soft—or you’ll end up with lumps, and nobody wants a bumpy cheesecake experience, right? If you need help preventing lumps in other recipes, check out my tips on perfect cream cheese frosting!
Crust Components
We need a sturdy, slightly salty base to hold all that creamy goodness. Don’t be shy when pressing this in!
- 1 1/2 cups graham cracker crumbs
- 1/4 cup granulated sugar
- 6 tablespoons unsalted butter, melted
Mascarpone Cream Filling Ingredients
This is where the luxurious texture comes from. Remember, the heavy cream absolutely must be cold for whipping!
- 16 ounces cream cheese, softened
- 1 cup mascarpone cheese
- 1 cup powdered sugar
- 1 teaspoon vanilla extract
- 1/2 cup heavy cream, cold
Espresso Soak and Topping for tiramisu cheesecake
This is the part that pulls it straight into the tiramisu camp. Seriously, brew your espresso strong—weak coffee just won’t cut it for this tiramisu cheesecake!
- 1 cup strong brewed espresso, cooled
- 2 tablespoons coffee liqueur (optional, but recommended!)
- 1 package (7 ounces) ladyfingers
- Unsweetened cocoa powder, for dusting
Step-by-Step Instructions for No Bake tiramisu cheesecake
Okay, this is where the fun happens! Because it’s no-bake, we move through these steps pretty quickly, but you absolutely have to respect the chilling times, or you’ll end up with soup, not cheesecake. I always put on my favorite upbeat music for this part. If you’re looking for more sweets you can prep ahead, check out my guide to easy make-ahead desserts!
Preparing the Crust and Setting the Base
First things first, we tackle that crumbly foundation. Just toss your graham cracker crumbs, the quarter cup of sugar, and the melted butter together right in a bowl. Once it looks like damp sand, press it down firmly into the bottom of your 9-inch springform pan. I use the bottom of a glass to really compact it tight! Then, slide that pan into the fridge for fifteen minutes. This short chill helps it firm up before we hit it with all that creamy weight.
Making the Creamy Mascarpone Filling
Grab your stand mixer or a really sturdy hand mixer for this. Beat that softened cream cheese until it’s totally smooth—no lumps allowed! Then, add your mascarpone, powdered sugar, and vanilla. Mix until it’s just combined and dreamy looking. Next up: the whipped cream. Whip your cold heavy cream separately until you get stiff peaks—you know, when you pull the beaters out and the peaks stand straight up. Now, don’t just dump it in! Gently fold the whipped cream into the cheese mixture. Folding is key here; we want to keep all those gorgeous air bubbles in there for the fluffiest bite!
Assembling the Layered tiramisu cheesecake
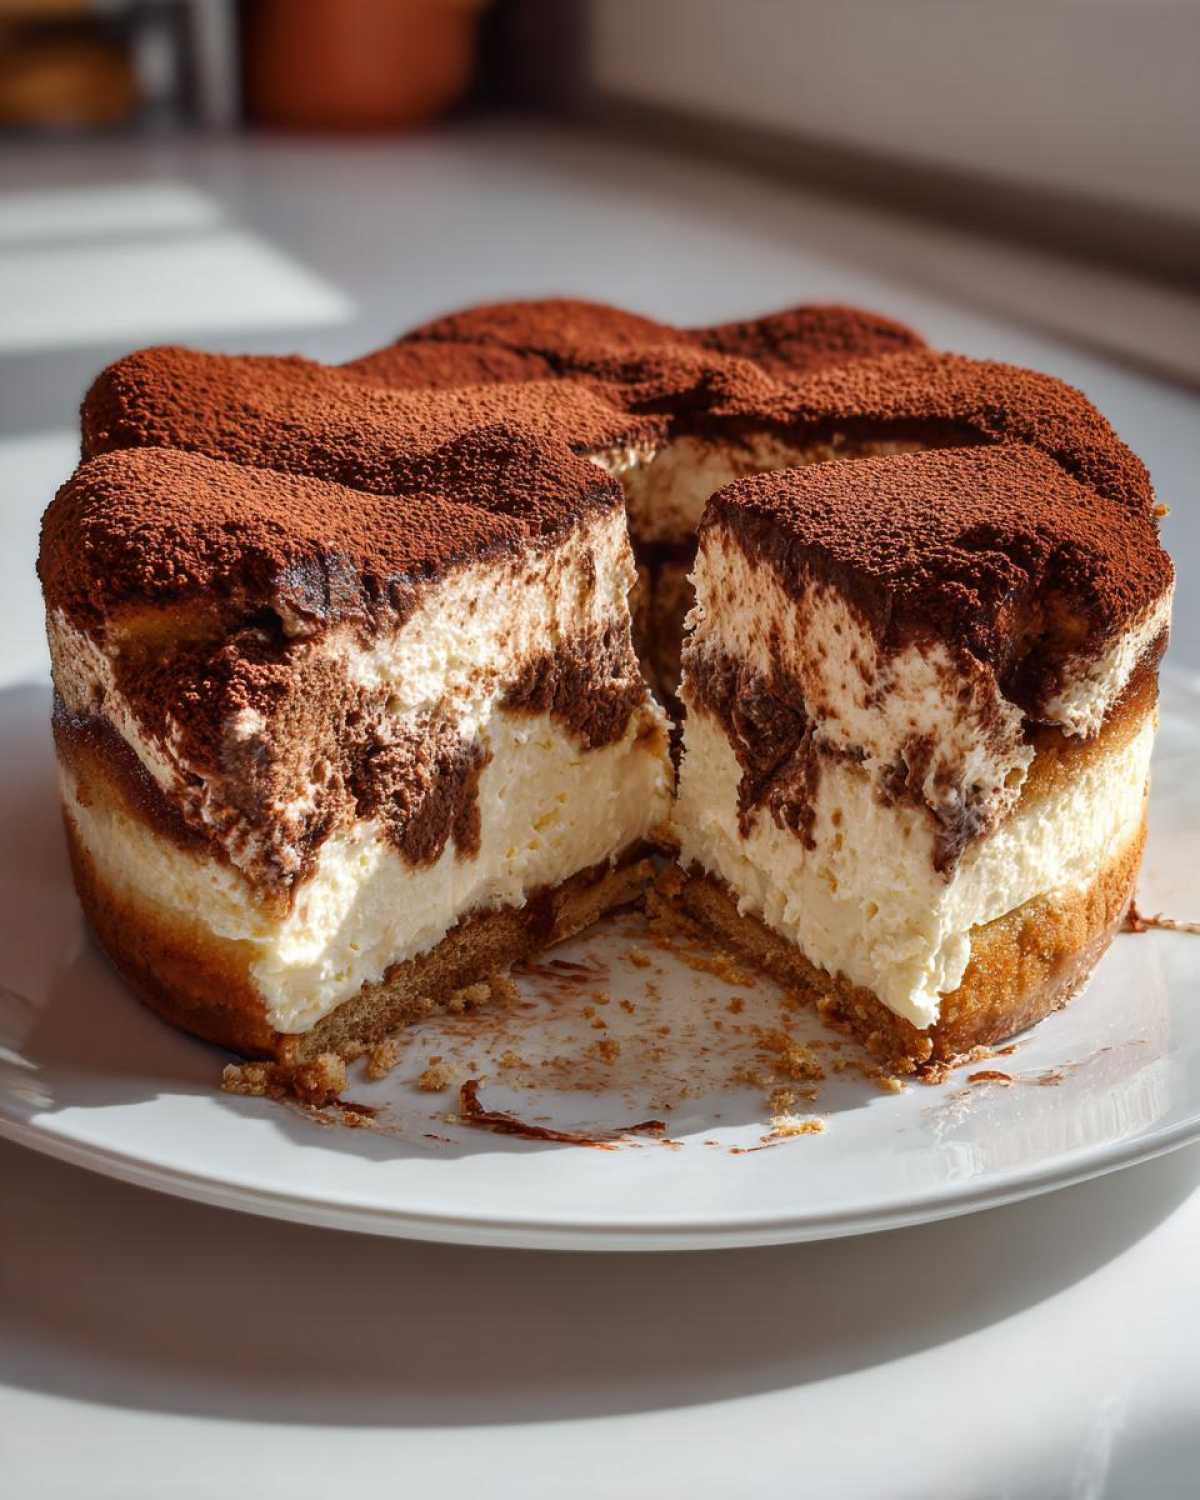
Time for the coffee dip! Mix up your cooled espresso and coffee liqueur (if you’re using it) in a shallow dish. Now, treat the ladyfingers gently, like delicate little sponges! Dip each one quickly—we are talking a one-second dip on each side. If you soak them too long, they turn to mush, and that ruins the structure of your tiramisu cheesecake. Layer half of those dipped ladyfingers right over your chilled crust. Spread half of that creamy mascarpone filling evenly on top. Repeat that process: another layer of dipped ladyfingers, and then cover everything with the remaining filling. Smooth out that top layer so it looks professional!
Setting and Finishing the tiramisu cheesecake Dessert
This is the hardest part because it requires patience: the chill! Cover the pan really loosely with plastic wrap and get it into the fridge. It needs a minimum of six hours, but I promise you, if you can manage overnight, the results are spectacular—the coffee flavor deepens so much. Once it’s rock solid, gently release the springform ring. Before you slice, take a generous, deep breath, and dust that entire top surface with unsweetened cocoa powder. That deep brown topping over the pale filling? Gorgeous!
Tips for Achieving the Best tiramisu cheesecake Results
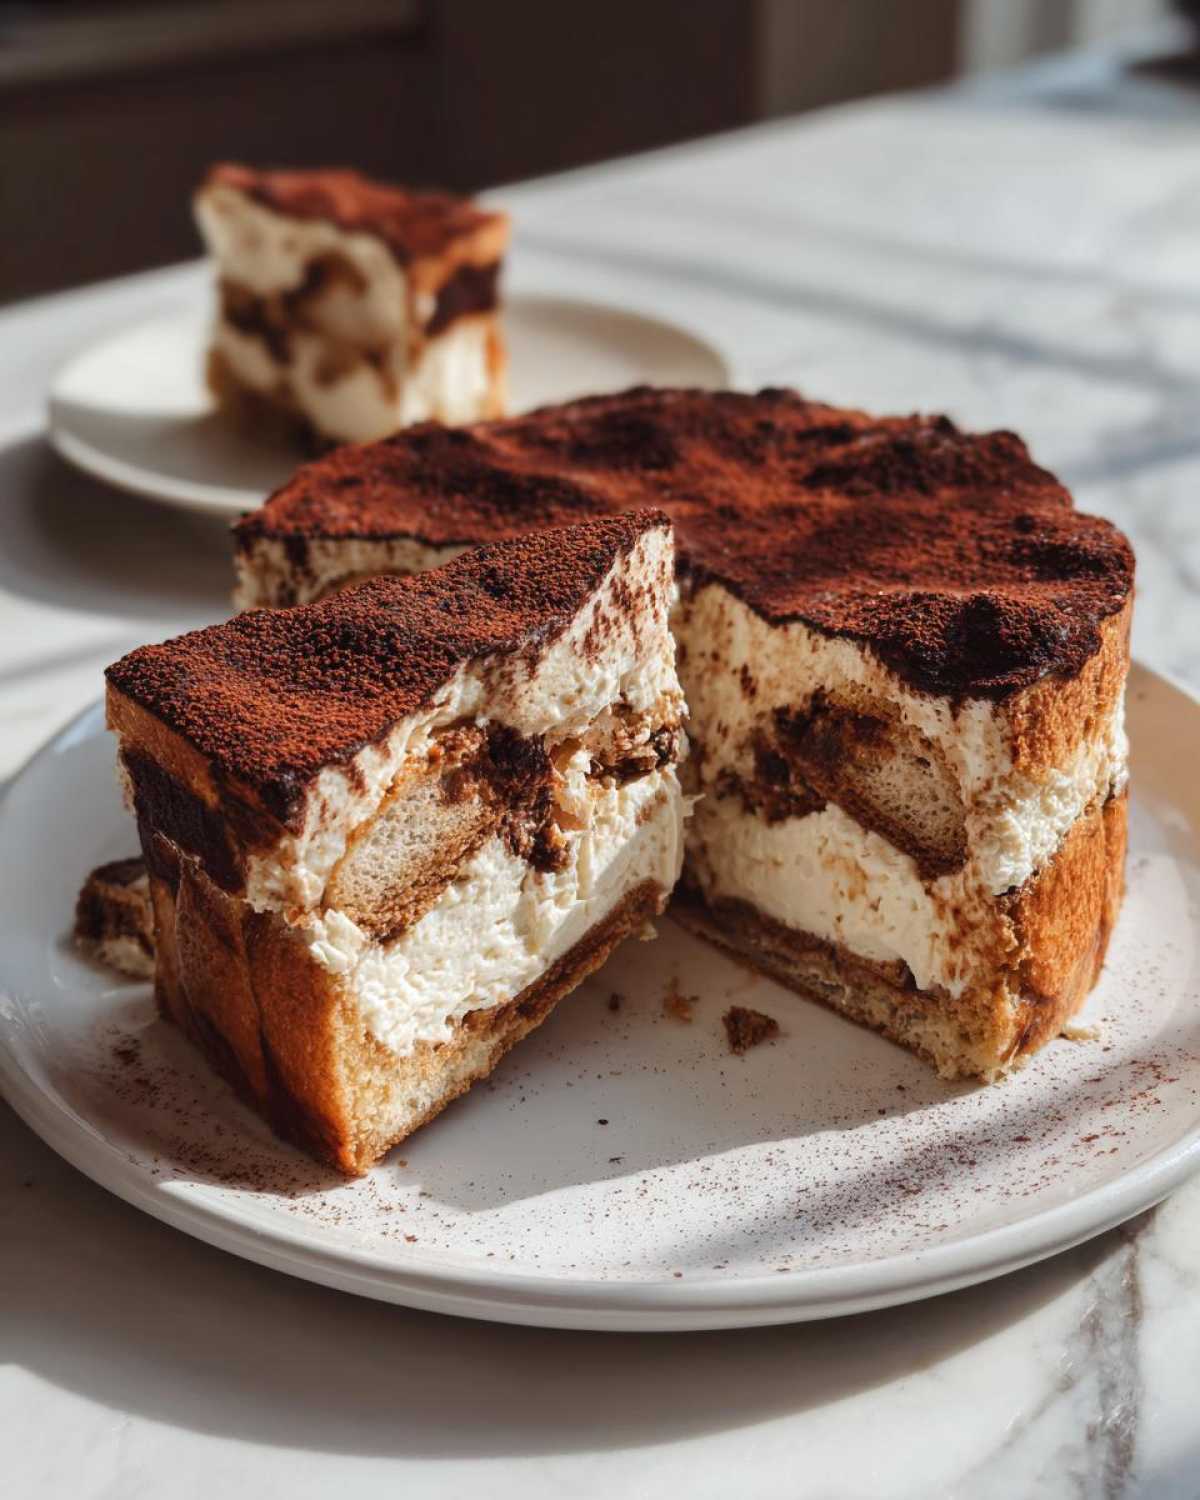
I’ve learned a few tricks over the years to make sure this tiramisu cheesecake sets up perfectly and tastes like it came straight from a fancy Italian bakery. You know me, I always share the insider secrets! First off, let’s talk structure. If you’re worried about it being too soft—maybe you’re rushing it and only chilling it for four hours—there’s a little trick. You can dissolve one teaspoon of unflavored gelatin in about a quarter cup of hot water and fold that right into your cream cheese mixture before you fold in the whipped cream. It gives it an extra insurance policy against collapse. Check out my blueberry muffin secrets; similar principles apply when you need structure!
Also, I cannot stress this enough: use high-quality, really strong espresso for that coffee soak. Weak coffee just tastes like sad, wet bread when it’s diluted on your ladyfingers. A deeper, richer bean makes the entire tiramisu cheesecake sing!
Variations on the Classic tiramisu cheesecake
While I absolutely adore this no-bake version for its simplicity and creamy texture—it’s perfect for when you just need a decadent treat without the oven drama—I know some folks are traditionalists or maybe they just need to use their oven! Don’t worry, we can absolutely pivot this whole flavor profile into something baked if you fancy some Baked Cheesecake Ideas. It really shows how versatile this tiramisu cheesecake concept is.
If you’re feeling adventurous with your spirits, go ahead and swap out that coffee liqueur for something else! A dash of Amaretto adds a lovely, nutty warmth against the espresso, or if you have some Kahlua lying around (you know I always keep that stocked for coffee needs!), it amps up the coffee intensity beautifully. You can even use a splash of dark rum if you want something a bit warmer and less sweet.
Making a Baked tiramisu cheesecake Version
If you are heading toward the oven, you have to make a few key swaps because we need structure that baking provides. First, ditch the heavy cream entirely—we don’t need the stability it gives the no-bake mix. Instead, you’ll beat in two large eggs, one at a time, right into your cream cheese and mascarpone mixture. That egg binder is crucial!
Pour that glorious batter over your crust, and now you’re baking at about 325 degrees Fahrenheit for 50 to 60 minutes. You’ll know it’s done when the edges are set but the very center still has a slight wobble. I always recommend setting this one up in a water bath if you can for the creamiest texture possible. For more dessert inspiration based on flavor profiles, take a peek at my eggnog cheesecake recipe for ideas on rich, baked fillings!
Serving Suggestions for Your Layered Cheesecake Fusion
This tiramisu cheesecake isn’t just a Tuesday night treat; it’s a showstopper! Because it has such rich, deep flavors from the coffee and mascarpone, you don’t need a lot of bells and whistles, but presentation is everything, especially when you’re pulling this out for Special Occasion Desserts.
When you dust that final layer of cocoa powder on, step back and admire it for a second! That dark, matte cocoa contrast against the pale filling underneath? Perfection. It looks so intentional and luxurious, and nobody needs to know you made it sitting next to the TV last night.
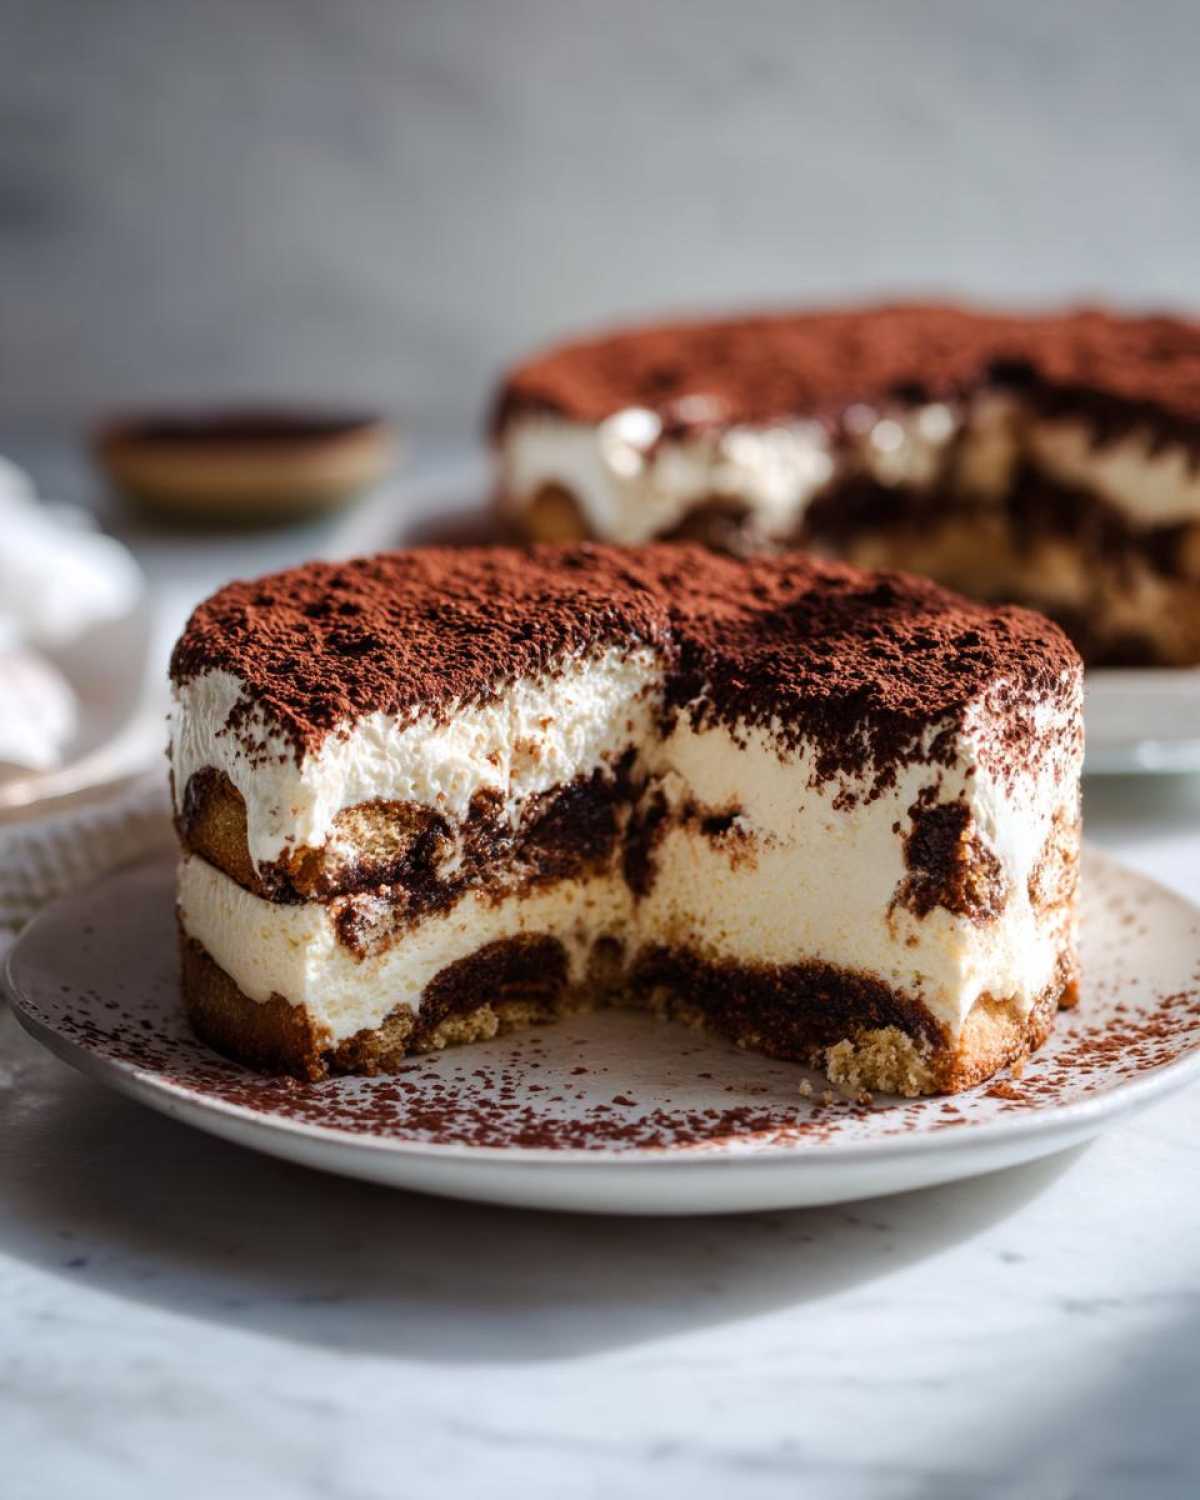
If you want to add a little something extra to the plate, I keep garnishes simple because we don’t want to compete with the coffee. A light scattering of high-quality, dark chocolate shavings across the plate edges looks fantastic. Or, if you want a tiny bit of contrasting color and sharpness, a few fresh raspberries or halved strawberries arranged around the base works wonders. They cut through the richness just enough!
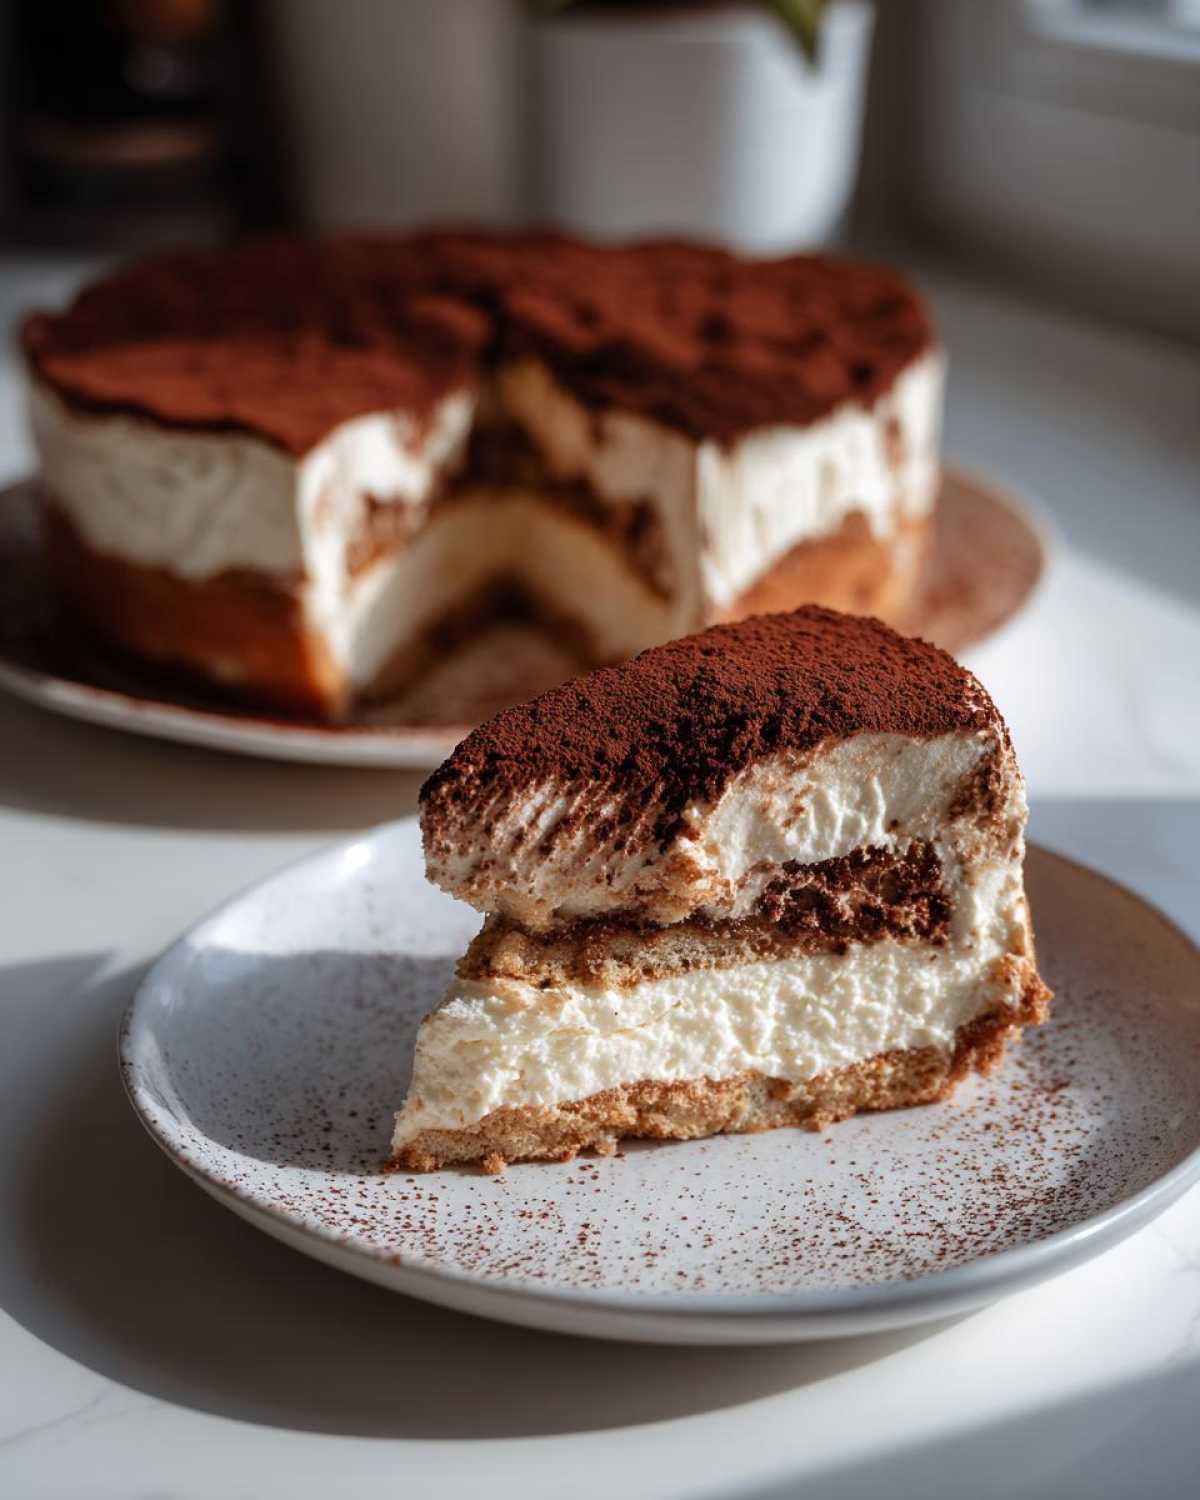
For pairings at a party, this goes hand-in-hand with a lovely little espresso martini if you’re serving cocktails, or just a simple, strong black coffee to really bring out those coffee notes. If you’re planning other desserts, maybe something light next to it—like fluffy vanilla cupcakes—so you don’t overwhelm your guests with too much decadent richness at once!
Storage and Make-Ahead Instructions for tiramisu cheesecake
One of the best things about this tiramisu cheesecake? It’s practically begging you to make it early! Honestly, this is the ultimate hostess secret weapon. I always aim to get this finished the day before I plan to serve it. Why? Because chilling isn’t just about *setting* the cheesecake; it’s about *flavor melding*.
When it sits overnight, that slightly bitter, beautiful espresso soak has time to work its way down and mingle with the sweet, tangy mascarpone filling. If you try to rush that settling time, the ladyfingers sometimes feel a little too separate from the cream. Give it that overnight chill in the fridge, and you get that unbelievably cohesive, melt-in-your-mouth experience. That’s why I love recipes you can rely on, like my other guide to easy make-ahead desserts.
When you store it, just make sure you cover it well! I like to use plastic wrap first, lightly touching the surface of the cocoa powder so it doesn’t stick unevenly, and then I cover the whole thing loosely with foil. It stays absolutely fantastic in the refrigerator for a good three to four days. If, by some miracle, you have leftovers after that!
Frequently Asked Questions About tiramisu cheesecake
I always get a ton of questions after sharing this recipe because people are usually worried about keeping that perfect structure! It’s totally normal, especially when you’re trying to nail that balance between creamy filling and coffee-soaked cookies. I’ve pulled the three questions I hear most often about making this tiramisu cheesecake. If you’ve got more, drop them in the comments below—I love chatting baking tips over at my homemade alfredo sauce post!
Can I skip the coffee liqueur in this tiramisu cheesecake?
Oh, absolutely, you can skip it! If you’re keeping things totally family-friendly or maybe just don’t have any on hand, no sweat. Just know that cutting the liqueur does make the coffee flavor a little less complex and deep. If you skip it, don’t leave the liquid totally out! I suggest replacing that missing volume with an extra tablespoon of very strong espresso, or even adding a half teaspoon of good quality vanilla extract to the soak mix. It keeps the liquid ratio right without adding booze.
What is the best way to get a clean slice of No Bake Cheesecake?
This is my favorite cleanup trick, and it’s essential for any great **No Bake Cheesecake** layer dessert! You need heat and patience. Don’t just try to saw through it with a room-temperature knife, or you’ll drag the cream filling right up the sides. Here’s the move: Fill a tall glass with really hot water. Dip a long, thin, sharp knife right into the hot water for about ten seconds. Wipe the knife completely dry with a paper towel—this part is important! Then, press straight down through the cheesecake. You’ll get such a clean cut! Before the next slice, dip and wipe again. It works like a charm!
Can I use different cookies instead of ladyfingers for this tiramisu cheesecake?
When you’re making a hybrid like this, the ladyfingers really are the traditional heart of the tiramisu side of things. They are light and airy, so they absorb that espresso soak perfectly without immediately dissolving into mush. That’s why they are the best choice for the layered effect!
However, if you’re in a pinch, you can try very thin, plain shortbread cookies—just dip them super gently because they are denser and won’t soak up the coffee as nicely. You could even use graham crackers again, but you’d skip the crust layer and treat them just like the ladyfingers, but honestly, the texture won’t be as spot-on authentic. Stick with the ladyfingers if you can for the best result in this **tiramisu cheesecake**!
Nutritional Snapshot of This Creamy Cheesecake Fusion
Okay, I know sometimes we want the indulgence without the guilt trip, right? This Creamy Cheesecake Fusion is definitely decadent—we are using cream cheese, mascarpone, and butter, after all! But since this is a No Bake Cheesecake, we skip the eggs and extra high heat, which can sneak up on you sometimes. I always run the ingredients through a calculator just to get a general idea, but remember, the final count changes based on your brand of graham crackers or if you skip that optional coffee liqueur!
This breakdown assumes you get 10 generous slices from the whole cake. If you cut it into twelve, the numbers shift down a bit. Always use good quality ingredients, and you’re golden! For those tracking macros or looking for slightly lighter alternatives, you should absolutely check out my recipe for protein cheesecake sometime!
- Serving Size: 1 slice
- Calories: Roughly 450 per slice (It’s a treat, folks!)
- Fat: Around 30g (That’s where the creamy flavor lives!)
- Saturated Fat: About 18g
- Trans Fat: 0g (We like clean fats over here!)
- Carbohydrates: About 40g
- Sugar: Around 35g (Mostly from the powdered sugar and graham crackers)
- Protein: About 8g
- Cholesterol: Near 95mg
Just think of this as a special occasion dessert, meant to be savored with that final dusting of cocoa powder!
Share Your Perfect tiramisu cheesecake Creation
So there you have it! You’ve just whipped up what I think is the most satisfying, no-fuss tiramisu cheesecake you could ever want. Now comes my favorite part: hearing from you! When you make this creamy, coffee-infused masterpiece, I genuinely want to know how it came out. Did you add the coffee liqueur? Did you chill it overnight like I begged you to?
Please, please leave a comment below. Tell me what you thought, and if you have any little tips you picked up along the way—I’m always learning, even after all these years in the kitchen! If you loved this recipe, the best compliment you can give is a rating! Aiming for those five stars really helps other bakers find the recipe!
And seriously, I would be thrilled beyond belief if you snapped a picture once you dusted it with that cocoa powder. Tag me on social media! Seeing your gorgeous, layered tiramisu cheesecake creations is what keeps me excited to share these family favorites online. Happy baking—or, well, happy *no-baking*!
PrintNo-Bake Tiramisu Cheesecake
A simple recipe for a creamy, no-bake cheesecake that combines the rich flavor of tiramisu with a classic cheesecake base, featuring espresso-soaked ladyfingers.
- Prep Time: 30 min
- Cook Time: 0 min
- Total Time: 6 hours 30 min
- Yield: 10 servings
- Category: Dessert
- Method: No Bake
- Cuisine: Italian Inspired
- Diet: Vegetarian
Ingredients
- 1 1/2 cups graham cracker crumbs
- 1/4 cup granulated sugar
- 6 tablespoons unsalted butter, melted
- 16 ounces cream cheese, softened
- 1 cup mascarpone cheese
- 1 cup powdered sugar
- 1 teaspoon vanilla extract
- 1/2 cup heavy cream, cold
- 1 cup strong brewed espresso, cooled
- 2 tablespoons coffee liqueur (optional)
- 1 package (7 ounces) ladyfingers
- Unsweetened cocoa powder, for dusting
Instructions
- Combine graham cracker crumbs, 1/4 cup granulated sugar, and melted butter in a bowl. Press the mixture firmly into the bottom of a 9-inch springform pan. Chill the crust for 15 minutes.
- In a large bowl, beat the softened cream cheese until smooth. Add the mascarpone cheese, powdered sugar, and vanilla extract. Beat until fully combined and creamy.
- In a separate bowl, whip the cold heavy cream until stiff peaks form. Gently fold the whipped cream into the cream cheese mixture.
- In a shallow dish, mix the cooled espresso with the coffee liqueur, if using.
- Quickly dip each ladyfinger into the espresso mixture, turning to coat both sides. Do not over-soak.
- Arrange a single layer of the dipped ladyfingers over the chilled crust. Break pieces if necessary to fit.
- Spread half of the mascarpone filling evenly over the ladyfingers.
- Create a second layer of espresso-dipped ladyfingers over the filling.
- Top with the remaining mascarpone filling and smooth the top surface.
- Cover the cheesecake loosely with plastic wrap and refrigerate for at least 6 hours, or preferably overnight, to allow it to set completely.
- Before serving, carefully remove the springform ring and dust the top generously with unsweetened cocoa powder.
Notes
- For a firmer set, you can add 1 teaspoon of unflavored gelatin dissolved in 1/4 cup of hot water to the cream cheese mixture before folding in the whipped cream.
- Use high-quality, strong espresso for the best coffee flavor in the soak.
- If you prefer a baked version, omit the heavy cream and use 2 large eggs, adding them one at a time to the filling mixture before pouring over the crust and baking at 325 degrees Fahrenheit for 50-60 minutes.
Nutrition
- Serving Size: 1 slice
- Calories: 450
- Sugar: 35
- Sodium: 250
- Fat: 30
- Saturated Fat: 18
- Unsaturated Fat: 12
- Trans Fat: 0
- Carbohydrates: 40
- Fiber: 1
- Protein: 8
- Cholesterol: 95