

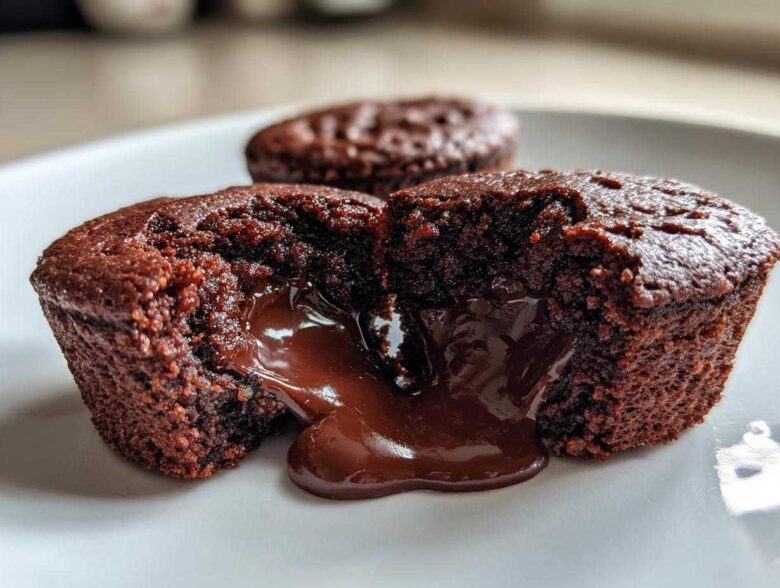
Oh, let’s talk deep, dark, decadent chocolate, shall we? Sometimes you just need that pure, rich, gooey, melt-in-your-mouth moment without any fuss. Forget slicing a huge cake! What if I told you we could capture that divine molten chocolate experience in a perfect, individual little package? After many, many attempts—and yes, a few too many chocolate mishaps on my countertop—I finally cracked the code for these incredible Gluten-Free Chocolate Lava Brownie Cups.
If you’ve struggled with gluten-free baking before, trust me, I get it. But these aren’t those crumbly, sandy attempts. These are fudgy, rich, and they deliver that signature flowing center everyone dreams about. They’re the perfect single-serving treat, and you can whip up a dozen in under 45 minutes. We’re making individual portion-controlled bliss right here using my foolproof method for controlling that lava flow!
Why You Will Love These Gluten-Free Chocolate Lava Brownie Cups
Why bother with a giant pan of brownies when you can have these perfect little bombs of joy? Seriously, once you try them, you’ll see why these have become my go-to quick dessert.
- They are completely gluten-free! No weird textures here; just pure fudgy goodness.
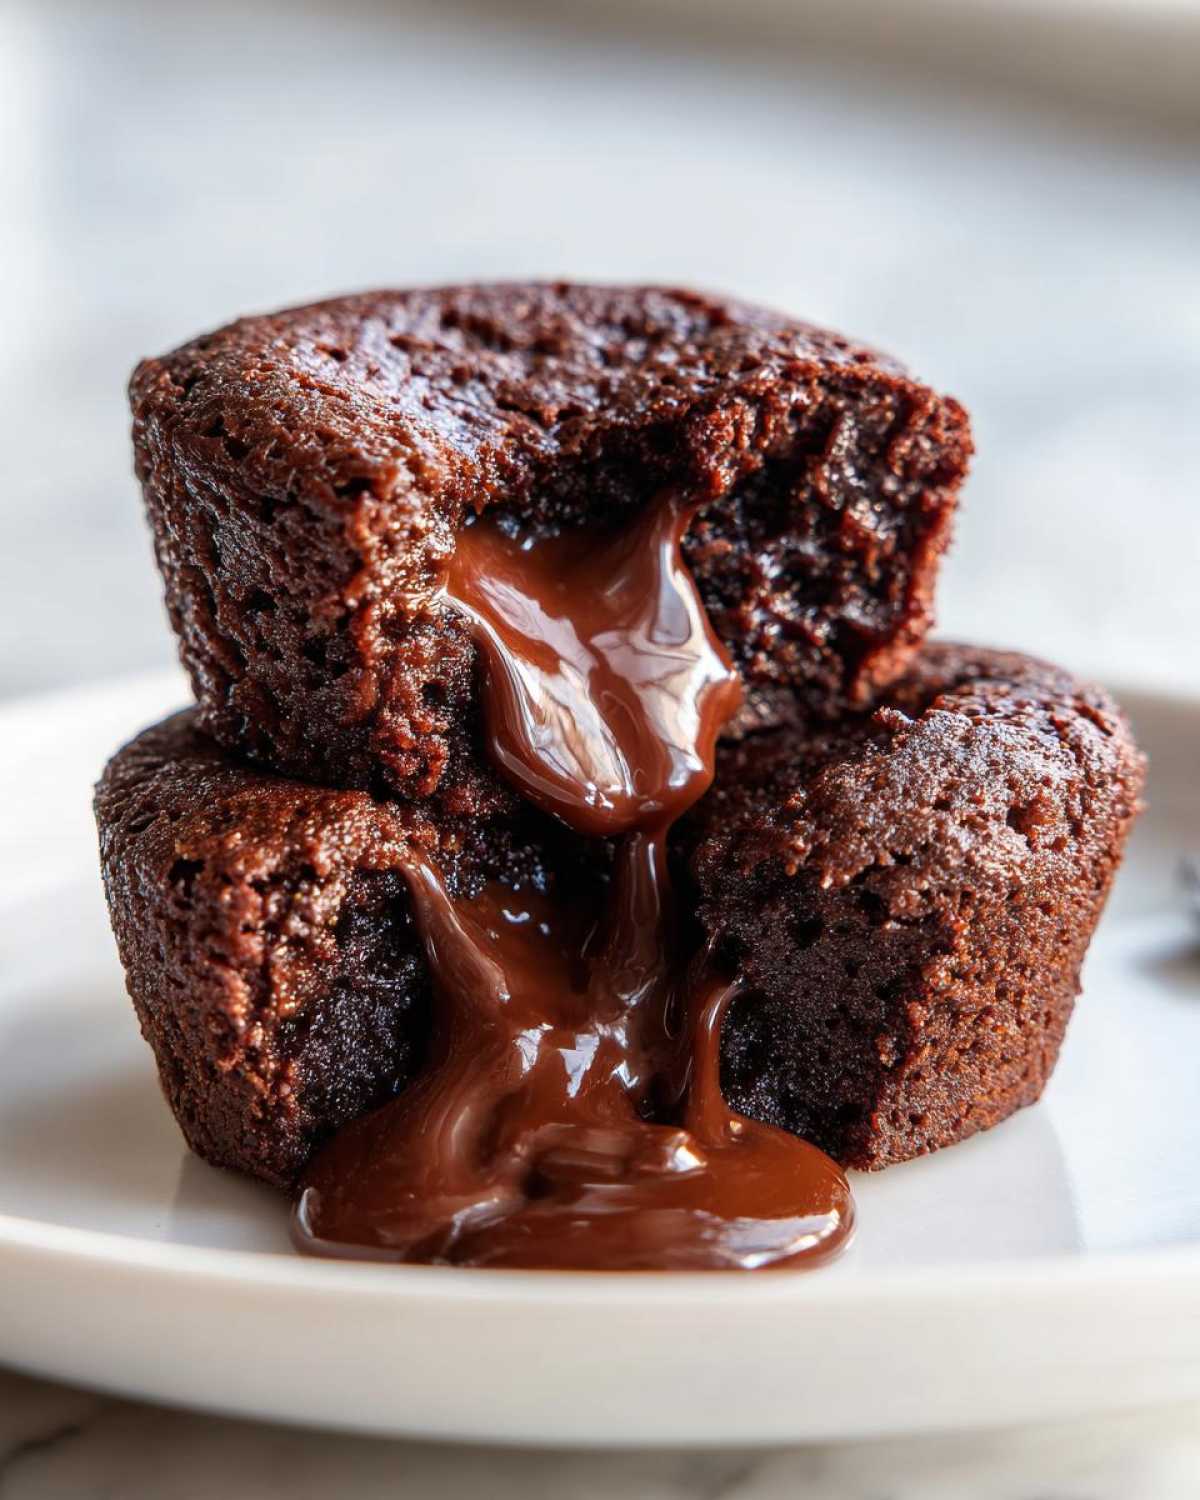
- Who doesn’t love a surprise? That molten, gooey center is pure magic straight from the oven.
- Portion control comes naturally! Thanks to the muffin tin, they are individual chocolate lava brownie bites ready to go.
- They bake up super fast—we’re talking about quick gluten-free chocolate treats that hit the spot when you need a decadent fix right now!
Essential Ingredients for Fudgy Gluten-Free Chocolate Lava Brownie Cups
Okay, getting the ingredients right is half the battle, especially when we’re skipping the wheat flour. Since these are small, we are dedicating most of our ingredient list to pure chocolate flavor and fudgy texture. High quality matters here; you really taste the chocolate in something this simple, so don’t reach for the dusty old cocoa powder from the back of the pantry!
Here’s what you need to gather for your 12 fudgy gluten-free brownie cups. Don’t worry if you don’t have all the fancy extracts; we are keeping this ingredient list tight and focused on chocolate goodness:
- 1/2 cup unsalted butter (Yes, real butter gives the best mouthfeel!)
- 4 ounces unsweetened chocolate, chopped (This is for the main structure.)
- 1 cup granulated sugar
- 2 large eggs (Big ones, please!)
- 1 teaspoon vanilla extract
- 1/2 cup almond flour (Our secret weapon for a dense, chewy, gluten-free base.)
- 1/4 cup unsweetened cocoa powder (The deeper the color, the better the taste.)
- 1/4 teaspoon salt
- 1/2 cup semi-sweet chocolate chips (These are for the glorious, hidden molten center.)
It’s important to me that you know I tested the heck out of this to make sure the texture was spot-on without gluten. I find that for the absolute best fudginess, you really need the fat content from the butter and the structure from the almond flour working together. For more ideas on how I tackle other GF bakes, check out my tips for Gluten Free Garlic Cheddar Biscuits—it’s a totally different flavor profile, but the ingredient wisdom carries over!
Ingredient Notes and Gluten-Free Substitutions
Let’s talk about the flour situation. I chose almond flour here because it adds a wonderful richness and moisture that traditional gluten-free blends sometimes lack. If you have a nut allergy, or just don’t have almond flour on hand, you can absolutely swap it out.
You can use a good quality 1-to-1 gluten-free all-purpose blend, but make sure it already contains xanthan gum, usually about 1/2 teaspoon is enough for this small batch if your blend is plain. If it doesn’t have it, add just a tiny pinch (like 1/8 tsp) to keep things from crumbling. Also, please splurge a little on your cocoa powder! That’s where that deep, rich chocolate flavor comes from in these rich chocolate brownie cup recipes.
Step-by-Step Instructions for Gluten-Free Chocolate Lava Brownie Cups
This is where the magic happens, and honestly, it’s so quick you’ll be surprised. We’re using a standard 12-cup muffin tin here, so line it properly! Paper liners are your friend when dealing with gooey centers. Get your oven preheated to 350°F (175°C) while you mix.
First things first: melt the chocolate. I usually zap the butter and the 4 ounces of chopped unsweetened chocolate together in 30-second bursts in the microwave, stirring well between each time until it’s just silky smooth. Then, whisk in your sugar and don’t stop until it looks somewhat uniform. Follow up by beating in those eggs one by one—make sure each egg is fully incorporated before adding the next one.
Now for the dry stuff. Whisk your almond flour, cocoa powder, and salt together in a separate little bowl. This prevents clumps later! Gently fold those dry ingredients into the wet mixture. And this is my number one easy gluten-free brownie recipe cups tip: Do not overmix! Seriously, mix until you just can’t see streaks of dry flour anymore. Overmixing is what turns GF batter tough or cakey, and we want fudgy! If you love super fudgy treats, you’ll want to check out my recipe for Hot Chocolate Brownies for inspiration.
Time to assemble these little gems, which is the secret to those hidden center chocolate brownies GF perfection. Spoon just a scant tablespoon of batter into the bottom of each liner (about 1/3 full). Then, drop 4 or 5 semi-sweet chocolate chips right in the middle. Cover those chips with the rest of the batter, filling the cups about 3/4 full.
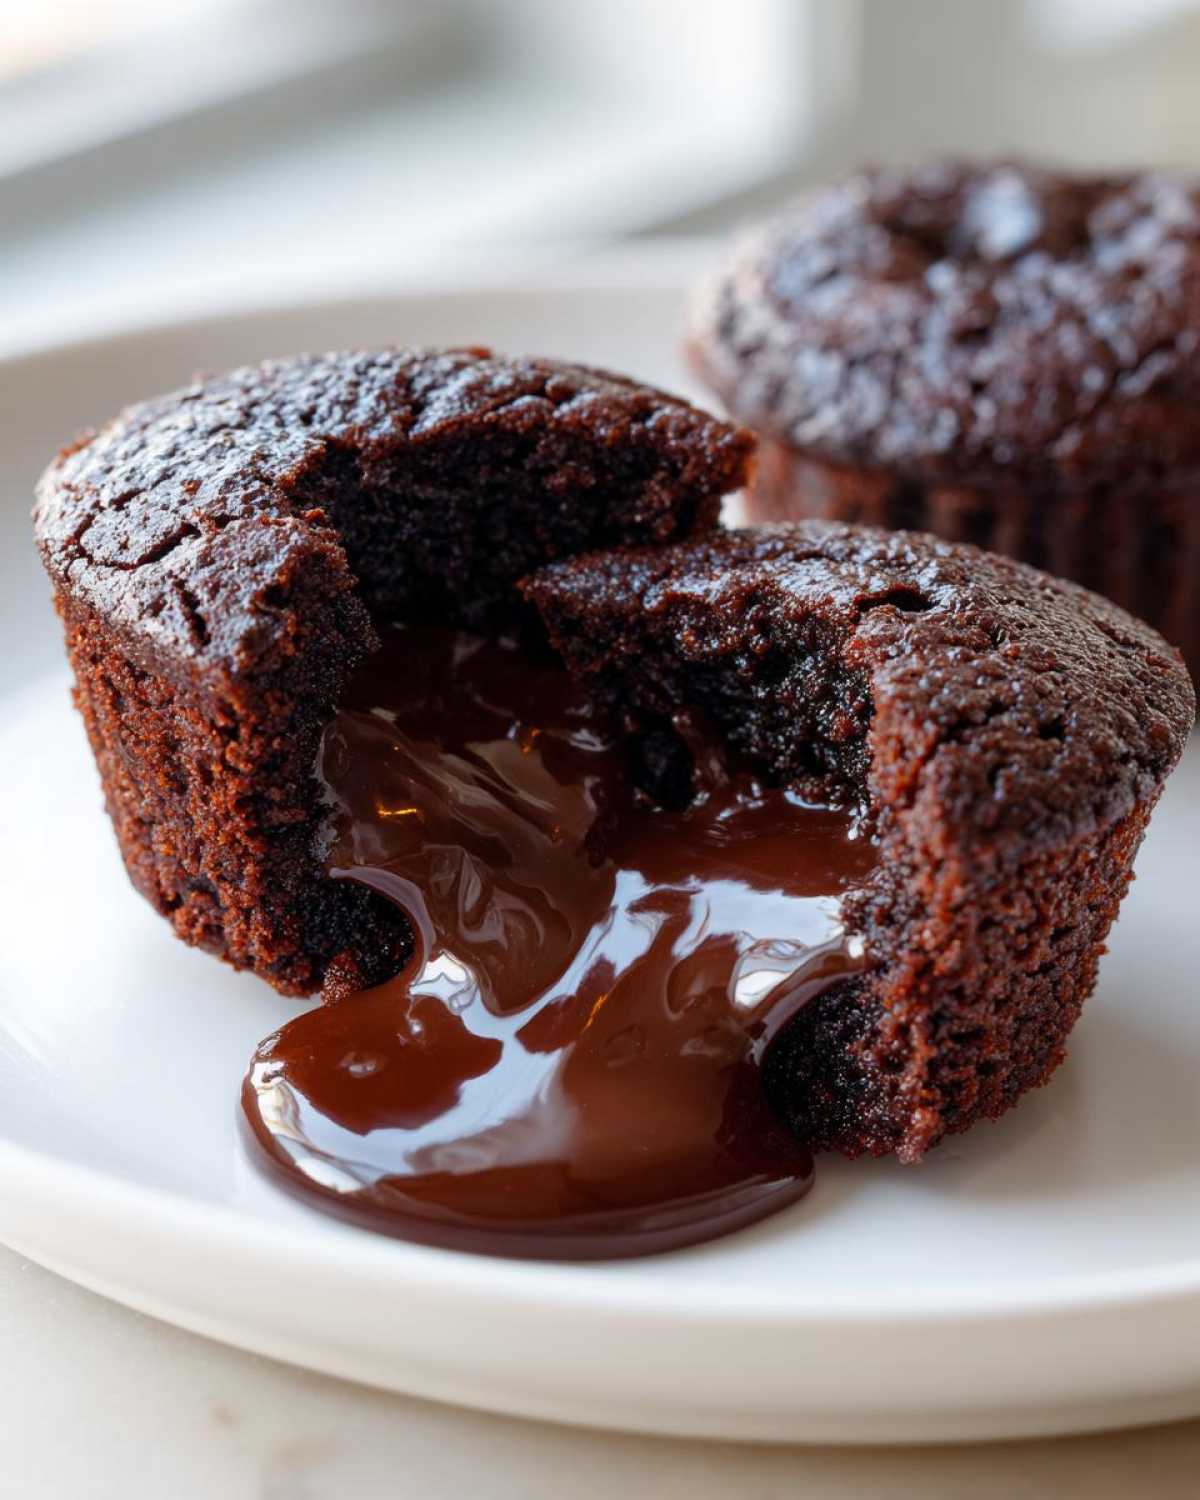
Bake them for between 15 and 18 minutes. This window is everything, honestly! Check them at 15 minutes. The edges should look finished, but if you gently poke the center, it should still feel quite soft. If they look completely dry on top, you’ve gone too far for the lava effect!
Let them sit in that hot muffin tin for exactly 5 minutes. No more, no less. They need that short cool-down to firm up just enough to hold their shape when you move them to a wire rack. For more baking secrets about getting perfect textures, check out my guide to the best banana bread—the cooling instructions are key there, too!
Achieving the Perfect Molten Center in Your Gluten-Free Chocolate Lava Brownie Cups
Listen, people search for molten chocolate lava brownie bites because they want that luxurious, oozy center, right? The key is twofold: the chips and the clock. We aren’t relying on undercooked batter entirely; we are specifically placing those extra chips where we want the melt to happen.
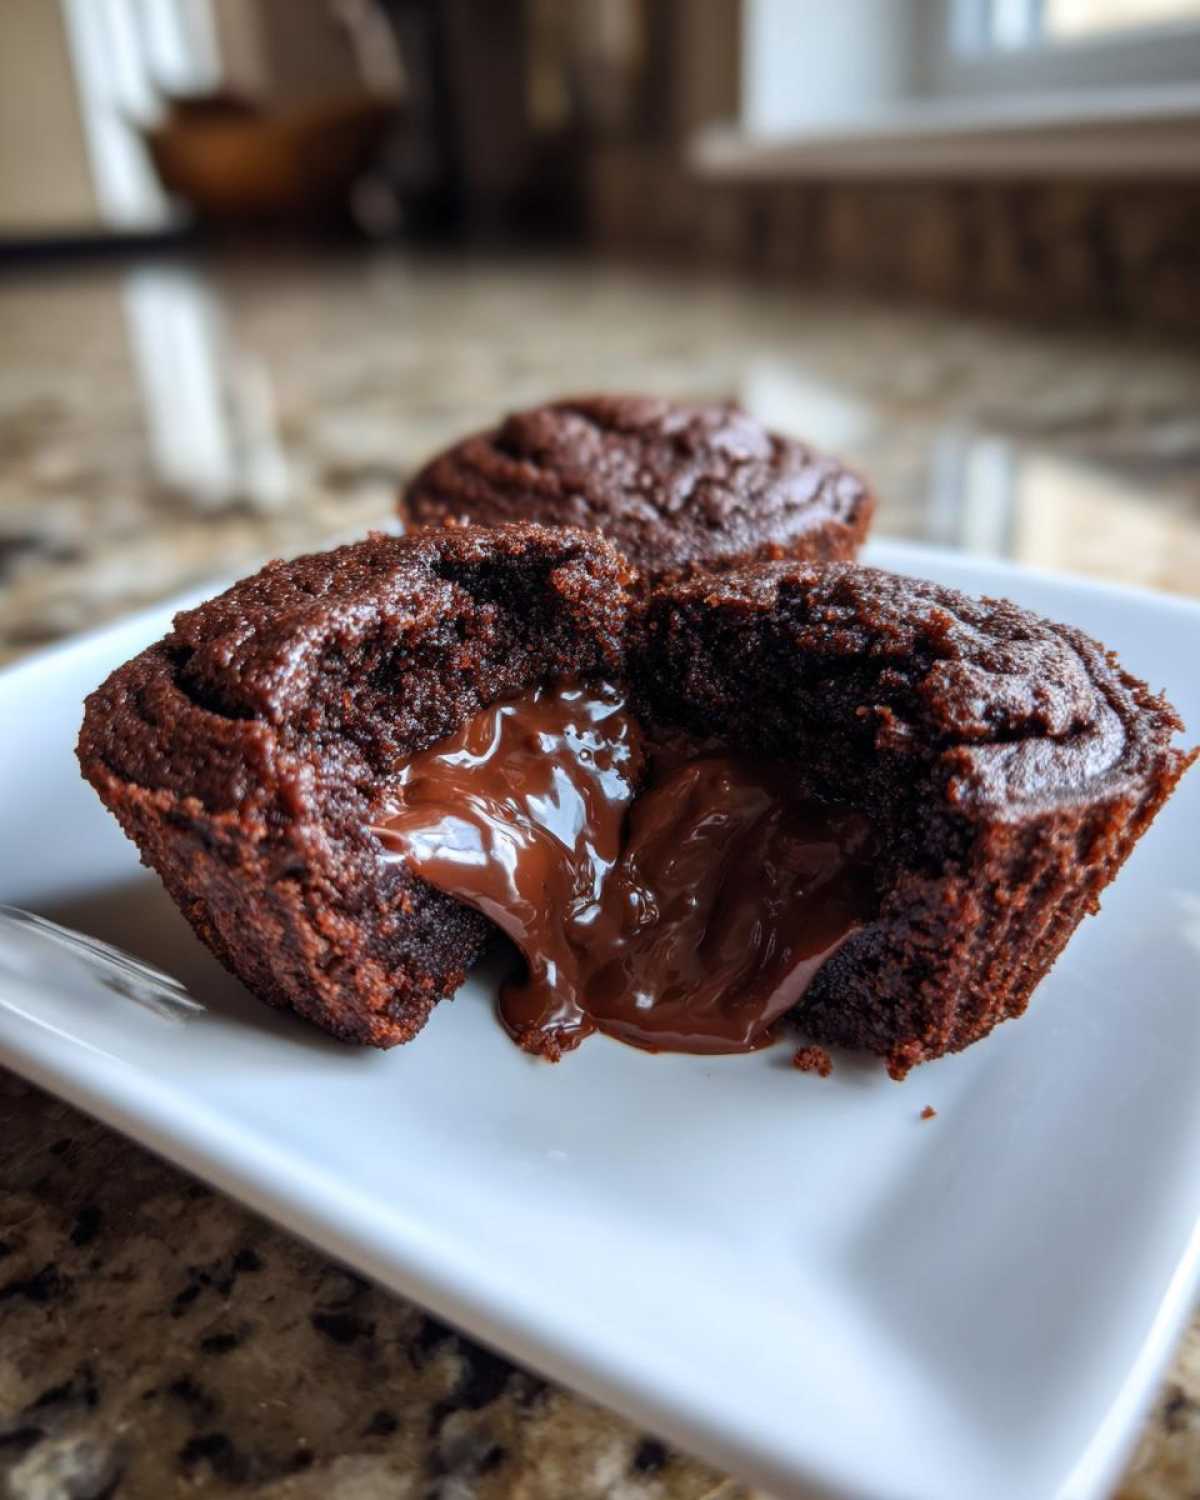
When you place those 4 or 5 chips right in the middle, they melt into a pure, hot fudge pocket while the surrounding batter bakes into that incredibly fudgy brownie texture. If you bake for 20 minutes, they become standard brownies. If you bake for 14 minutes, you’ll have soup. Aim for that 16-minute mark, pull them out, and watch the edges set beautifully around that glorious, gooey core. Trust me, this simple center placement makes all the difference in getting that promised flow when you dig in.
Tips for Success with Your Muffin Tin Brownie Recipe Gluten Free
Making sure these individual chocolate lava brownie cups turn out perfectly molten every single time is all about respecting the cooling process. It’s tempting to dig in the second they come out of the oven, but patience is truly the secret ingredient for that gooey center!
Here are a few of my hard-won rules to guarantee success when you make this muffin tin brownie recipe gluten free:
- Don’t Skip the 5-Minute Sit: I mentioned this before, but I can’t stress it enough. Those five minutes sitting in the hot muffin tin are crucial. If you try to peel the paper liner off immediately, the structure hasn’t set, and you’ll end up with a sticky mess—or worse, a broken lava explosion before you get to your plate!
- Cooling on a Rack is Non-Negotiable: Once they’ve sat in the tin, immediately transfer them to a wire rack. If you leave them sitting in that metal tin, they will continue to cook from the residual heat underneath. That will bake your lava center solid! We want these to cool *just* enough to handle, but not enough to fully set the middle.
- Know Your Oven’s Personality: Since we are aiming for an intentional underbake, ovens vary wildly. I’ve found that if my oven runs hot, 15 minutes is perfect. If yours runs a little cool, stick closer to 18 minutes. Always check the edges first—they must be firm and set, even if the middle is jiggly. This is how we ensure the outside is a proper fudgy brownie and not just warm batter!
- A Little Dusting Goes a Long Way: While you can load these up with toppings, sometimes the best approach is restraint. A simple dusting of powdered sugar, maybe alongside my recipe for Red Velvet Cheesecake Brownies if you want contrast, lets the intensity of the dark chocolate and the molten center really shine. It keeps them looking elegant without hiding the glorious dome shape.
Storage and Reheating Instructions for Gluten-Free Chocolate Lava Brownie Cups
Because these gluten-free chocolate lava brownie cups are best served warm with that flowing center, storing and reheating them requires a little finesse. If you happen to have leftovers—which I doubt, honestly—you can keep them airtight at room temperature for two days. Don’t worry about the fridge just yet; cold temperatures make any brownie fudgy structure stiffen up too much.
To bring the lava back? Pop one cup in the microwave for just 8 to 10 seconds. That brief burst of heat melts the hidden chocolate chips right back into liquid gold without cooking the edges further! If you must refrigerate them, you’ll need about 20 seconds in the microwave. For more tips on storing rich chocolate desserts, my guide on the Brownie Refrigerator Cake has some great general rules that apply here too.
Serving Suggestions for Decadent Gluten-Free Dessert Cups
The decadent gluten-free dessert cups deserve a proper fanfare when serving, don’t they? Since these already pack such a rich punch of chocolate, you honestly don’t need much else. I find the best pairings contrast the warm, dark intensity with something cool and bright—or just something soft to scoop up the lava!
My absolute favorite way to serve these is still warm, maybe just 10 minutes out of the oven, alongside a big scoop of really good vanilla bean ice cream. The contrast between the hot, sticky brownie and the melting cold ice cream is just unbeatable. Sometimes I’ll even drizzle some of my homemade buttercream frosting over the top, though you should check out my recipe for Fluffy Stable Vanilla Buttercream if you want something a bit more luxurious than just powdered sugar.
For a little pop of color and acidity, fresh raspberries are incredible with dark chocolate. Just scatter a few around the base of the cooling brown cup. If you’re feeling slightly fancy but still want to keep it simple, try a sprinkle of flaky sea salt right on top before serving. That hits all the right notes—sweet, salty, and intensely chocolatey!
Variations for Your Rich Chocolate Brownie Cup Recipe
Because these little chocolate lava brownie cups are so simple in their base structure, they become a fantastic canvas for adding your own favorite decadent touches! Once you’ve mastered the timing for that gooey center, feel free to experiment. I love mixing things up to keep dessert interesting, and these hold up really well to additions. You can even look at how I incorporate warm spices in my Gingerbread Brownies Recipe for inspiration on how different flavors can elevate chocolate.
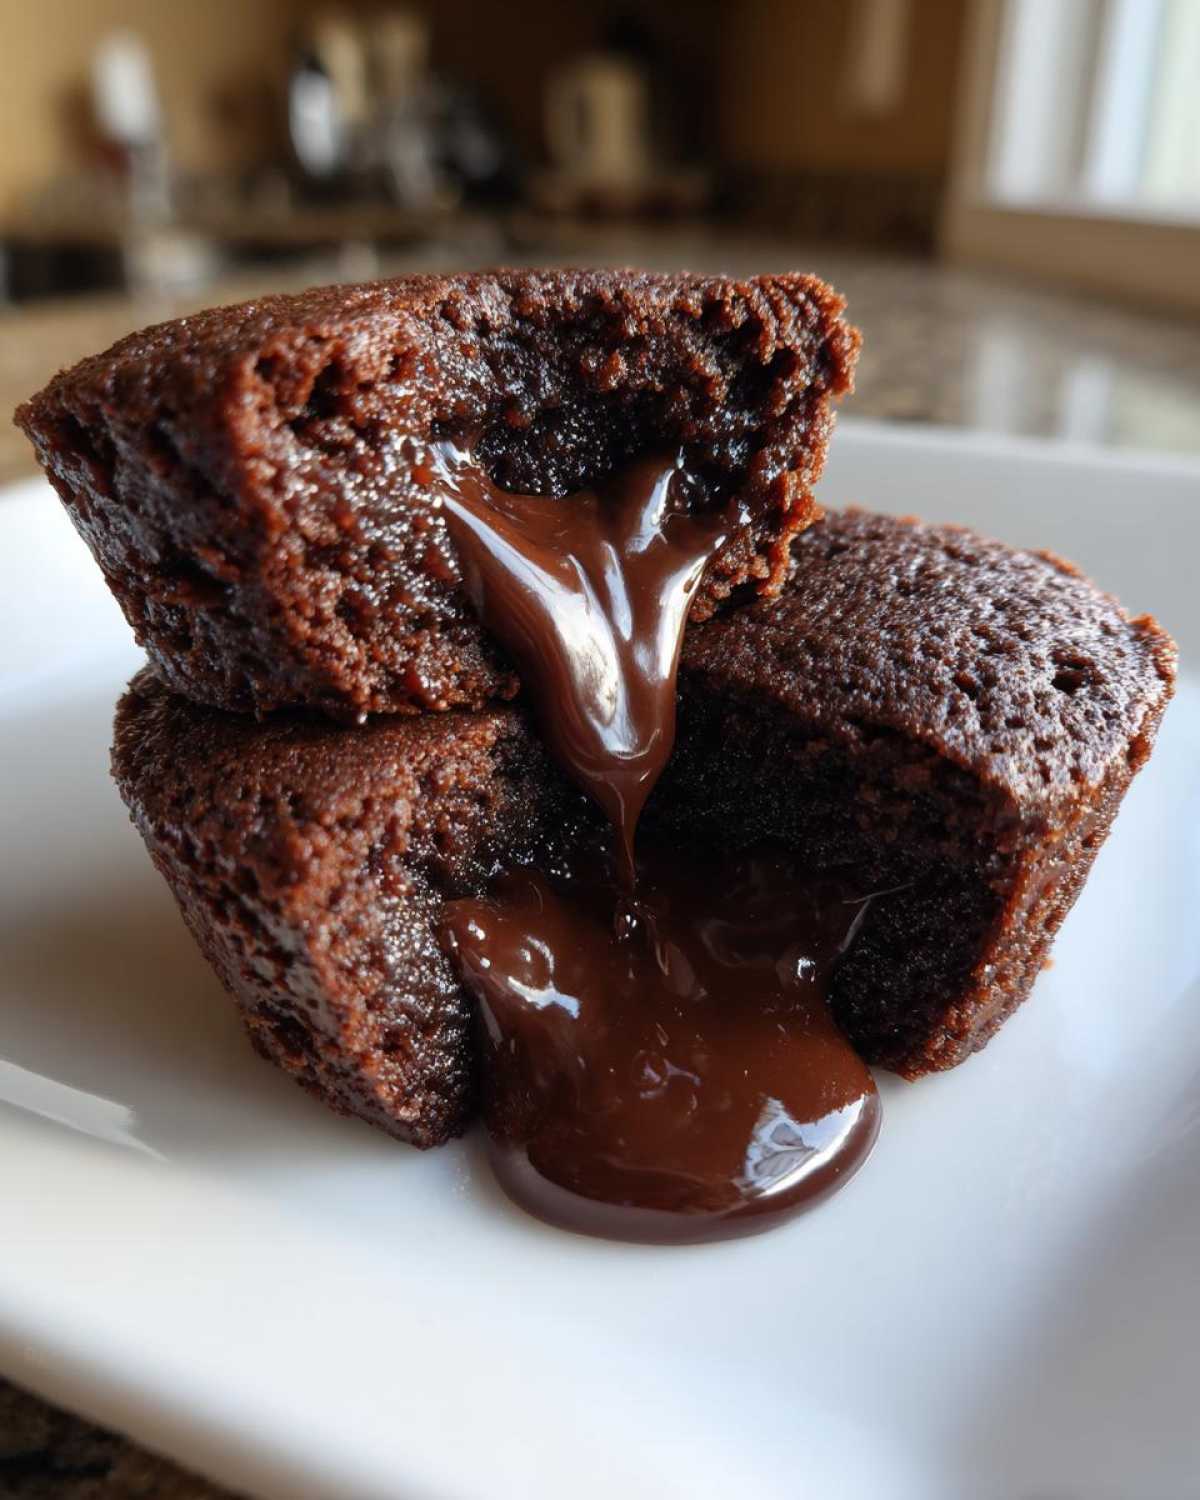
Here are a few thrilling ways I like to jazz up this basic batch of gluten-free dessert cups:
- Espresso Boost for Depth: Oh man, this is my favorite savory twist. Right when you melt the butter and chocolate together in Step 2 of the recipe, add about 1 teaspoon of instant espresso powder. It won’t make them taste like coffee, but it deepens that dark chocolate flavor dramatically. It makes them taste even richer than they already are!
- A Hint of Heat: If you enjoy a little warmth with your sweetness, try adding a tiny pinch—maybe 1/8 teaspoon—of cayenne pepper to your dry ingredients along with the salt and cocoa. It hits the back of your throat just after you swallow the chocolate. It’s unexpected and perfect for fall or winter treats.
- Chocolate Chip Mix-Up: Don’t feel tied down to semi-sweet chips for the molten center! Try using dark chocolate chunks for an intensely bitter lava pour, or even mix it up: use half semi-sweet and half milk chocolate chips in the center. Just ensure whatever you use melts nicely when heated.
The best part is that none of these flavor additions really mess with the bake time, which is fantastic for us busy bakers!
Frequently Asked Questions About Gluten-Free Chocolate Lava Brownie Cups
I know when you tackle a special dessert like this, especially one that has to be gluten free and still gooey, you’re going to have questions! I’ve rounded up the worries I usually get when I share these individual chocolate lava cakes gluten free. Hopefully, this helps you feel totally confident before you preheat that oven!
Can I make these Gluten Free Brownie Cups ahead of time?
This is a tricky one because of the lava factor! If you mix the batter ahead of time (which you totally can, it’s nice to have that ready!), keep it covered in the fridge for up to 24 hours. However, you must bake them fresh right before serving because once they cool after baking, that center starts to firm up. When you are ready to eat, remember to let the batter sit out for about 30 minutes so it warms up a bit before scooping, just to ensure they bake evenly. These are truly best when served within an hour of coming out of the oven!
How do I ensure the center is truly molten (lava)?
This is the main focus! For the very best gooey chocolate centers gluten free baking, you need two things going for you. First, we use those extra semi-sweet chips tucked right in the middle, which act like little time bombs of melted chocolate. Second, pull them out *young*. I keep stressing that 15-to-18-minute window. If you see *any* dry cake pulling away from the paper liner edges, it’s time to trust your instincts and pull them out immediately. They firm up those last few seconds when cooling.
Are there Dairy Free Options Gluten Free Brownie Cups?
Absolutely! I love making these for friends who can’t do dairy, and it’s a super easy swap. You can substitute the regular butter with an equal amount of high-quality dairy-free baking sticks or refined coconut oil if you prefer that flavor profile. For the chocolate chips in the center, just grab any brand of dairy-free baking chips you like—they melt beautifully. These adjustments turn them into perfectly delicious dairy free options gluten free brownie cups!
If you are looking for other great GF treats, my Gluten-Free Strawberry Almond Muffins are another winner where ingredient quality really shines through!
Nutritional Estimates for Gluten-Free Chocolate Lava Brownie Cups
Now, let’s pop over to the numbers side of things. Because these are rich, decadent, and contain all that wonderful butter and chocolate, we need to be realistic about what’s going into each one of these single serving gluten-free brownies. This recipe yields 12 cups, so the figures below are based on that count only.
Here is the nutritional breakdown based on the standard recipe measurements. Keep in mind, this is just an estimate, you know how it is—if you swap out butter for a lower-fat spread or use dark chocolate instead of semi-sweet, those totals will shift a little bit. But this gives you a fantastic baseline for what you’re enjoying!
- Serving Size: 1 cup
- Calories: 220
- Sugar: 18g
- Fat: 15g (And yes, that’s good, rich fat from the butter and chocolate!)
- Saturated Fat: 8g
- Carbohydrates: 20g
- Protein: 4g
- Sodium: 75mg (A nice low sodium count, which means you can sprinkle a little flaky salt on top guilt-free!)
This is just an estimate, mind you. The accuracy completely changes based on the exact brand of almond flour or chocolate chips you use, so take these numbers as a helpful guide rather than gospel truth. Enjoy these tiny powerhouses of chocolate goodness!
PrintGluten-Free Chocolate Lava Brownie Cups
Bake individual, fudgy brownie cups with a molten chocolate center using this simple gluten-free recipe.
- Prep Time: 15 min
- Cook Time: 18 min
- Total Time: 33 min
- Yield: 12 cups
- Category: Dessert
- Method: Baking
- Cuisine: American
- Diet: Gluten Free
Ingredients
- 1/2 cup unsalted butter
- 4 ounces unsweetened chocolate, chopped
- 1 cup granulated sugar
- 2 large eggs
- 1 teaspoon vanilla extract
- 1/2 cup almond flour
- 1/4 cup unsweetened cocoa powder
- 1/4 teaspoon salt
- 1/2 cup semi-sweet chocolate chips (for molten center)
Instructions
- Preheat your oven to 350°F (175°C). Line a 12-cup muffin tin with paper liners.
- Melt the butter and chopped unsweetened chocolate together in a microwave-safe bowl in 30-second intervals, stirring until smooth.
- Whisk the sugar into the melted chocolate mixture until combined.
- Beat in the eggs one at a time, mixing well after each addition. Stir in the vanilla extract.
- In a separate bowl, whisk together the almond flour, cocoa powder, and salt.
- Gently fold the dry ingredients into the wet ingredients until just combined. Do not overmix.
- Spoon about one tablespoon of batter into the bottom of each lined muffin cup.
- Place 4 to 5 semi-sweet chocolate chips directly in the center of the batter in each cup.
- Top with the remaining batter, dividing it evenly among the 12 cups.
- Bake for 15 to 18 minutes. The edges should look set, but the center should still be soft for the lava effect.
- Let the cups cool in the tin for 5 minutes before transferring them to a wire rack to cool slightly. Serve warm.
Notes
- For a richer flavor, use high-quality dark chocolate in the batter.
- If you prefer a firmer brownie, bake for 20 minutes.
- You can substitute the almond flour with a gluten-free all-purpose blend containing xanthan gum.
Nutrition
- Serving Size: 1 cup
- Calories: 220
- Sugar: 18
- Sodium: 75
- Fat: 15
- Saturated Fat: 8
- Unsaturated Fat: 7
- Trans Fat: 0
- Carbohydrates: 20
- Fiber: 2
- Protein: 4
- Cholesterol: 55